Online Video Editor, The Fast Way to Edit MP4 in Your Browser (Without Losing Your Mind)
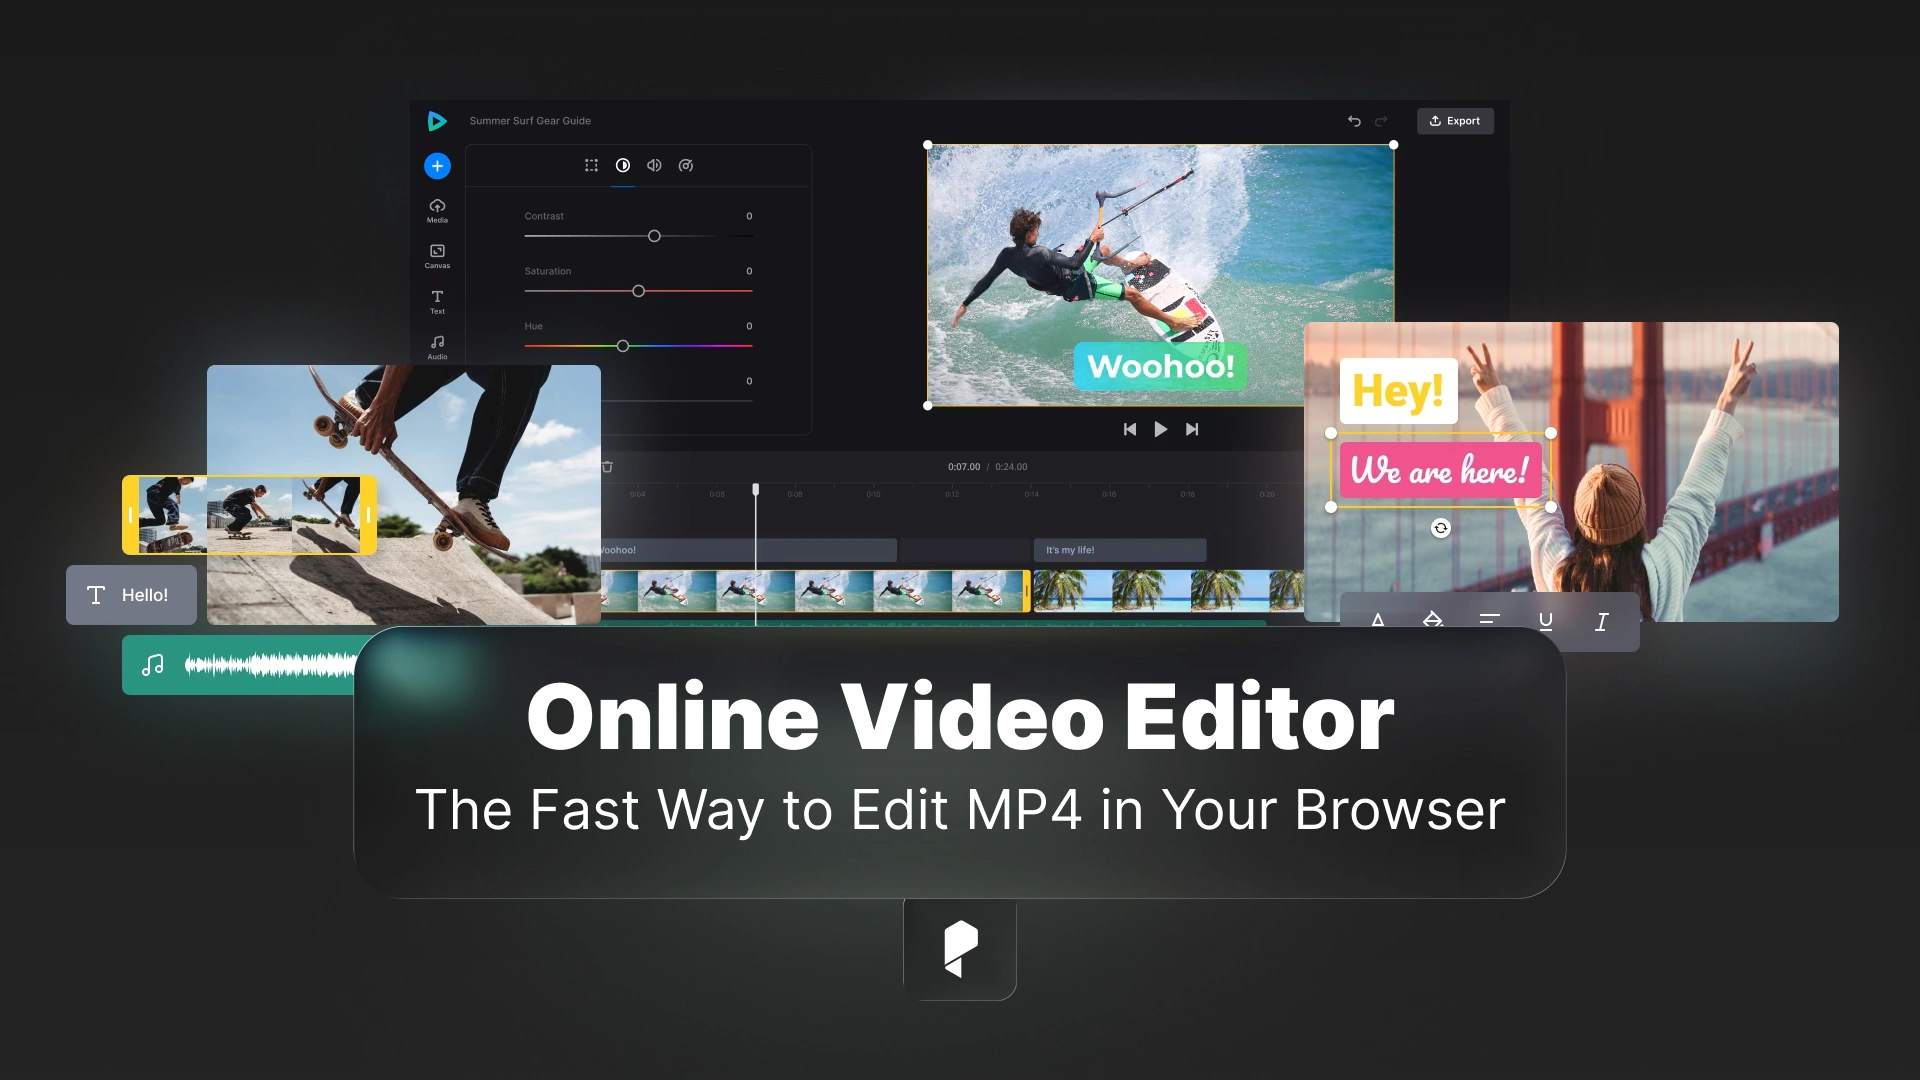
Sometimes you just need to do the annoying, real-world stuff: cut the awkward first 3 seconds, stitch two clips together, crop for TikTok, mute background noise, add a quick title, export, and send. You want the result, not a second career in keyframes.
That’s where an online video editor earns its keep: speed, simplicity, and “good enough” quality for the places most videos actually live today.
In this guide, I’ll show you the practical workflow for editing MP4s in your browser, the features that matter (and the ones that are marketing fluff), the watermark reality check, and export settings that keep your video looking clean.
Why “Online Video Editor” Searches Are Really “MP4 Editor” Problems
That’s why demand clusters around terms like “mp4 editor,” “edit mp4,” “mp4 video editor,” and “mp4 editor online.” This blog is MP4-first on purpose, because that’s what readers usually mean.
What An Online Video Editor is Actually Good At
- trimming and cutting mistakes
- removing dead space at the start and end
- merging clips into one deliverable
- cropping to the right format (9:16, 1:1, 16:9)
- resizing exports for uploading and sharing
- adding basic text, captions, or a simple intro
- muting sections or replacing background music
- exporting review versions for clients
Online editors are not great for:
- heavy color grading
- complex motion graphics
- multi-cam editing with deep control
- advanced audio repair
- long projects with many tracks and layers
The 7-Point Checklist Before You Upload Anything
1) MP4 import reliability
If it struggles to import MP4 smoothly, you’ll fight every step after that.
2) Trim, cut, split (non-negotiable)
If trimming isn’t fast and precise, the editor fails at its most important job.
3) Crop + aspect ratio presets
You want presets for 9:16, 1:1, and 16:9.
4) Audio basics
At minimum, the editor should let you mute, reduce volume, and detach or replace audio.
5) Export options
You want basic control like 1080p and 720p exports and a clear output format (MP4 preferred).
6) Watermark policy clarity
If the watermark rules are vague, assume there will be a watermark.
7) Privacy and storage transparency
If you’re editing client footage or private material, you need clear answers about storage and deletion.
Quick rule: if a tool is vague about how long it keeps uploads, don’t upload sensitive material.
A Fast Repeatable Workflow To Edit MP4 Online
Step 1: start with a copy
Don’t edit your only master. Duplicate the file and edit the duplicate.
Step 2: do the “80% edits” first
Most videos only need:
- trim the beginning and end
- cut obvious mistakes
- crop to the platform
Step 3: edit in a browser-first tool
Open video editor and upload your MP4:
Then do the essentials:
- trim the start and end
- split and remove mistakes
- crop to the correct format
- adjust audio (mute noise sections, level obvious spikes)
- add a title if needed (keep it short)
Step 4: structure it like a viewer
A fast edit is not just “shorter”; it’s easier to watch. Start quickly, remove filler, and end decisively.
Step 5: export for the destination
Use 1080p for sharp text and captions, use 720p for fast sharing or email, and bump quality if motion looks smeared.
If you want a hub for browser-first utilities, use the Clideo website, or if you prefer to have Clideo with all the time, start using the iOS app of Clideo
“Free” And “No Watermark”: What’s Real And What’s Bait
Reality:
- “free” often means watermark, limits, or restricted exports
- “no watermark” might require an account, a paid tier, or specific export settings
Smart move: export a 10-second test clip before you commit to the full edit.
Export Settings: How To Keep Quality Acceptable
Rule 1: text needs 1080p
If your clip has captions, screens, or UI, 720p can look soft.
Rule 2: motion needs bitrate
Fast motion is where smearing and blockiness show up first; increase quality if needed.
Rule 3: audio is a trust signal
Keep audio stable, avoid clipping, and don’t let it jump in volume.
If you want deeper technical fundamentals on bitrate and compression tradeoffs, this Pixflow post on Mastering Video Compression is going to help you a lot!
Privacy And Rights: What You Should Verify
Troubleshooting
My MP4 won’t upload:
- file too large
- unusual codec profile
- unstable connection
Fix: try a short clip first or export a lighter version from your source editor.
The export looks worse:
- preset too low
- resolution dropped
- compression too aggressive on motion
Fix: export 1080p and increase quality one step.
The editor is slow:
Do a short test section first, validate settings, and then do the full edit.
Disclaimer : If you buy something through our links, we may earn an affiliate commission or have a sponsored relationship with the brand, at no cost to you. We recommend only products we genuinely like. Thank you so much.

Write for us
Publish a Guest Post on Pixflow
Pixflow welcomes guest posts from brands, agencies, and fellow creators who want to contribute genuinely useful content.
Fill the Form ✏