Video Editor Mac Review: Filmora Video Editing Software for MacBook
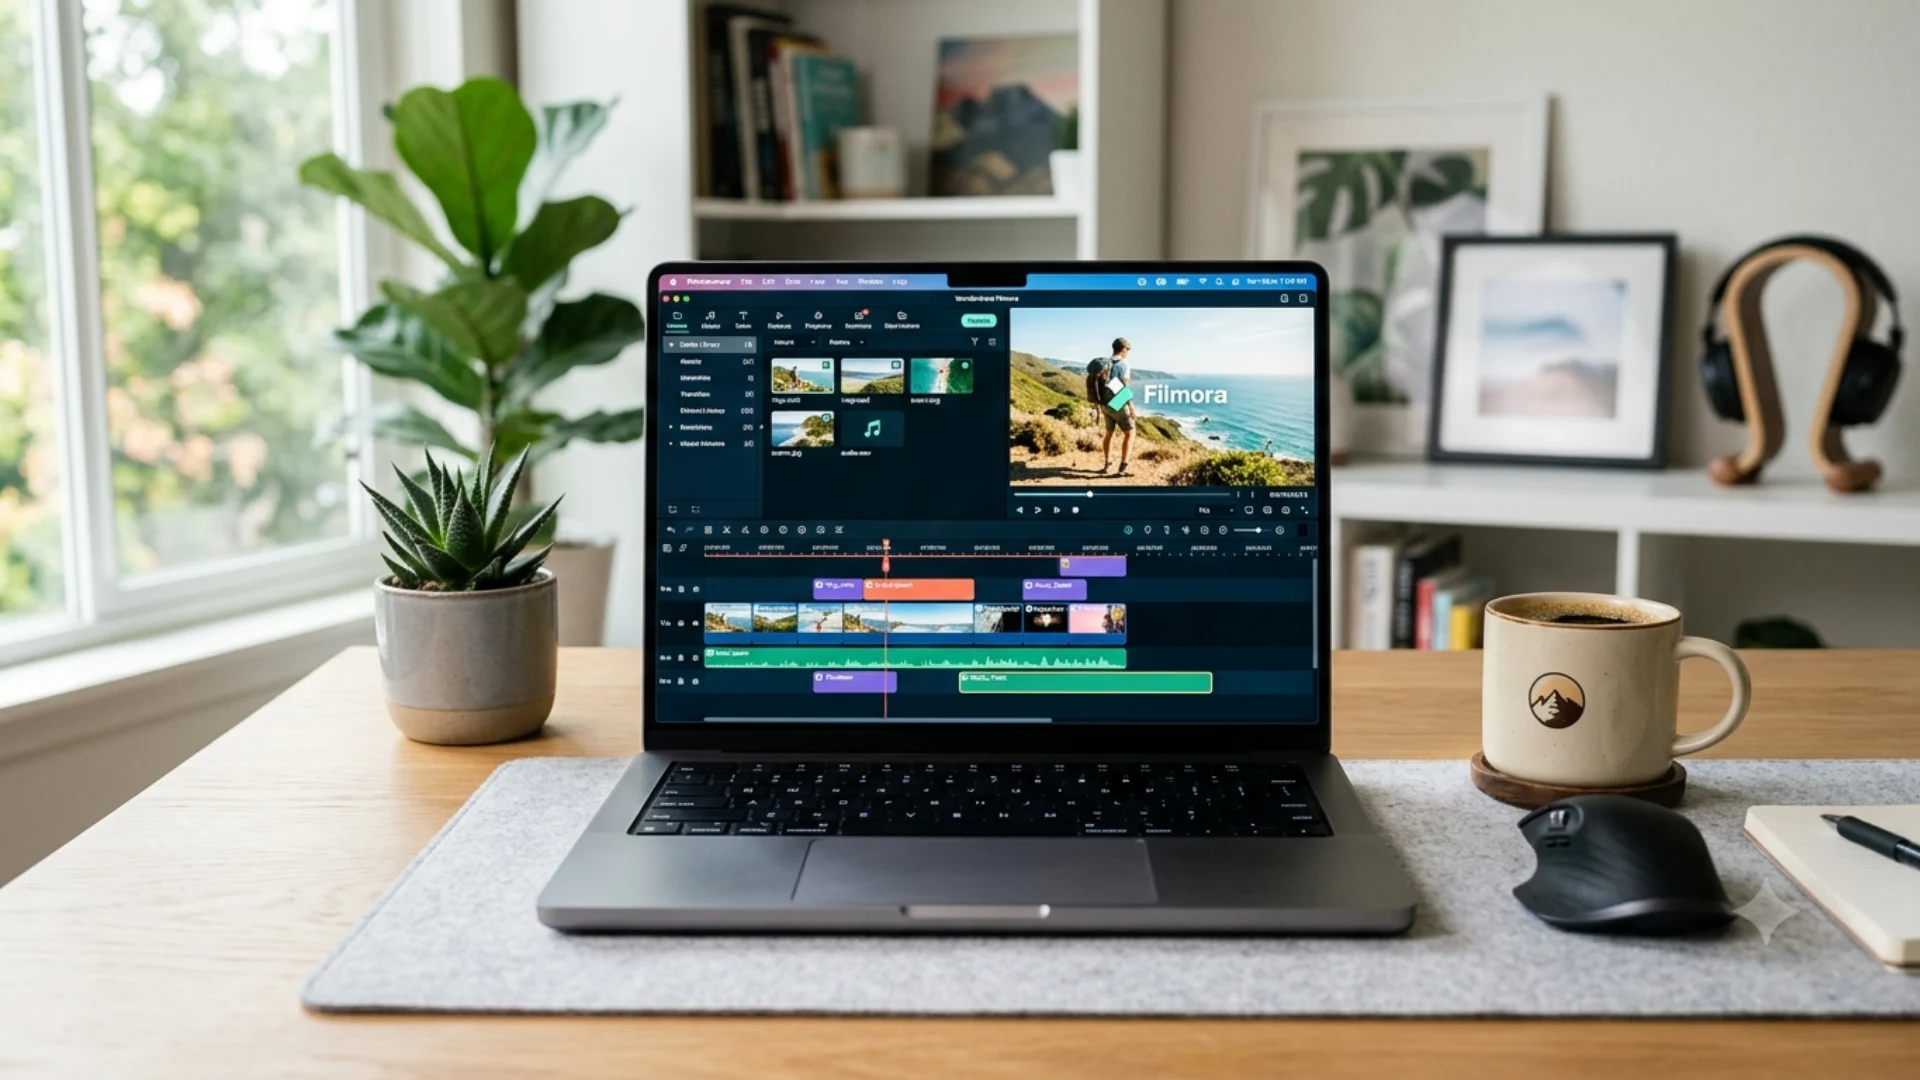
Filmora presents itself as a simpler editor for everyday Mac production. It includes a free trial, Apple certification, and current chip support. Wondershare also highlights templates, stock media, and built-in AI editing tools. That combination makes Filmora easier for tutorials, promos, and client edits.
Part 1. Video Editor Mac Basics: What Makes Filmora a Smart Editing Choice
Moreover, the tool stands out through built-in templates, stock media, and AI-based tools that support quicker production. The official feature set positions it as video editing software suited to tutorials, social clips, client revisions, and short branded content. For Mac users, that combination adds practical value because efficiency, asset access, and simpler editing remain central buying factors today for many teams.
Key Features
- AI Smart Cutout: Automatically isolates people or objects, helping editors replace backgrounds and build cleaner compositions without frame-by-frame masking.
- Smart Scene Cut: Finds highlights, faces, and key actions in long footage, making rough cuts faster for short-form editing.
- AI Video Enhancer: Improves low-resolution or blurry clips by restoring detail, reducing noise, and supporting cleaner 4K-ready output results.
- AI Smart Search: Searches dialogue, faces, or visual elements quickly, which helps editors locate specific clips inside larger projects.
- Export Support: provides 4K export to help Mac users deliver sharper videos for client work and branded content.
Part 2. Video Editor Mac Pricing: Filmora Video Editing Software Plans
Part 3. Video Editor Mac Pros: Why Filmora Works Well for Mac Users
Pros
- Text-based editing simplifies dialogue cuts and reduces repetitive timeline trimming.
- Screen recording supports tutorials, demos, and walkthroughs without extra software.
- Split-screen tools help compare scenes, interviews, and product footage.
- Smart cutout helps isolate subjects and remove backgrounds more cleanly.
- Speed ramping gives simple footage more motion control and pacing.
Cons
- Advanced color grading remains lighter than dedicated professional finishing software.
- Larger projects may require stronger hardware for smoother editing sessions.
- Some advanced tools may depend on paid plans or add-ons.
User Reviews
Positive Reviews
- “I like Wondershare Filmora mainly because it offers great value for money. The pricing is reasonable compared to other video editing tools, especially for the features it provides. The software is very easy to use, even for beginners, and the interface is clean and intuitive.”– Rajesh A.
- “Filmora is easy to use and quick to start once you understand the basics. I don’t need a complex setup or advanced technical knowledge. This helps a lot when I need to create educational content quickly, especially during busy clinic days or when I have to prepare teaching material on short notice.”– Ishan S.
Negative Reviews
- “…The business model of Wondershare Filmora leaves much to be desired. Although the program offers a remarkable integration of AI-based functions, many of its most powerful tools are locked behind a points system that, once exhausted, require additional payments, even if you have already purchased the software license…”-David L
Part 4. Video Editor Mac Workflow: How to Video Edit on Mac Using Filmora
Step 1. Set Up the Project Before Styling the Clip
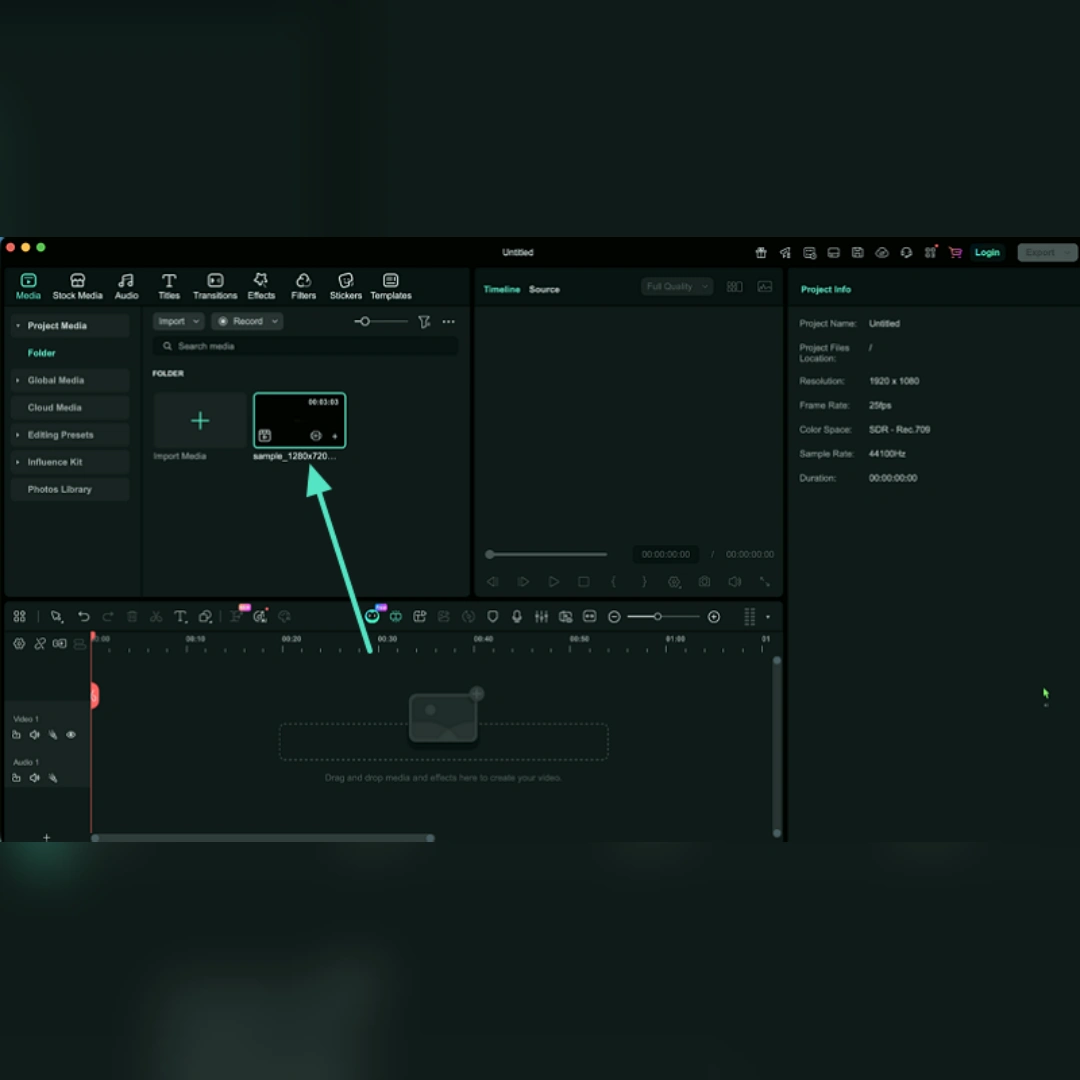
Begin from Filmora’s start screen by selecting “Create New Project.” After that, bring the required footage into the media library and place the chosen clip on the timeline to proceed.
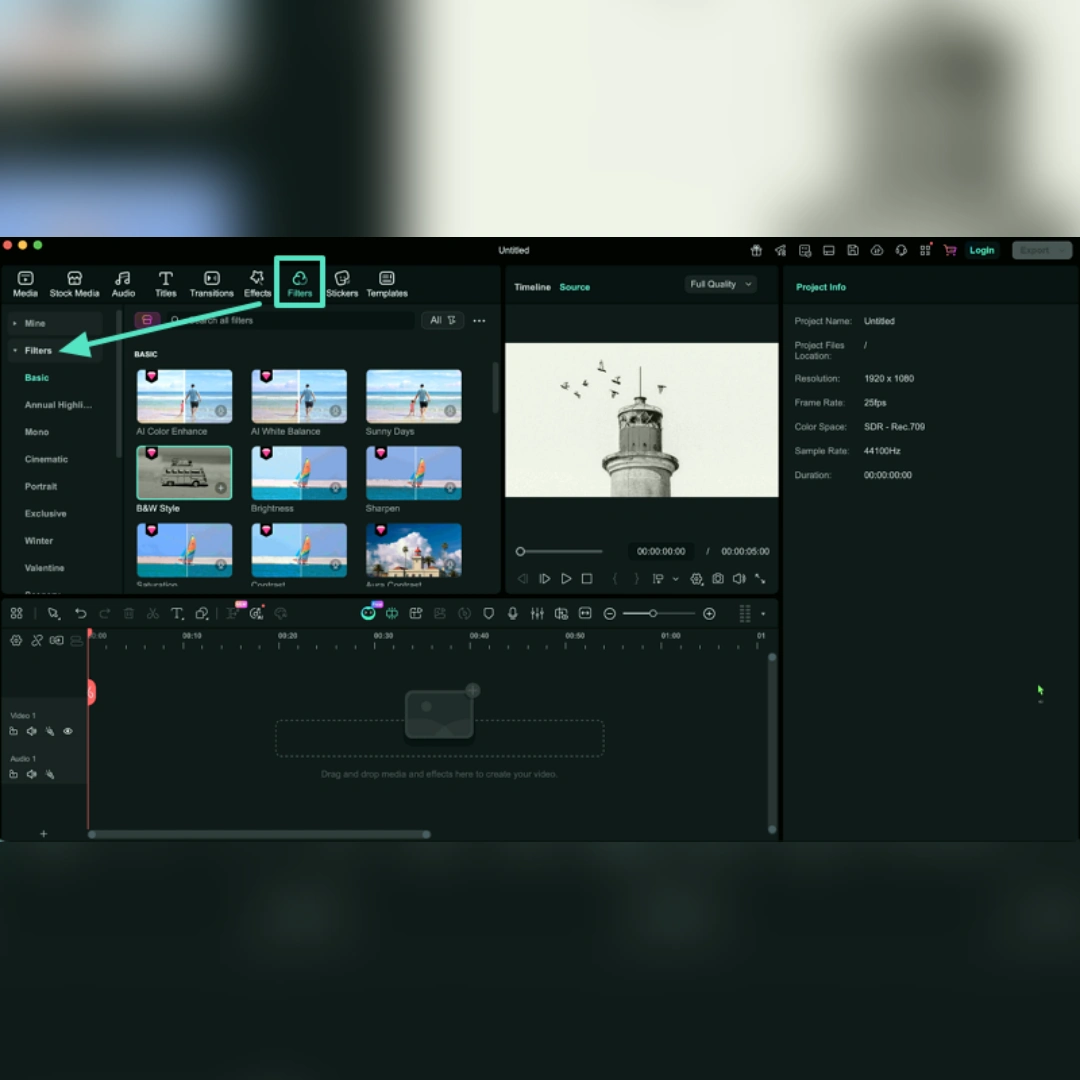
Once the clip is ready on the timeline, open “Effects” from the top toolbar. From there, enter the “Filters” section on the left to review the available looks before choosing one for the footage.
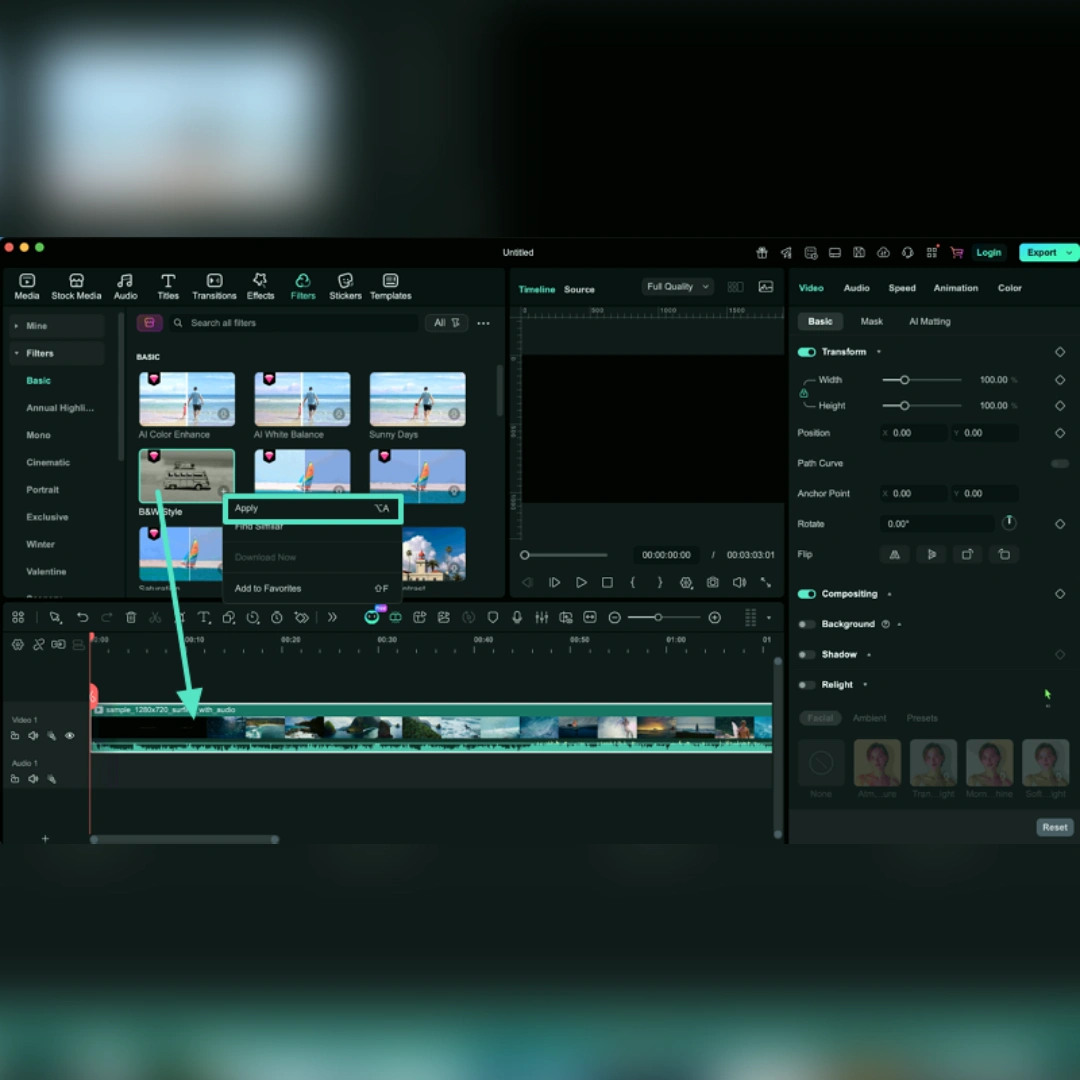
After reviewing the filter library, choose the style that best suits the clip. The selected filter can then be added either by dragging it onto the timeline clip or by using the “Apply” option from the right-click menu.
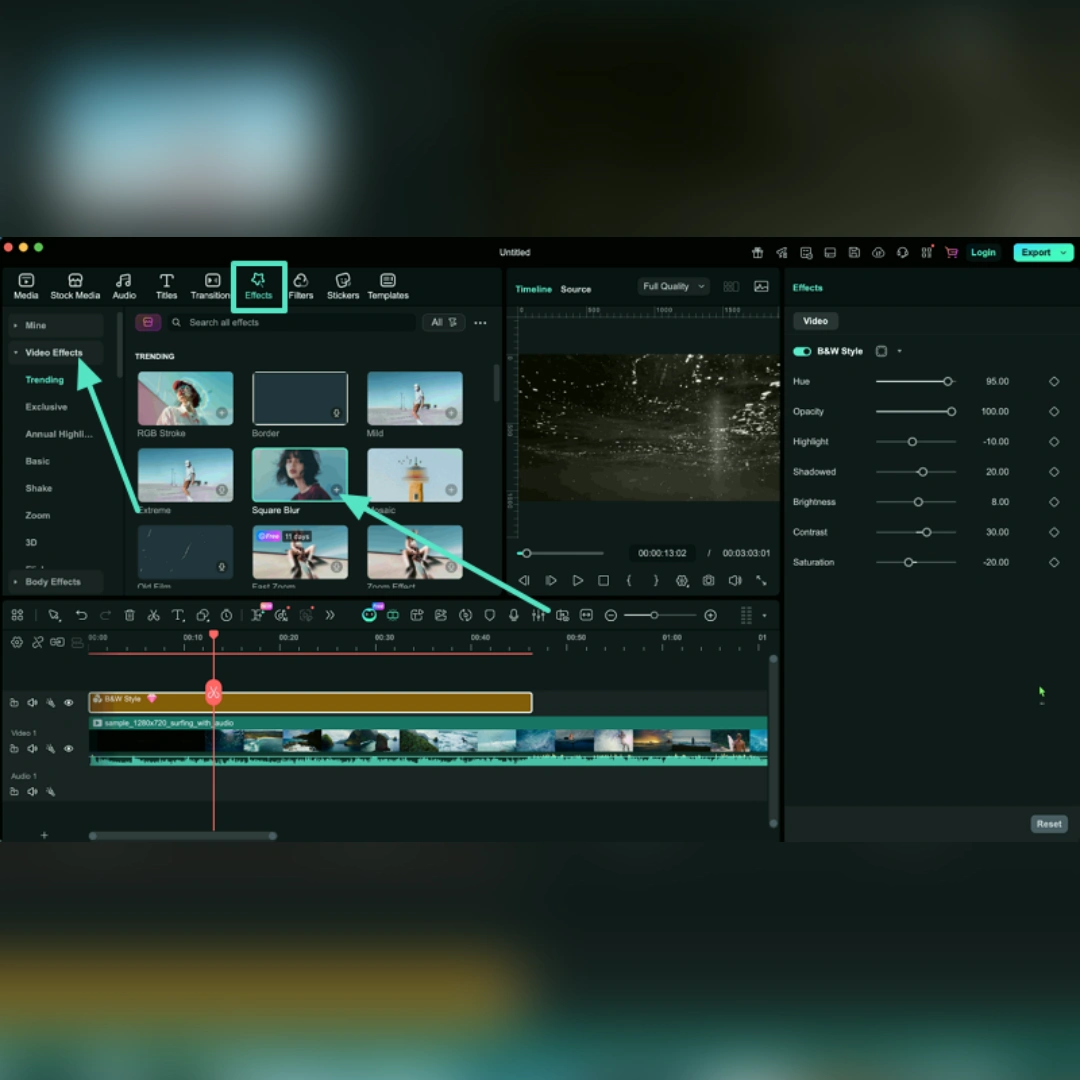
With the filter in place, stay inside “Effects” and open “Video Effects.” Select the required overlay and add it to the clip by pressing the “Plus” icon or by dragging it directly onto the same timeline section.
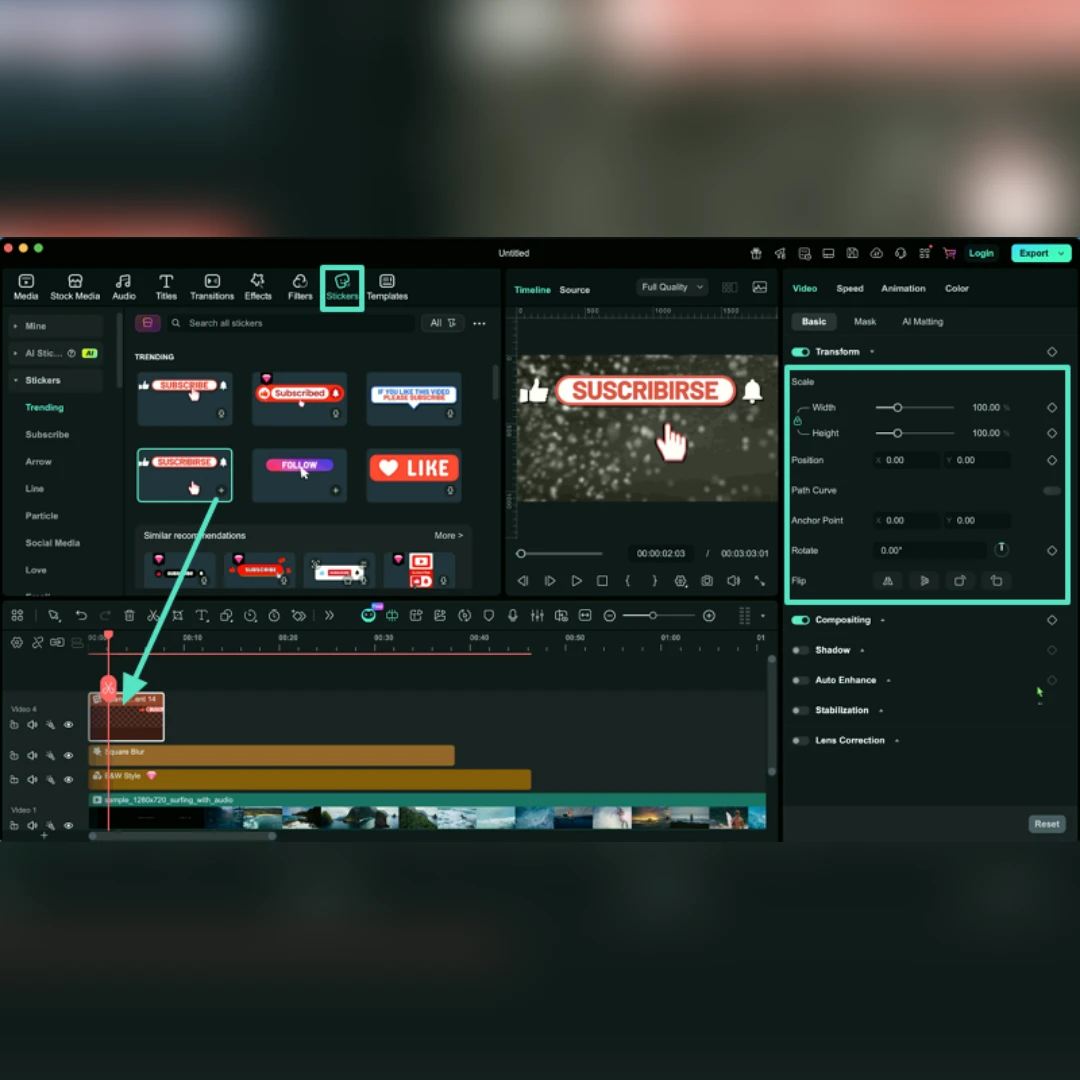
Next, switch to the “Stickers” tab from the top menu and select the required element. After placing it on the timeline, adjust its size, timing, position, and overall display from the settings panel.
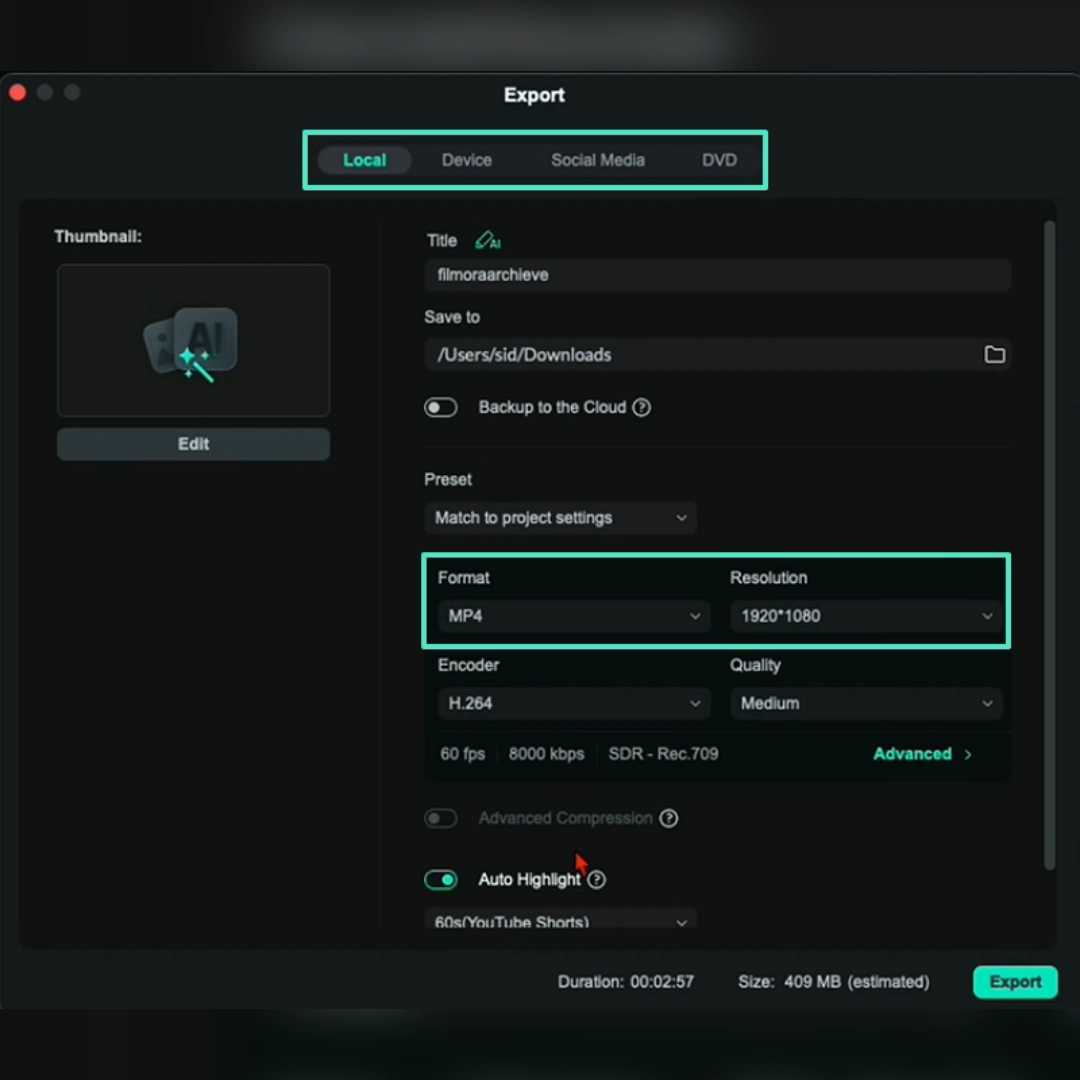
When the styling work is finished, open “Export” from the top-right corner. Set the file name, resolution, format, and save location, then confirm the export settings to render the final edited video.
Conclusion
Note: This article is editorially independent and intended for informational purposes only. It does not reflect the official stance of any publishing media outlet. Users should check the official Filmora website for the most current pricing, features, and plan details.
Disclaimer : If you buy something through our links, we may earn an affiliate commission or have a sponsored relationship with the brand, at no cost to you. We recommend only products we genuinely like. Thank you so much.
Blog Label:


Write for us
Publish a Guest Post on Pixflow
Pixflow welcomes guest posts from brands, agencies, and fellow creators who want to contribute genuinely useful content.
Fill the Form ✏