Premiere Pro Color Grading Tutorial: A Step-by-Step Guide to Color Correction, LUTs, and Cinematic Effects

But what exactly is color grading, and why is it so crucial? At its core, color grading is the process of adjusting the colors in your video to correct imperfections and creatively enhance the mood, atmosphere, and tone. It’s one of the final but most important steps in post-production.
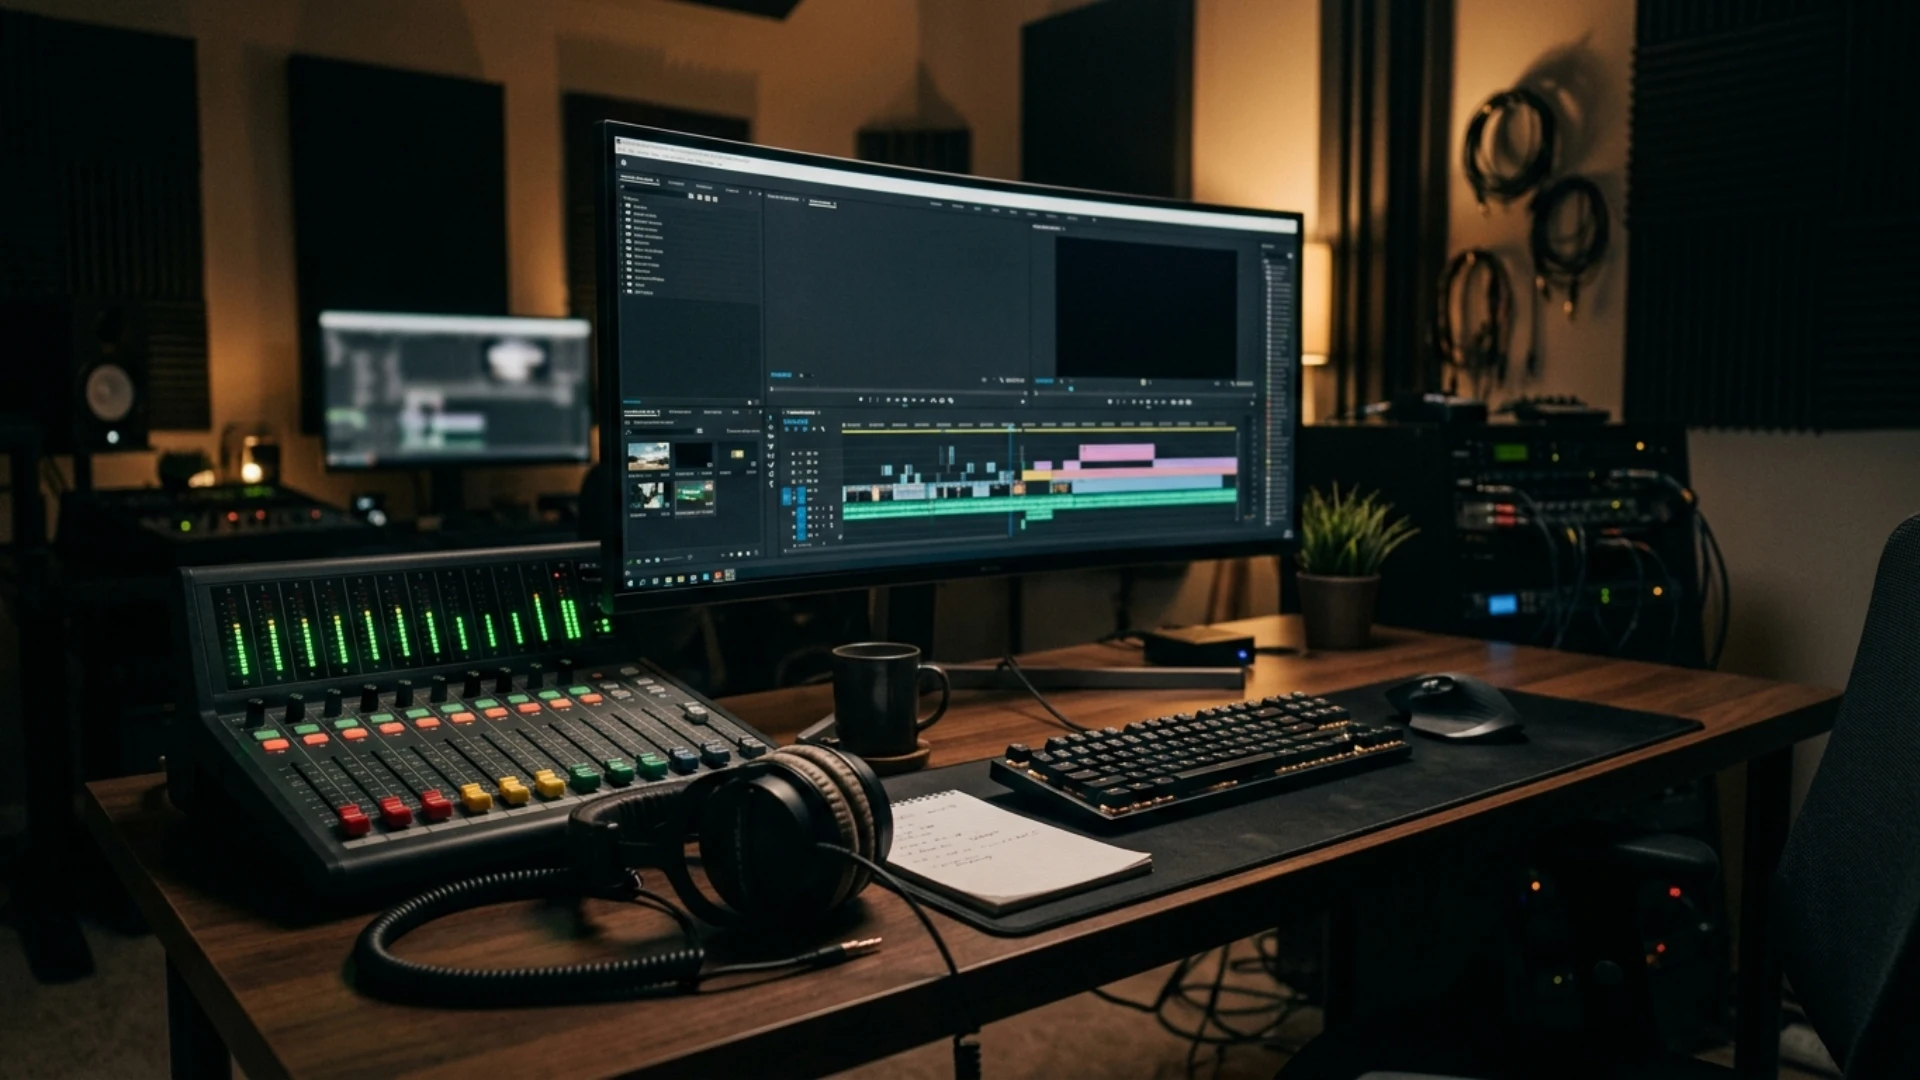
In this guide, we’ll walk you through color grading in Premiere Pro, one of the most popular tools among video editors. Whether you’re a beginner looking to understand the Lumetri Color panel, or an intermediate user ready to master LUTs, color wheels, and cinematic grading techniques, this step-by-step tutorial is tailored for you.
Professional Premiere Pro Templates
Understanding the Basics of Color
Color Correction vs. Color Grading
Before diving into the tools, it’s essential to understand the difference between color correction and color grading in Premiere Pro:
- Color Correction is the technical process of fixing your footage. Think of it as setting a clean foundation—adjusting exposure, white balance, and contrast to make your video look natural and accurate.
- Color Grading, on the other hand, is the artistic process. It’s where you add mood, style, and emotion through color, giving your video a distinctive look.
Understanding the line between these two helps you build a strong workflow: correct first, grade second.
Key Color Concepts
- Hue: The actual color—red, green, blue, etc.
- Saturation: The intensity or purity of the color. High saturation means vivid color, while low saturation appears washed out.
- Luminance: The brightness level of a color.
You’ll also frequently work with:
- Color Temperature: Adjusts the warmth (orange) or coolness (blue) of an image.
- White Balance: Helps ensure that what’s white in real life appears white on screen. This is foundational in basic color correction in Premiere Pro.
A strong understanding of the color spectrum and how these elements interact will empower your decisions throughout the grading process. You can read more about Hue, Saturation, and Luminance here.
Getting Started with Color Tools in Premiere Pro
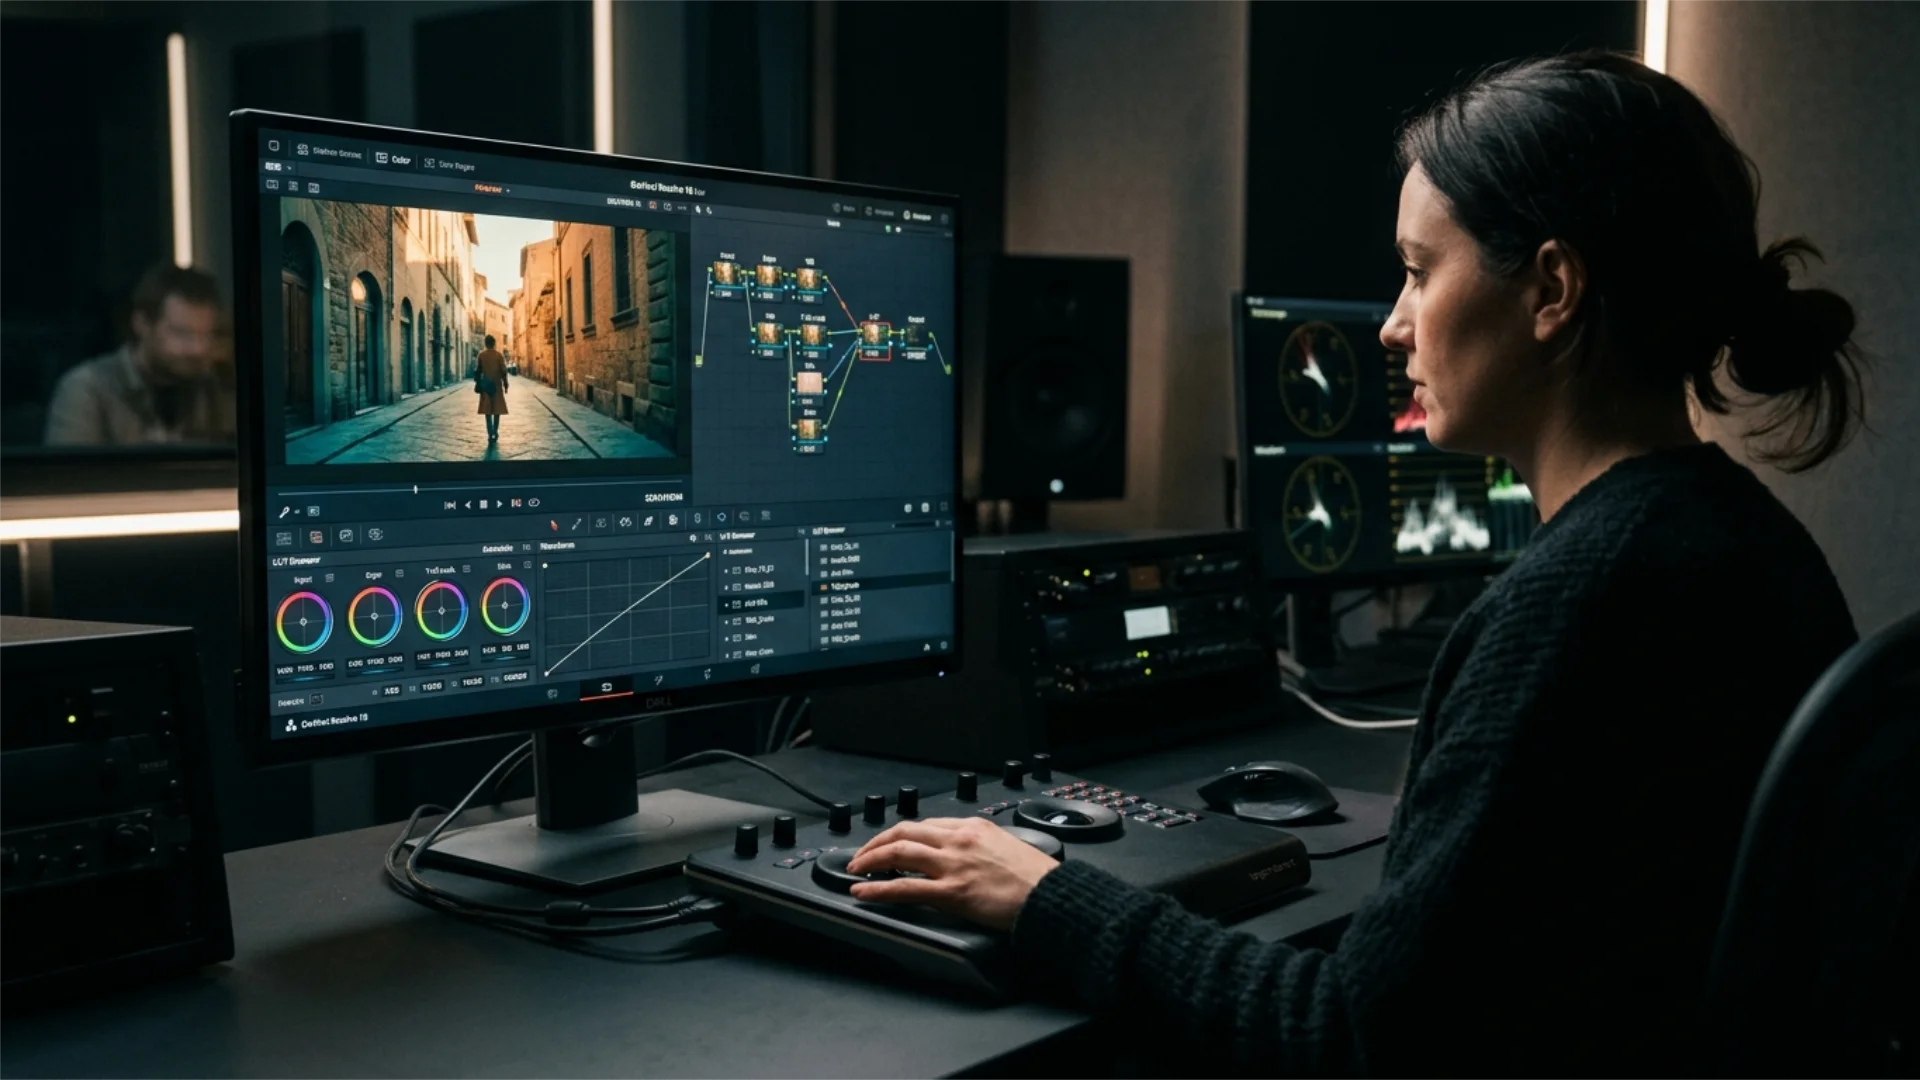
The Lumetri Color Panel: Your Central Hub
Adobe Premiere Pro’s Lumetri Color panel is where most of the magic happens. It combines a full suite of professional color correction and grading tools in a single, easy-to-navigate workspace.
To access it:
- Go to Window > Lumetri Color.
- Or switch your workspace to Color using the top navigation bar.
The Lumetri panel is divided into useful sections:
- Basic Correction
- Creative
- Curves
- Color Wheels & Match
- HSL Secondary
- Vignette
Let’s explore some of the core areas for Premiere Pro color correction.
Basic Correction
This is your first stop for technical fixes.
- Input LUTs: These are color Look-Up Tables that simulate the look of a specific camera or style. To apply one, use the Input LUT dropdown under Basic Correction. Browse popular LUTs for Premiere Pro.
- White Balance: Use the Temp and Tint sliders to neutralize any color casts.
- Tone: Adjust Exposure, Contrast, Highlights, Shadows, Whites, and Blacks to fix image imbalance.
- Saturation: Boost or reduce the overall intensity of color in your footage.
Creative Adjustments
This section helps you bring artistic style into your grading.
- Look: Apply creative LUTs in Premiere Pro to add cinematic effects or mood quickly.
- Faded Film: Adds a vintage, soft contrast look.
- Sharpen: Enhances details in the image.
- Vibrance: Adjusts saturation selectively to prevent skin tones from becoming overly saturated.
Want to jumpstart your visuals with pre-built effects? Check out this curated collection of Premiere Pro templates to streamline your creative workflow.
Mastering Color Grading Techniques
Working with Curves
Curves give you precise control over tonal ranges and color channels.
- RGB Curves: You can independently manipulate Red, Green, and Blue channels or adjust the overall luma curve to control contrast.
- Luma Waveform and RGB Parade: These scopes help monitor exposure and color balance. They’re crucial when making subtle changes with confidence.
- Hue vs. Curves:
- Hue vs. Sat: Adjust the saturation of a specific hue.
- Hue vs. Hue: Shift a particular color hue (e.g., making greens more teal).
- Luma vs. Sat: Modify saturation based on brightness—great for skin tones.
These tools are essential for advanced users learning how to color grade video in Premiere Pro with precision.
Color Wheels and Secondary Color Correction
The Color Wheels & Match section offers granular tonal control.
- Lift (Shadows), Gamma (Midtones), and Gain (Highlights): These wheels let you add warmth to shadows, cool down highlights, or correct midtones.
- Offset: Adjusts all tones globally—use sparingly for subtle balance shifts.
For targeting specific colors:
- HSL Secondary lets you isolate and correct or stylize a specific hue. This is great for enhancing skies, correcting skin tones, or drawing attention to an object.
Creating a Specific Look
Want that cinematic color grading in Premiere Pro?
- The classic teal and orange combo boosts contrast and enhances skin tones.
- Use reference images or even movie stills for inspiration.
- Layer subtle adjustments across the Lumetri sections to develop your own palette.
You can also experiment with various color presets in Premiere Pro or build your own based on your favorite tones. Saving and reusing these helps maintain visual consistency across projects.
Need professionally styled LUTs to jumpstart your color grading? Browse the best options for creative looks here.
Workflow and Best Practices
Set Up Your Workspace
- Use a dual-monitor setup if possible.
- Place your Lumetri Scopes side-by-side with the Lumetri Color panel.
- Organize your sequence so all shots that need grading are easy to access.
Use Adjustment Layers
For non-destructive editing, apply grading changes to adjustment layers. This allows easy changes across multiple clips and keeps your edits reversible.
Match Colors Between Clips
Use the Comparison View and Color Match feature to auto-match tones and lighting between shots—especially helpful for interviews or multicam sequences.
Save and Apply Color Presets
You can save any look you create as a preset by right-clicking on the Lumetri panel and choosing Save Preset. This helps you maintain a consistent style or apply signature branding across projects.
Work with LUTs Effectively
- Technical LUTs: Use these for initial color correction based on your camera profile.
- Creative LUTs: Apply these after corrections for mood and style.
Check out these Premiere Pro templates that are already optimized for effective color workflows and cinematic finishing.
Monitor Your Colors
Don’t rely solely on your display. Use scopes like:
- Vectorscope for color accuracy and skin tones.
- Luma Waveform for exposure.
- RGB Parade for balancing highlights and shadows.
Performance Tips
- Disable high-resolution playback during grading.
- Use proxies for smoother performance.
- Turn off unused Lumetri instances to reduce processing load.
Advanced Color Grading Techniques
Using Masks and Vignettes for Targeted Adjustments
Want to isolate part of the frame to adjust color or exposure?
- In the Lumetri Color panel, you can use masks (circular or polygonal) to apply effects only to a portion of the frame.
- This is useful for things like brightening a face, cooling down the background, or creating spotlight effects.
- Add a subtle vignette to draw the viewer’s eye toward the subject. The Vignette section is located at the bottom of the Lumetri panel and is excellent for cinematic mood.
Working with Third-Party Color Grading Plugins
While Lumetri is powerful, third-party tools can offer more flexibility and looks:
- Magic Bullet Colorista: Real-time grading with guided corrections.
- Boris FX Continuum: Offers film looks, advanced color matching, and more.
- FilmConvert Nitrate: Emulates film stocks for ultra-authentic looks.
These plugins are perfect for professionals or those working on larger creative projects. However, many cinematic effects can still be achieved using built-in Lumetri tools or carefully crafted LUTs in Premiere Pro, like the ones available on Pixflow.
Understanding Color Management and Export Settings
Before final export, it’s important to:
- Ensure your project color space matches your delivery format (e.g., Rec.709 for web).
- Use scopes to confirm nothing is clipping in highlights or shadows.
- If needed, apply a final Output LUT in the export settings to maintain the look across devices.
Keep in mind, certain platforms like YouTube or Vimeo may slightly alter colors upon upload—test exports are always a good idea.
Conclusion
Whether you’re an aspiring YouTuber, freelance editor, or filmmaker, color grading is an essential skill—and Premiere Pro gives you everything you need to do it right.
Looking to fast-track your workflow with ready-made templates and color styles? Check out our Premiere Pro templates and hand-crafted color LUTs to save time and boost your quality.
Keep experimenting, keep practicing, and most importantly—keep telling visual stories with color.
Disclaimer : If you buy something through our links, we may earn an affiliate commission or have a sponsored relationship with the brand, at no cost to you. We recommend only products we genuinely like. Thank you so much.


Write for us
Publish a Guest Post on Pixflow
Pixflow welcomes guest posts from brands, agencies, and fellow creators who want to contribute genuinely useful content.
Fill the Form ✏