How to Recover Deleted Videos From an SD Card or Memory Card
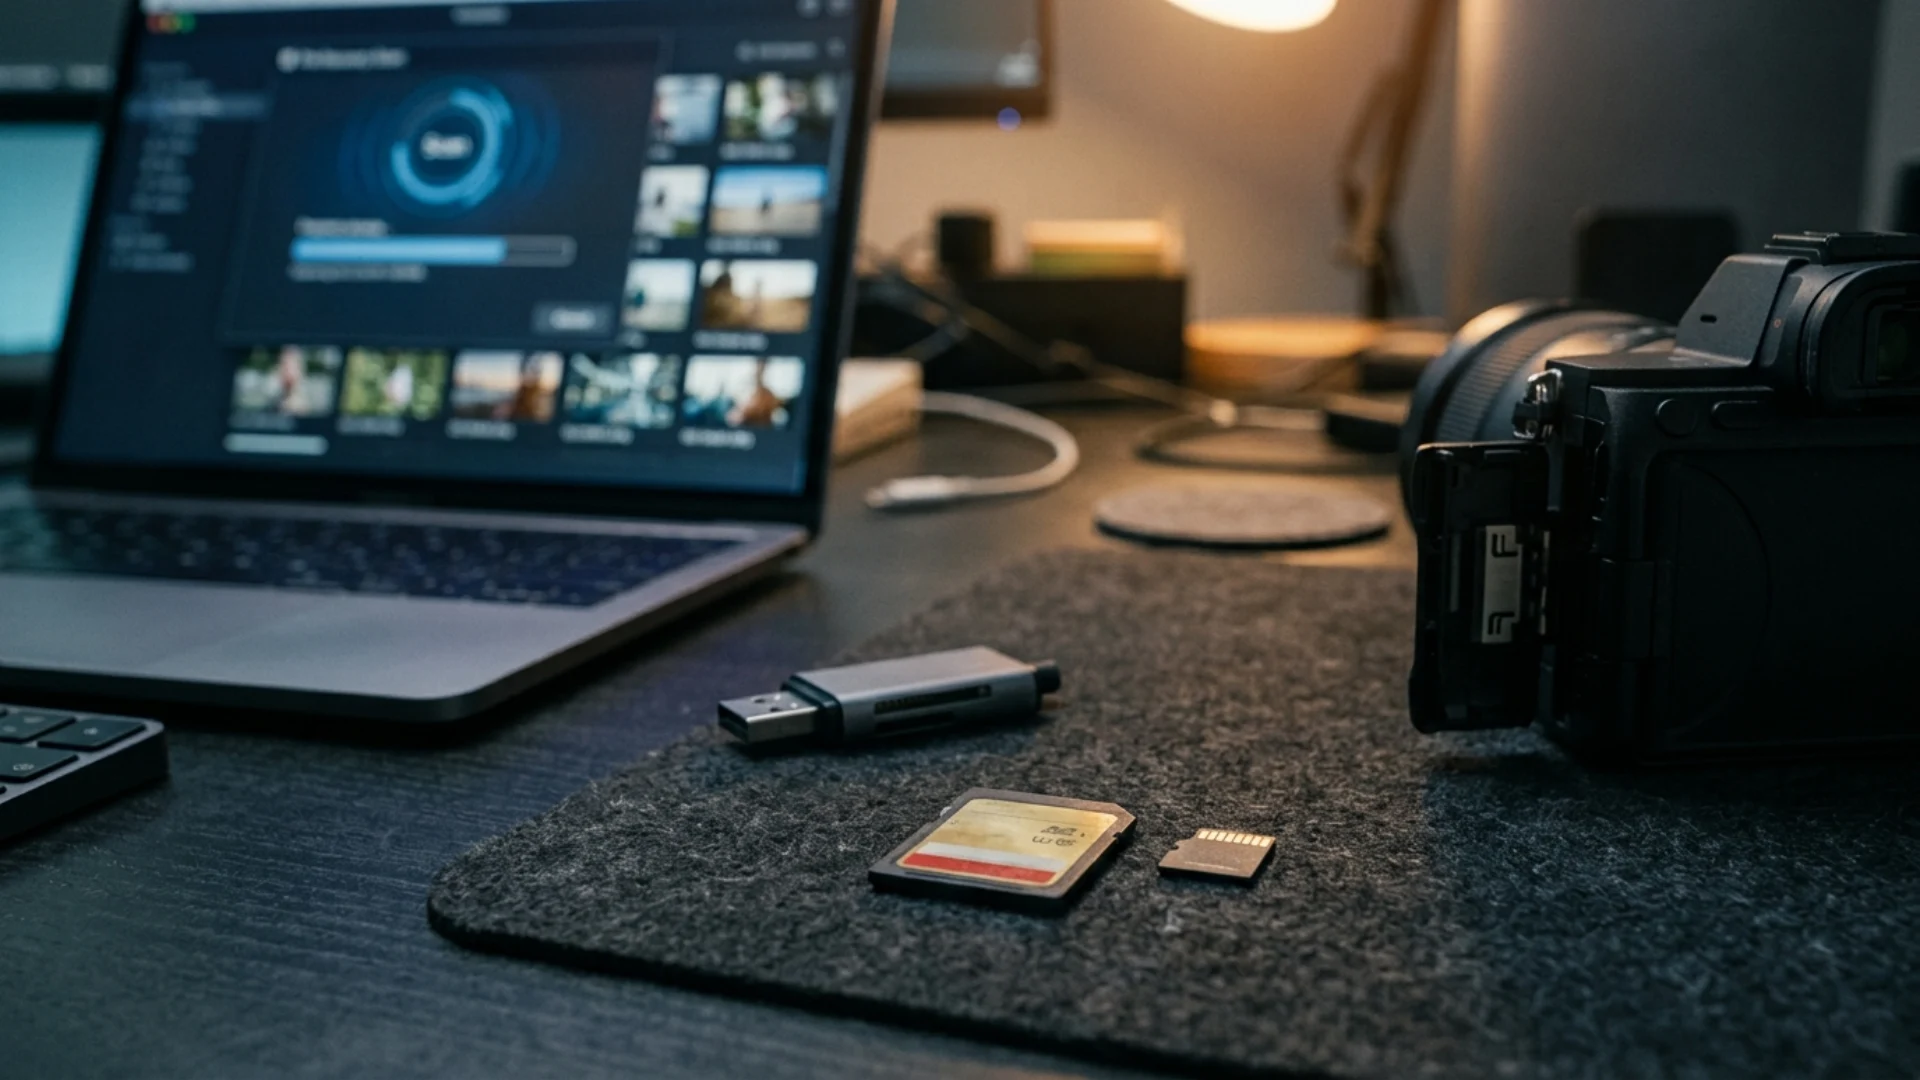
Below, we walk through how to recover deleted videos from an SD card in the order that protects the footage, and explain why camera files break in ways photos don’t.
What Decides Whether SD Card Video Recovery Works
That is why the first rule of SD card video recovery is simple: do not record anything else to the card.
Video recovery can be more difficult than photo recovery because large MP4 and MOV files may be split across several areas of the card. This is known as fragmentation. A basic recovery tool might locate the beginning of a clip but fail to reconstruct all of its later fragments. The result can be a file that opens normally, plays for several seconds, then freezes or loses audio.
GoPro footage has another complication. Longer recordings are divided into separate chapter files, which this walkthrough for lost GoPro videos covers in detail.
Your chances also depend on what happened after deletion.
Before You Recover Deleted Footage From an SD Card
Step 1. Stop recording and remove the card
Turn the camera off and wait until its card-access light has stopped flashing. Remove the SD or microSD card.
Do not shoot a test clip to see whether the camera still works. Even a few seconds of high-bitrate footage can overwrite blocks belonging to the deleted video.
Step 2. Lock a full-size SD card
If you are using a full-size SD card, move the side tab to the Lock position.
A microSD card does not have its own lock switch, although some SD adapters do.
The switch should be treated as an extra precaution rather than the only protection. You should still avoid any software operation that attempts to modify the card.
Step 3. Reject format and repair prompts
If Windows says the card must be formatted before it can be used, click Cancel.
Do not run CHKDSK before recovering the footage. Likewise, do not start an in-camera database repair simply because clips are missing. Operations designed to repair a file system or rebuild a camera database can change data on the card.
Step 4. Connect the card through a reader
Use your computer’s built-in SD slot or a USB card reader.
This is preferable to leaving the card inside the camera and connecting the camera by USB. Many cameras expose their files through MTP or PTP rather than presenting the memory card as a directly addressable storage device. Recovery applications need access to the card itself to scan deleted areas properly.
How to Recover Deleted Videos From an SD Card
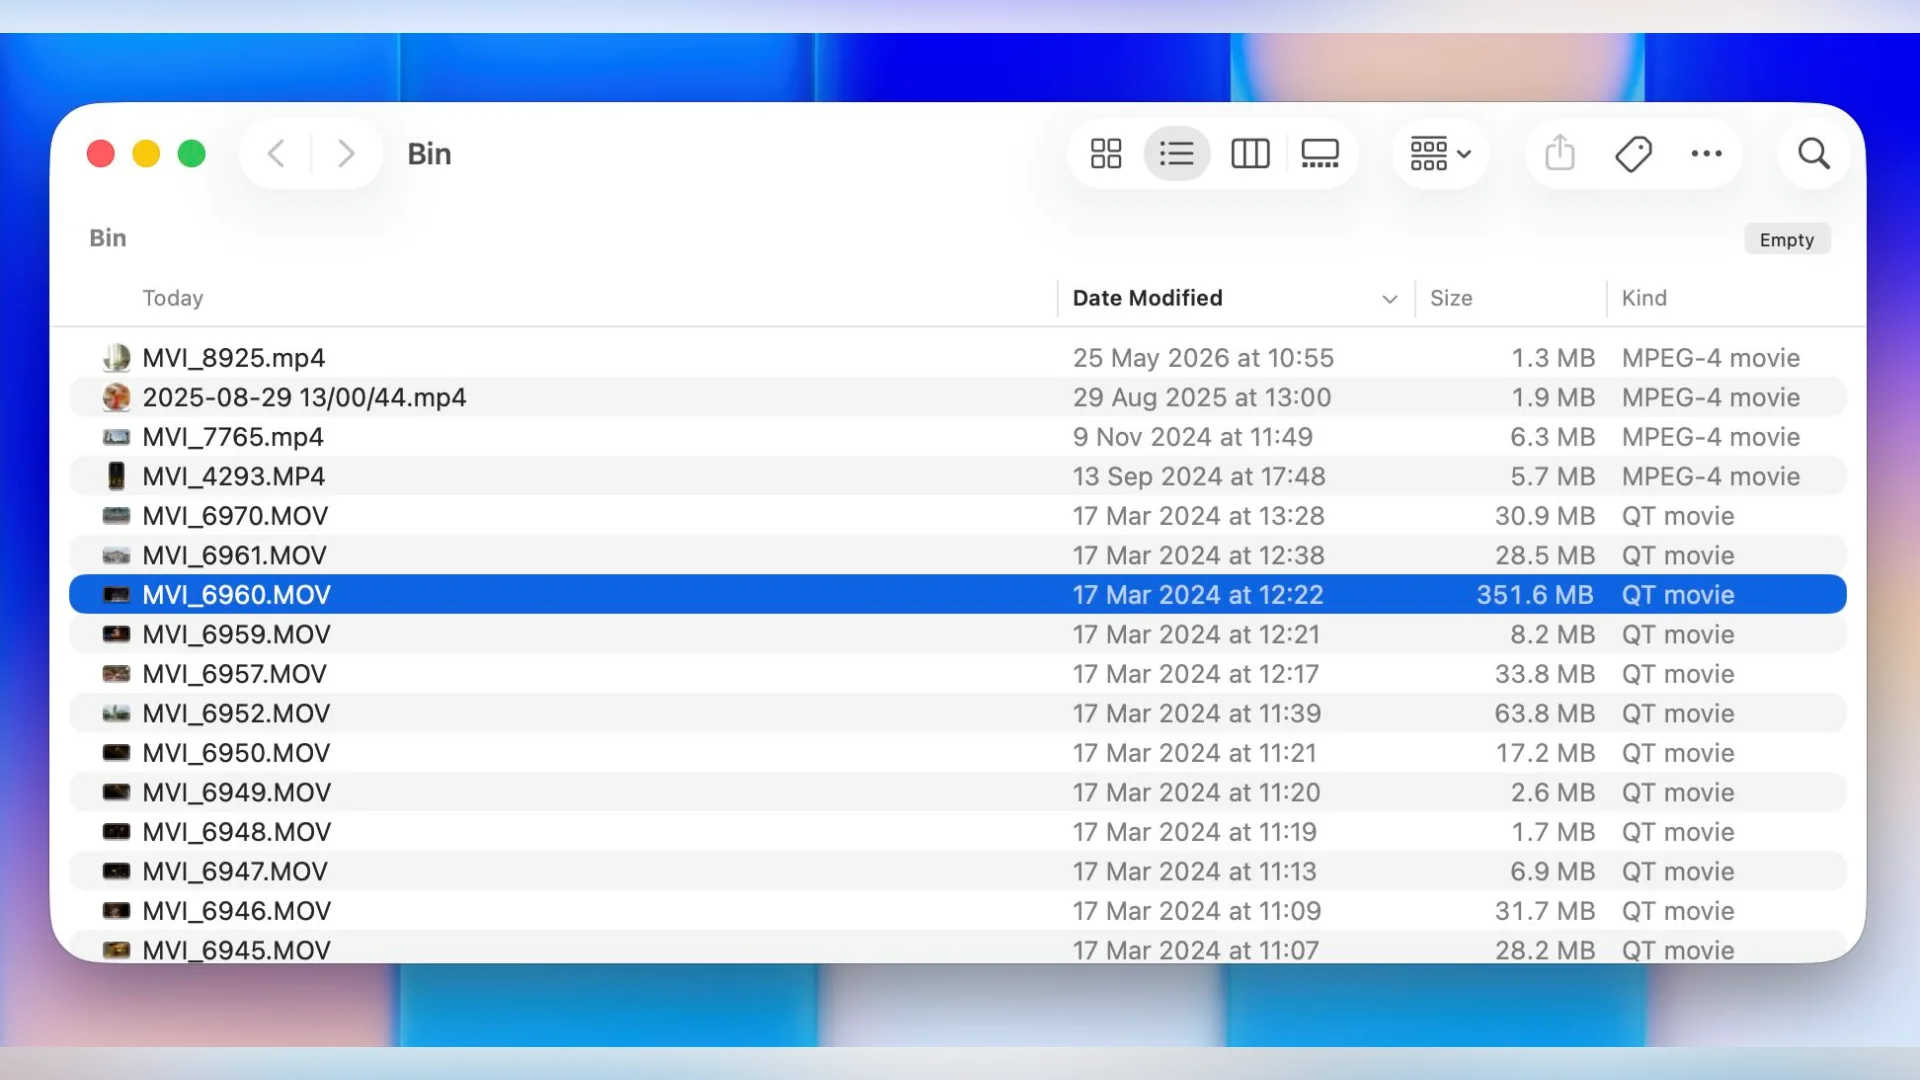
Method 1: Check for a Recently Deleted Copy on a Mac
This only applies if you deleted the file through Finder while the card was connected to the Mac and have not emptied Trash. It does not help with footage deleted in-camera.
- Insert the card into the same Mac. Wait for it to mount in Finder.
- Open Trash from the Dock.
- Search for the clip by filename or sort the contents by date.
- Copy the clip to your internal drive. Drag it from the Bin to a folder on your Mac or another storage device.
Do not restore it back to the memory card you are trying to protect.
Method 2: Find a Copy Your Editing Workflow Already Made
Before scanning the source card, check what happened during ingest.
Editors often create copies, proxies, optimised media or cloud uploads without thinking of them as backups. These files may be enough to recover the shot or, at minimum, identify exactly which clip you need.
If the footage passed through an editing app, a phone, or a cloud service, check these before you scan:
- Premiere Pro projects that ingest with Copy, Transcode, or Create Proxies write a second file to the Primary or Proxy Destination, which defaults to the project folder.
- DaVinci Resolve keeps copies in Clone Tool destinations and in your Optimized Media and Proxy Media folders.
- Final Cut Pro imports set to Copy to library keep the original media in the library or its storage location.
- DJI Fly saves a lower-resolution copy to your phone when Cache When Recording is on. Look in the app’s Album.
- GoPro Quik can auto-upload to GoPro’s cloud with a subscription, and Sony’s Creators’ App can send clips to a phone or to Creators’ Cloud.
- Frame.io Camera to Cloud uploads proxies or original files during the shoot, depending on the camera.
The problem here is that most of these copies are proxies or cache files at a lower resolution. They work for a rough cut and can help confirm which clip you need to keep the edit moving while you recover the original.
Nothing turned up? Then the only copy is on the card, and it’s time to scan it.
Method 3: Scan the SD Card With Video Recovery Software
If there is no usable copy in your editing workflow, the next step is to scan the original card for deleted data. This is why it was important not to record new footage, run repair tools, or write anything else to the card: recovery software can only work with data that has not yet been overwritten.
There are several tools that can scan SD cards, but for this walkthrough we recommend Disk Drill because its Advanced Camera Recovery mode is designed specifically for footage from cameras and drones. Instead of relying only on standard file signatures, it can reconstruct fragmented video from supported camera formats, which is particularly useful for large MOV and MP4 files.
if the card repeatedly disconnects, becomes unusually hot, reports the wrong capacity, or is not detected properly in Disk Management or Disk Utility.
Before you scan: stop here if the card repeatedly disconnects, becomes unusually hot, reports the wrong capacity or is not detected by Disk Utility or Disk Management. Those symptoms may point to hardware failure, and repeated scans can put an unstable card under additional stress.
- Connect the locked card through the reader. Install Disk Drill on your computer’s drive, never on the card.
- Open Advanced Camera Recovery. Select Advanced Camera Recovery from the left sidebar, then select the physical SD card rather than its individual volume.
- Select the camera type. Choose the camera brand that recorded the footage. Supported devices include cameras and recording systems from brands such as GoPro, Sony, Canon, Nikon, DJI, Panasonic and Fujifilm. Leave the other settings at their defaults unless you have a specific reason to modify them.
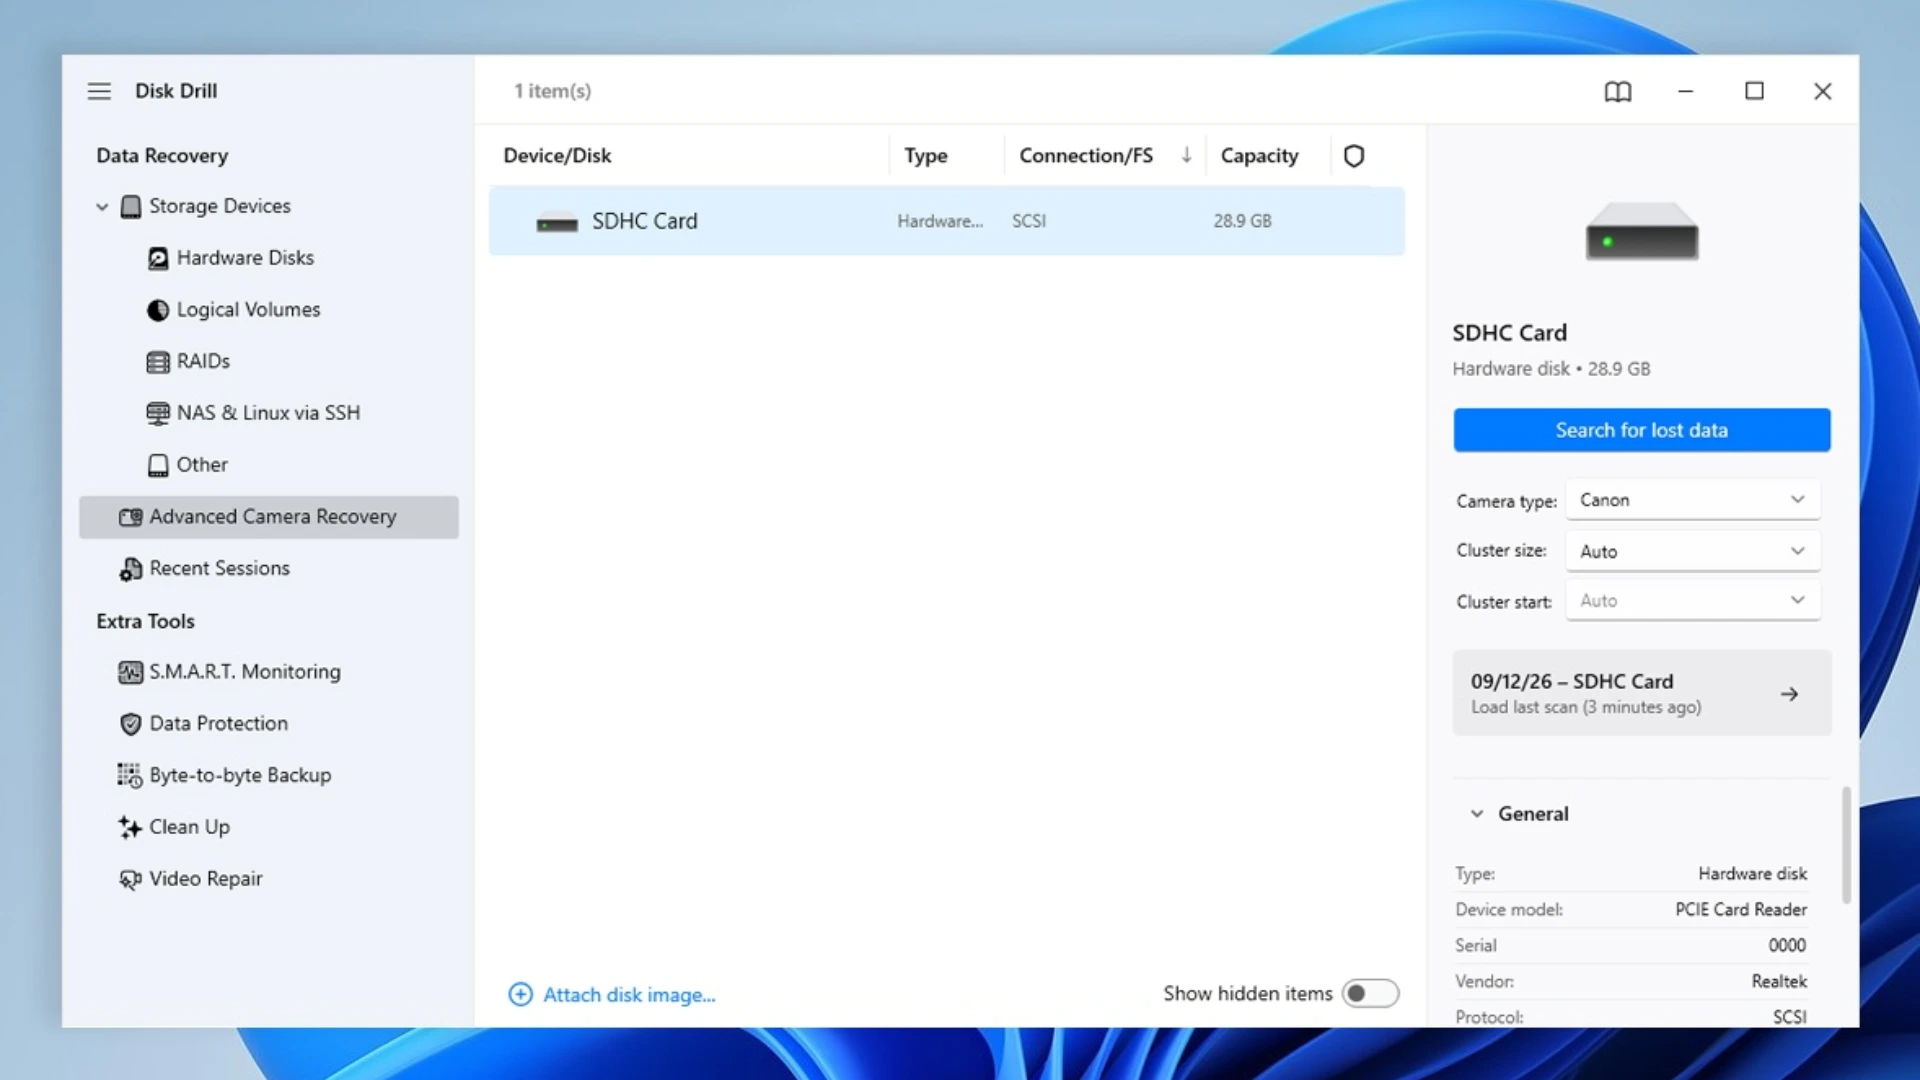
- Click Search for lost data to begin the scan.
- Let the scan finish. Do not stop the scan as soon as you recognize one filename. Camera recovery can identify different versions or fragments of the same recording at different stages of the scan.
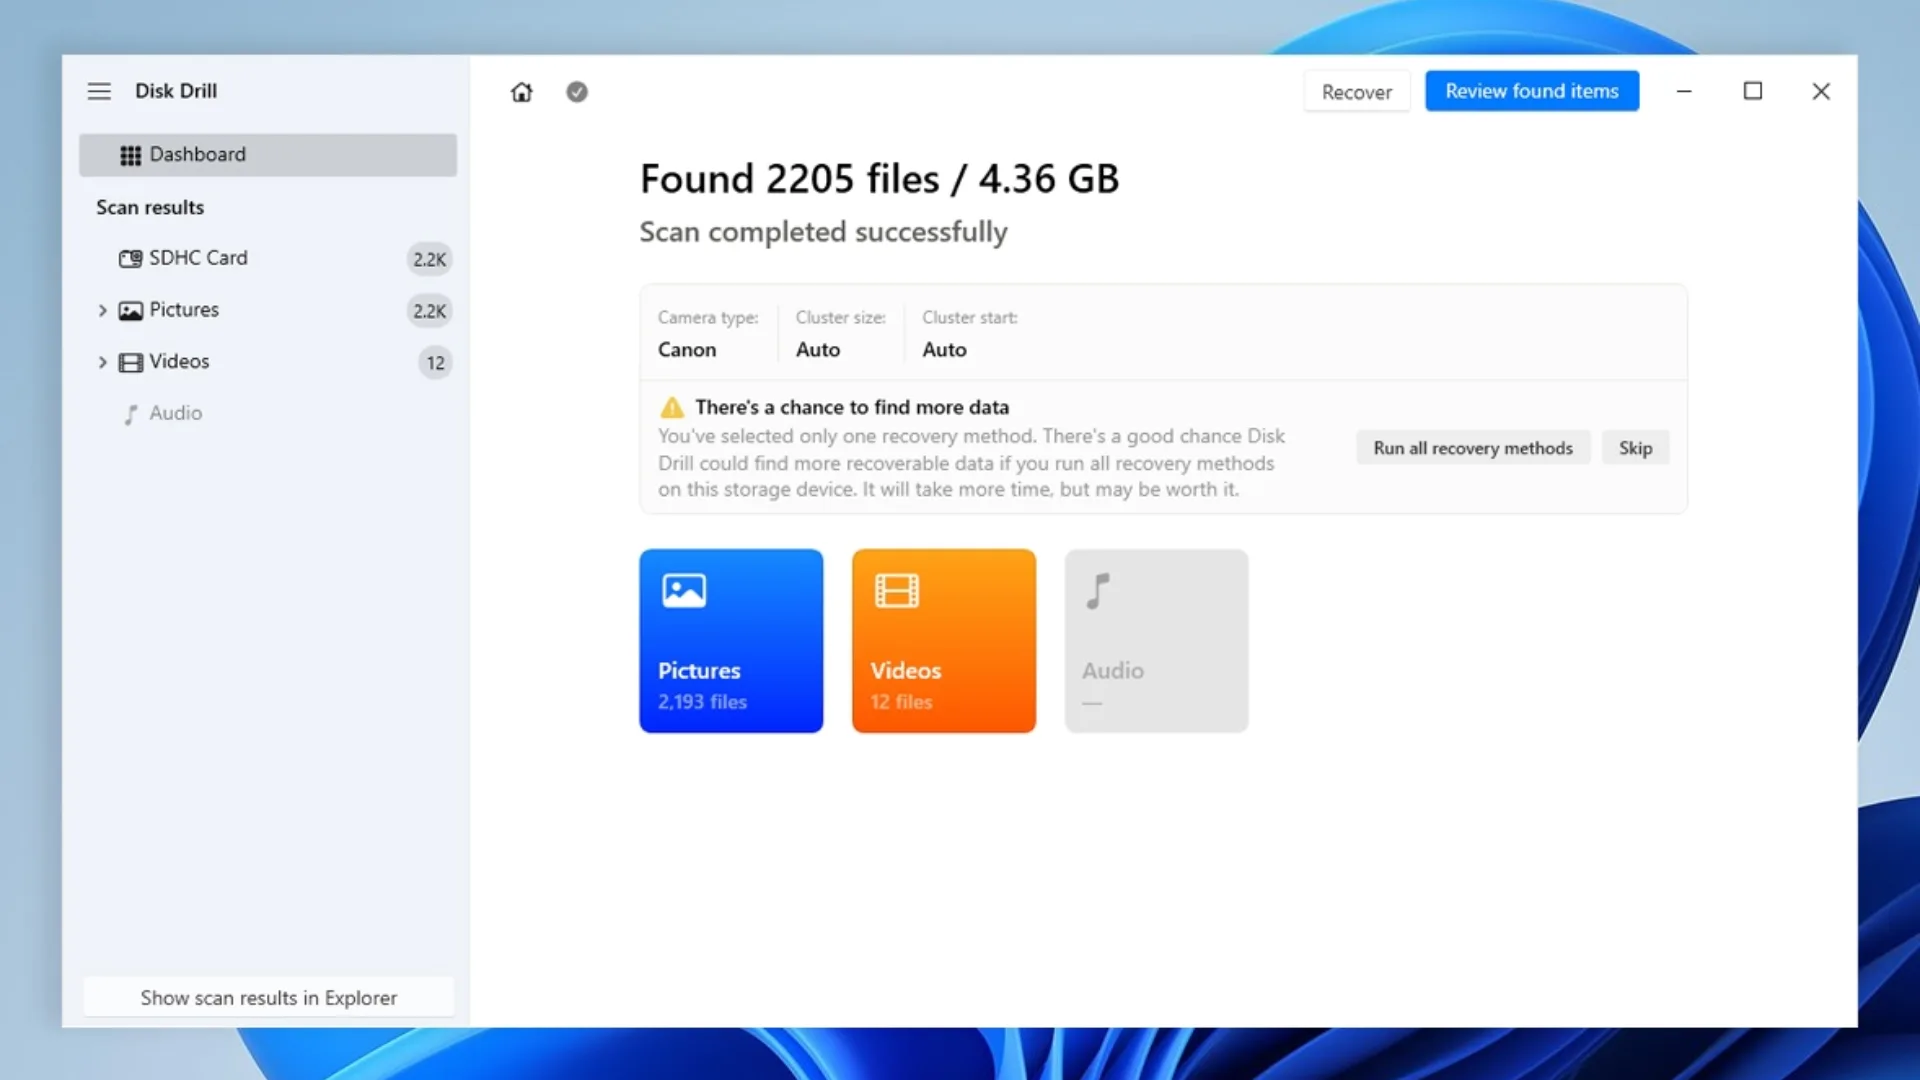
- Filter the results. Open the Videos category and narrow the results to the formats used by your camera. Use filename, estimated size, resolution and duration to narrow down the correct take.
- Preview the complete clip. Scrub to the middle. Jump to the final few seconds. Check whether playback stops at a specific point. Full playback in preview is the best sign the file came back whole.
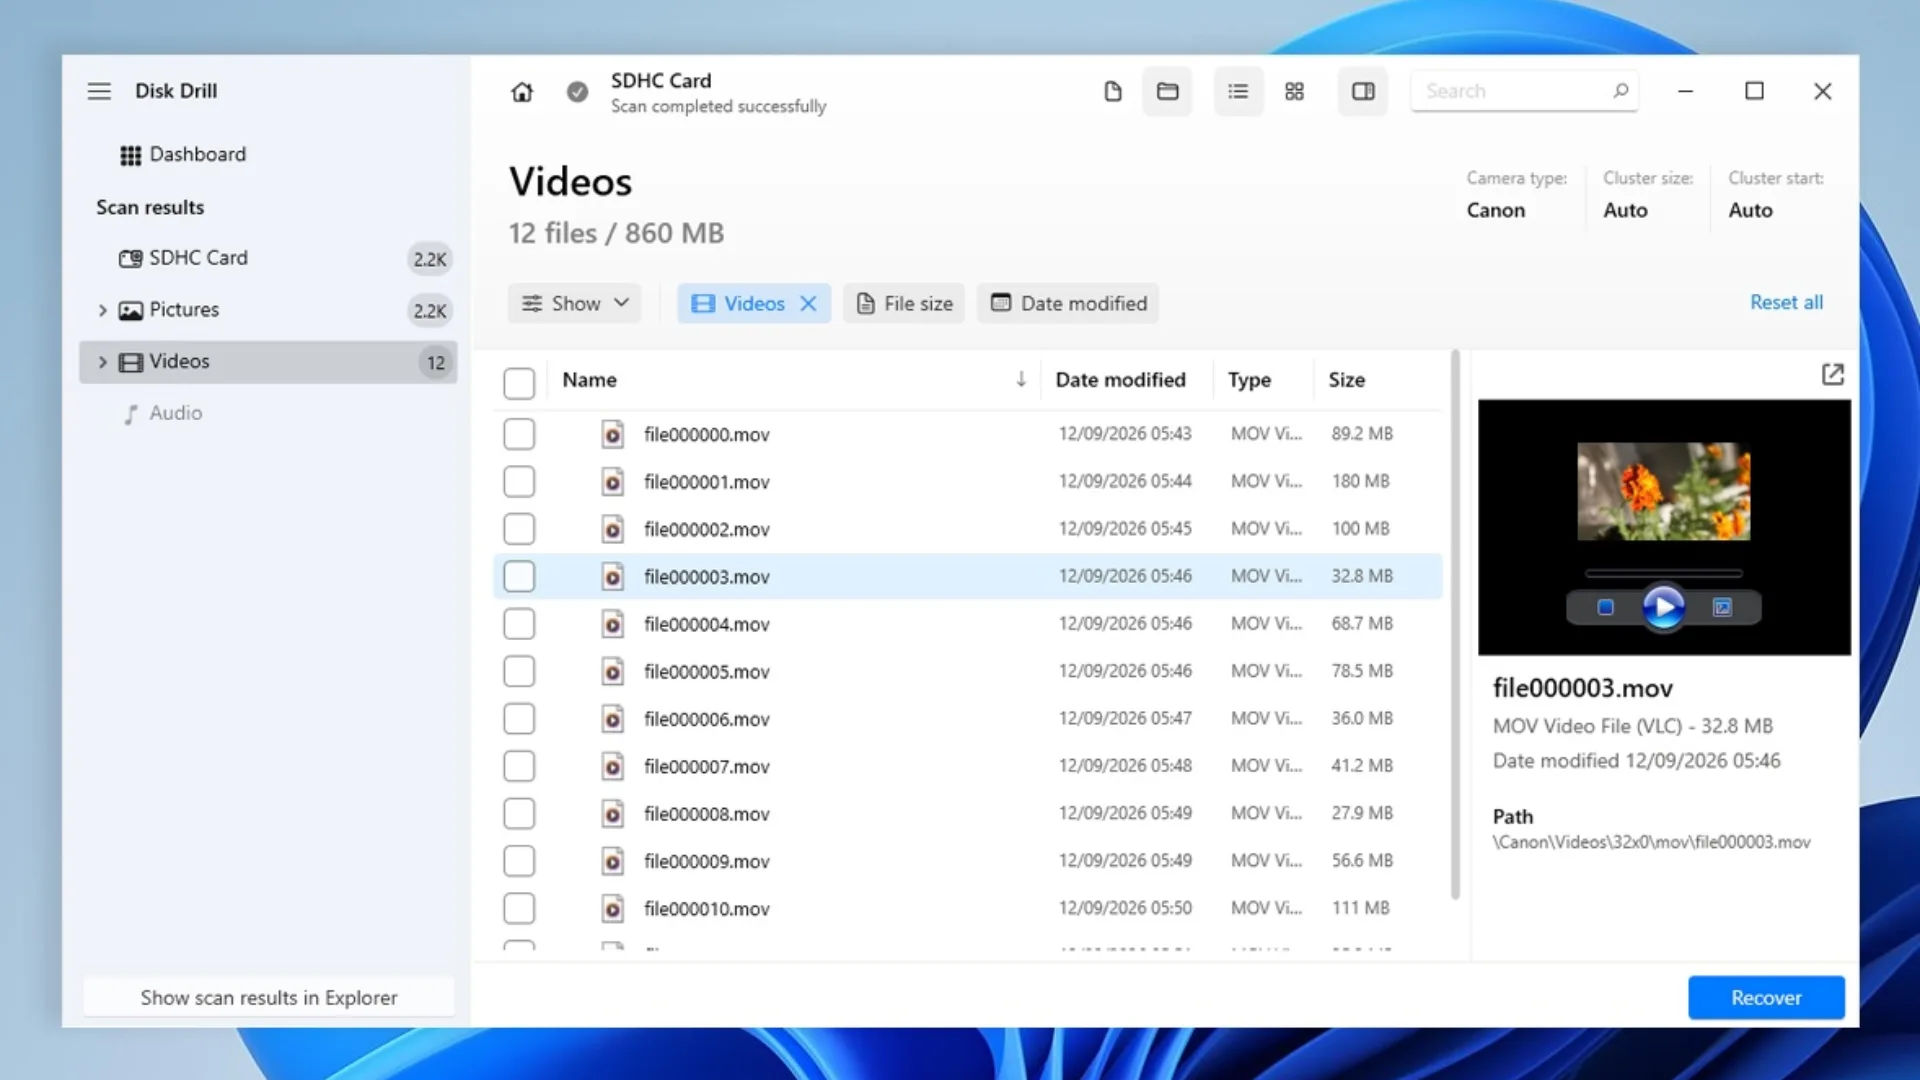
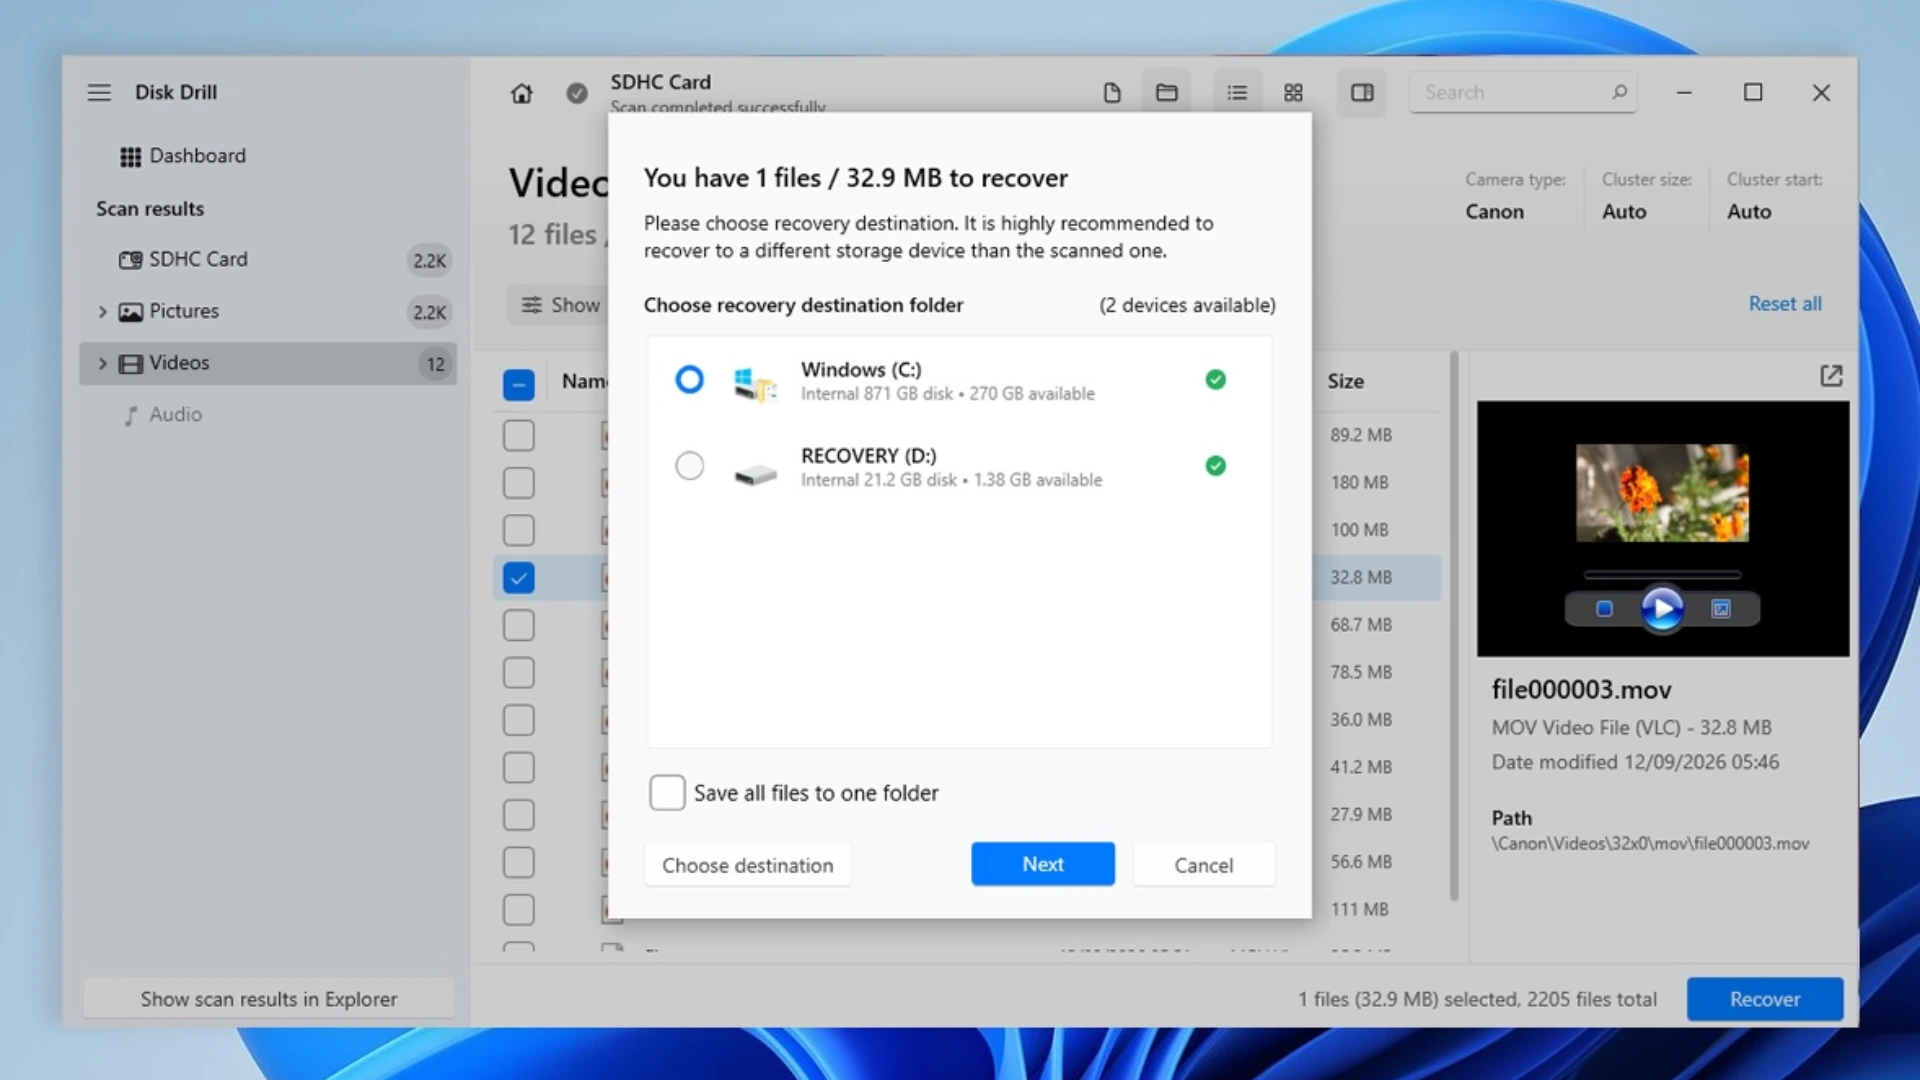
- Recover to a different drive. Select the files you need and click Recover. Never save it back to the card itself.
- Validate the recovered footage. Before reusing or formatting the SD card, import the recovered file into your NLE and play it from beginning to end. Do not assume recovery is complete simply because an MP4 or MOV now exists on your drive.
In one forum thread, a Sony A7 III shooter’s first free scan missed a deleted 4K take that a camera recovery scan then found. The flow is the same for other brands, and there’s a separate guide if you need to recover photos and videos deleted from Nikon camera bodies.
If paying for recovery software is not an option, PhotoRec is worth trying before giving up on the card. It is free and can recover files by looking for known file signatures rather than relying entirely on the damaged file system. The downside is that original filenames and folder structures may be lost, and heavily fragmented camera footage can be difficult to reconstruct correctly. So a recovered MP4 may still be incomplete or unplayable.
If you want to compare other tools, the community-maintained software list on r/DataRecoveryHelp includes both commercial and free recovery utilities.
What to Do When a Recovered Clip Won’t Play
- Play every clip to the last frame, or drop them on a timeline and scrub through.
- Compare duration and bitrate in MediaInfo against a healthy clip from the same shoot.
- Keep both the original SD card and the untouched recovered file until every clip checks out.
A damaged clip usually falls into one of two cases. A missing index (the moov atom in MP4 and MOV files) can be rebuilt by repair tools such as Clever Online Video Repair, using a reference clip from the same camera and settings. Overwritten frame data can’t be restored.
Also check the scan results for a proxy or GoPro LRV of the same shot. Smaller files are more likely to survive, and one can hold the edit in the meantime.
Five Habits That Prevent the Next Lost Take
Use a workflow where a card does not return to the camera until the footage exists in at least two verified locations.
A practical sequence is:
- Copy camera originals to your main media drive using a checksum-based copy or cloning tool.
- Create a second independent copy on another physical drive.
- Open several clips from both copies and verify that the transfer completed.
- Only then return the SD card to the camera. Format only in camera, and only after both copies are verified.
- Flag bad takes instead of deleting them on set. Deleted clips leave gaps that fragment the next recording.
If your camera has two card slots, use simultaneous backup recording when the project justifies it rather than treating the second slot only as overflow.
Wrapping Up
And if the card itself is physically unstable, stop scanning it and move to professional recovery instead.
Disclaimer : If you buy something through our links, we may earn an affiliate commission or have a sponsored relationship with the brand, at no cost to you. We recommend only products we genuinely like. Thank you so much.
Blog Label:



Write for us
Publish a Guest Post on Pixflow
Pixflow welcomes guest posts from brands, agencies, and fellow creators who want to contribute genuinely useful content.
Fill the Form ✏