VBR vs CBR: Which Bitrate Setting Should You Use in 2026?
- What is CBR - Constant Bitrate
- What is VBR - Variable Bitrate
- VBR 1 Pass vs VBR 2 Pass
- CBR vs VBR - Side-by-Side Comparison
- How to Set VBR and CBR in Your Editing Software
- When to Use CBR vs VBR - The Editor Decision Framework
- The Bitrate Settings Cheat Sheet for Editors
- How Codecs Affect Your VBR vs CBR Choice
- Common Mistakes Editors Make with Bitrate Settings
- What About Constrained VBR - CVBR
- Conclusion
Here’s the thing: most guides that explain VBR vs CBR are written for streaming engineers and broadcast professionals, not for video editors and motion designers. The advice you’ll find online usually boils down to “use CBR for live streaming and VBR for everything else,” which isn’t exactly helpful when you’re trying to get the best possible export out of Premiere Pro.
In this guide, we’re breaking down constant bitrate vs variable bitrate specifically for people who edit video for a living, whether you’re working in Premiere Pro, After Effects, DaVinci Resolve, or OBS. We’ll go deep into VBR 1 Pass vs 2 Pass (a topic most articles barely touch), give you software-specific walkthroughs, and hand you a cheat sheet you can reference every time you export.
Quick refresher: bitrate is the amount of data your video uses per second, measured in Mbps. Higher bitrate generally means better quality and larger files. The question is how that bitrate gets distributed across your video, and that’s exactly what VBR and CBR control.
Whether you’re exporting a client project, rendering Pixflow’s video templates, or uploading your latest reel to YouTube, the bitrate mode you choose will directly impact quality, file size, and export time. Let’s get into it.
What is CBR (Constant Bitrate)?
Think of CBR like a flat-rate water bill. You pay the same amount every month regardless of whether you used a trickle or flooded the garden. Simple and predictable, but not exactly efficient.
In practice, this means:
- Simple scenes waste data. A 5-second black screen with white text uses the same bitrate as a complex VFX shot. Those extra bits don’t improve quality on the simple frame; they just inflate your file size.
- Complex scenes can suffer. When the encoder hits a fast-motion sequence or a densely detailed frame, it can’t allocate more bits to preserve that detail. The result? Compression artifacts like blocking, banding, or motion smear.
- File sizes are predictable. Because the bitrate never changes, you can calculate your exact output file size before you even start exporting. That’s genuinely useful for workflows with strict storage or bandwidth limits.
CBR is the default choice for live streaming because it produces a steady, predictable data stream that won’t spike and overwhelm your upload connection. But for video exports? It’s rarely the best option.
What is VBR (Variable Bitrate)?
Complex scenes with lots of motion, color variation, and fine detail get more bits. Simple, static scenes get fewer. The result is a better quality-to-file-size ratio, because you’re not wasting data on frames that don’t need it.
Continuing the water analogy: VBR is like a metered water bill. You pay for what you actually use. Heavy usage months cost more; light months cost less. Over time, it’s more efficient.
When you set up VBR encoding, you’ll typically configure two values:
- Target bitrate: The average bitrate the encoder aims for across the entire video.
- Maximum bitrate: The ceiling the encoder won’t exceed, even during the most complex scenes.
For example, setting a target of 10 Mbps and a maximum of 15 Mbps tells the encoder: “Average around 10, but feel free to go up to 15 when things get intense.” This gives the encoder breathing room to maintain quality during demanding sections while keeping overall file size in check.
VBR 1 Pass vs VBR 2 Pass: The Deep Dive
How VBR 1 Pass Works
With VBR 1 Pass, the encoder processes your video in a single run. It analyzes each frame as it encounters it and makes real-time decisions about how many bits to allocate.
The upside? It’s fast. Export times are roughly the same as CBR, because the encoder only goes through your timeline once.
The downside? The encoder is essentially flying blind. It can’t “see ahead” to know that a complex action sequence is coming up in 30 seconds, so it can’t save bits on the current easy section to spend them later. Bit allocation is good, but not optimal.
VBR 1 Pass is your go-to when:
- You need a quick export for internal review or client feedback
- You’re posting drafts to social media
- Export speed matters more than squeezing out every last bit of quality
How VBR 2 Pass Works
VBR 2 Pass is where the real magic happens.
In the first pass, the encoder scans your entire video without actually encoding it. It maps out the complexity of every frame, identifying which sections are easy to encode (static shots, simple graphics) and which are demanding (fast motion, detailed textures, particle effects).
In the second pass, it uses that analysis to build a “bit budget” and allocate data precisely where it’s needed most. Easy sections get fewer bits. Hard sections get more. The encoder knows exactly what’s coming and plans accordingly.
The result? Superior visual quality at the same average bitrate compared to both VBR 1 Pass and CBR. You get sharper detail in complex scenes, fewer compression artifacts, and often a smaller file size than CBR at comparable quality.
The trade-off is time. VBR 2 Pass roughly doubles your export duration because the encoder goes through your timeline twice. For a 10-minute video that normally exports in 5 minutes with 1 Pass, expect around 9-11 minutes with 2 Pass.
Real-World Quality Comparison
Here’s what real-world testing consistently shows, and this matches what editors on forums like Reddit and Creative COW have confirmed through side-by-side comparisons:
At the same target bitrate: VBR 2 Pass > VBR 1 Pass > CBR
One editor ran a test exporting 4K footage at 5 Mbps (intentionally low to make differences obvious). The CBR version showed visible pixel sticking and graphical glitches. The VBR 1 Pass version had fewer artifacts but still some issues. The VBR 2 Pass version was “almost passable” despite the extremely low bitrate.
Why does this happen? It comes down to bit distribution. CBR throws the same data at every frame regardless of need. VBR 1 Pass makes decent real-time decisions. VBR 2 Pass has a complete map of your video’s complexity and distributes bits with surgical precision.
Here’s an important nuance, though: the maximum bitrate determines your quality ceiling. A CBR encode at 20 Mbps will look as good as (or very close to) a VBR encode with a 20 Mbps maximum. The difference is that the VBR file will be significantly smaller, because it doesn’t waste 20 Mbps on scenes that only need 8.
Export Time Impact
Let’s put concrete numbers to this:
- CBR: ~1x baseline export time
- VBR 1 Pass: ~1x (roughly the same as CBR)
- VBR 2 Pass: ~1.8-2.2x (nearly double)
Is the extra time worth it? For final client deliverables, YouTube uploads, and portfolio pieces: absolutely. For rough cuts, internal reviews, and social media drafts: probably not. Use VBR 1 Pass for speed and switch to 2 Pass when quality is the priority.
CBR vs VBR: Side-by-Side Comparison
How to Set VBR and CBR in Your Editing Software
Premiere Pro
- Go to File > Export > Media (or press Ctrl+M / Cmd+M).
- Under Format, select H.264 (or H.265 for HEVC).
- Scroll down to the Video tab and find the Bitrate Encoding dropdown.
- Choose from: CBR, VBR, 1 Pass, or VBR, 2 Pass.
- Set your Target Bitrate and Maximum Bitrate (for VBR modes).
Recommended values for H.264:
- 1080p 30fps: Target 10 Mbps, Max 15 Mbps (VBR 2 Pass)
- 1080p 60fps: Target 15 Mbps, Max 20 Mbps (VBR 2 Pass)
- 4K 30fps: Target 40 Mbps, Max 50 Mbps (VBR 2 Pass)
- 4K 60fps: Target 55 Mbps, Max 70 Mbps (VBR 2 Pass)
For a complete walkthrough of Premiere Pro’s export panel, check out our guides on best export settings for YouTube and how to professionally export videos in Premiere Pro.
After Effects + Media Encoder
- In After Effects, go to Composition > Add to Adobe Media Encoder Queue (Ctrl+Alt+M / Cmd+Opt+M).
- In Media Encoder, click the Format column and select H.264.
- Click the output name to open Export Settings.
- Under the Video tab, find the Bitrate Encoding dropdown, same options as Premiere Pro.
Pro tip: Because Media Encoder runs in the background, you can continue working in After Effects while VBR 2 Pass does its thing. This effectively eliminates the export time penalty. For more detail on this workflow, see our guide on exporting After Effects projects like a pro.
DaVinci Resolve
- Navigate to the Deliver page (bottom panel).
- Choose your format (H.264 or H.265 under “Custom Export”).
- Under Quality, find the Rate Control dropdown.
- Options include: Constant Bitrate and Variable Bitrate (Resolve doesn’t explicitly label 1 Pass vs 2 Pass; it uses its own optimization approach).
- For VBR, set your target quality or bitrate restriction.
Resolve’s encoding engine is highly optimized, and its VBR mode tends to produce excellent results even without a manual 2-pass option. If you’re using Resolve’s optimized media workflow for editing proxies, pairing it with VBR for final delivery gives you the best of both worlds.
OBS (For Recording and Streaming)
OBS is unique because you’ll likely want different settings for streaming vs local recording.
- Go to Settings > Output (switch to Advanced mode).
- Under the Streaming tab, set Rate Control to CBR. This is recommended by Twitch, YouTube Live, and virtually every live streaming platform because it provides predictable, steady bandwidth usage.
- Under the Recording tab, set Rate Control to CQP (Constant Quality Parameter) or VBR for better quality local recordings.
Why the split? Live streaming sends data in real-time to a server. Bitrate spikes from VBR can overwhelm your upload connection and cause dropped frames or buffering for viewers. CBR keeps the data flow smooth and predictable. But for local recordings saved to your drive, there’s no bandwidth constraint, so CQP or VBR can produce higher quality files.
When to Use CBR vs VBR: The Editor’s Decision Framework
- Live streaming (Twitch, YouTube Live, OBS)? Use CBR. Predictable bandwidth is non-negotiable for real-time delivery.
- Final export for YouTube or Vimeo? Use VBR 2 Pass. These platforms re-encode your upload anyway, so start with the highest quality source.
- Quick draft for client review? Use VBR 1 Pass. Fast, good quality, gets the job done.
- Archiving master files? Use VBR 2 Pass at a high bitrate. Maximize quality for long-term storage.
- Instagram Reels or TikTok? Use VBR 1 Pass. These platforms compress heavily on their end, so speed is more valuable than marginal quality gains.
- OBS local recording? Use CQP or VBR. No bandwidth limits on your own hard drive.
- File size is critical? Use VBR (either pass). It produces smaller files at the same quality compared to CBR.
The Bitrate Settings Cheat Sheet for Editors
How Codecs Affect Your VBR vs CBR Choice
H.264 + VBR 2 Pass is the gold standard for delivery. It’s universally compatible, well-optimized, and every major platform accepts it. If you’re unsure, this combo is your safest bet.
H.265 (HEVC) offers roughly 25-50% better compression than H.264 at the same visual quality. This means VBR shines even more with HEVC: you can hit the same quality at significantly lower bitrates, saving file size and upload time. The catch? Slower encoding and slightly less universal playback support.
ProRes and DNxHD/HR are intra-frame editing codecs that compress each frame independently at very high bitrates. They’re essentially CBR by nature, and the VBR vs CBR choice doesn’t really apply. Use these for intermediate editing workflows, not final delivery.
AV1 is the emerging open-source codec with excellent compression efficiency. VBR encoding with AV1 can produce stunning quality at low bitrates, but encoding times are still very slow compared to H.264 and H.265. Keep an eye on this one for the future.
For a deeper breakdown of how codecs and containers work together, that guide covers the relationship in detail.
Common Mistakes Editors Make with Bitrate Settings
1. Using CBR for final YouTube uploads. YouTube re-encodes everything you upload. Starting with a CBR file means you’re handing YouTube a less-optimized source, which gets compressed again. VBR 2 Pass gives YouTube the best possible starting point.
2. Setting VBR target and maximum to the same value. If your target is 15 Mbps and your max is also 15 Mbps, you’ve basically created a CBR encode with extra steps. Give the encoder room to breathe. A good rule of thumb: set maximum at 1.5x your target.
3. Ignoring VBR 2 Pass for important deliverables. The extra export time is worth it for anything that matters. Portfolio pieces, client finals, festival submissions, YouTube uploads – always use 2 Pass. When you’re exporting complex motion graphics like Pixflow’s After Effects templates, VBR 2 Pass ensures every frame gets the bits it needs to look its best.
4. Using VBR for live streaming. VBR’s bitrate spikes can exceed your upload bandwidth, causing dropped frames and buffering for viewers. Stick with CBR for any real-time streaming scenario.
5. Not matching bitrate to resolution. A 10 Mbps bitrate that looks great at 1080p will look terrible at 4K. Higher resolutions need proportionally higher bitrates. Check the cheat sheet above for resolution-specific recommendations.
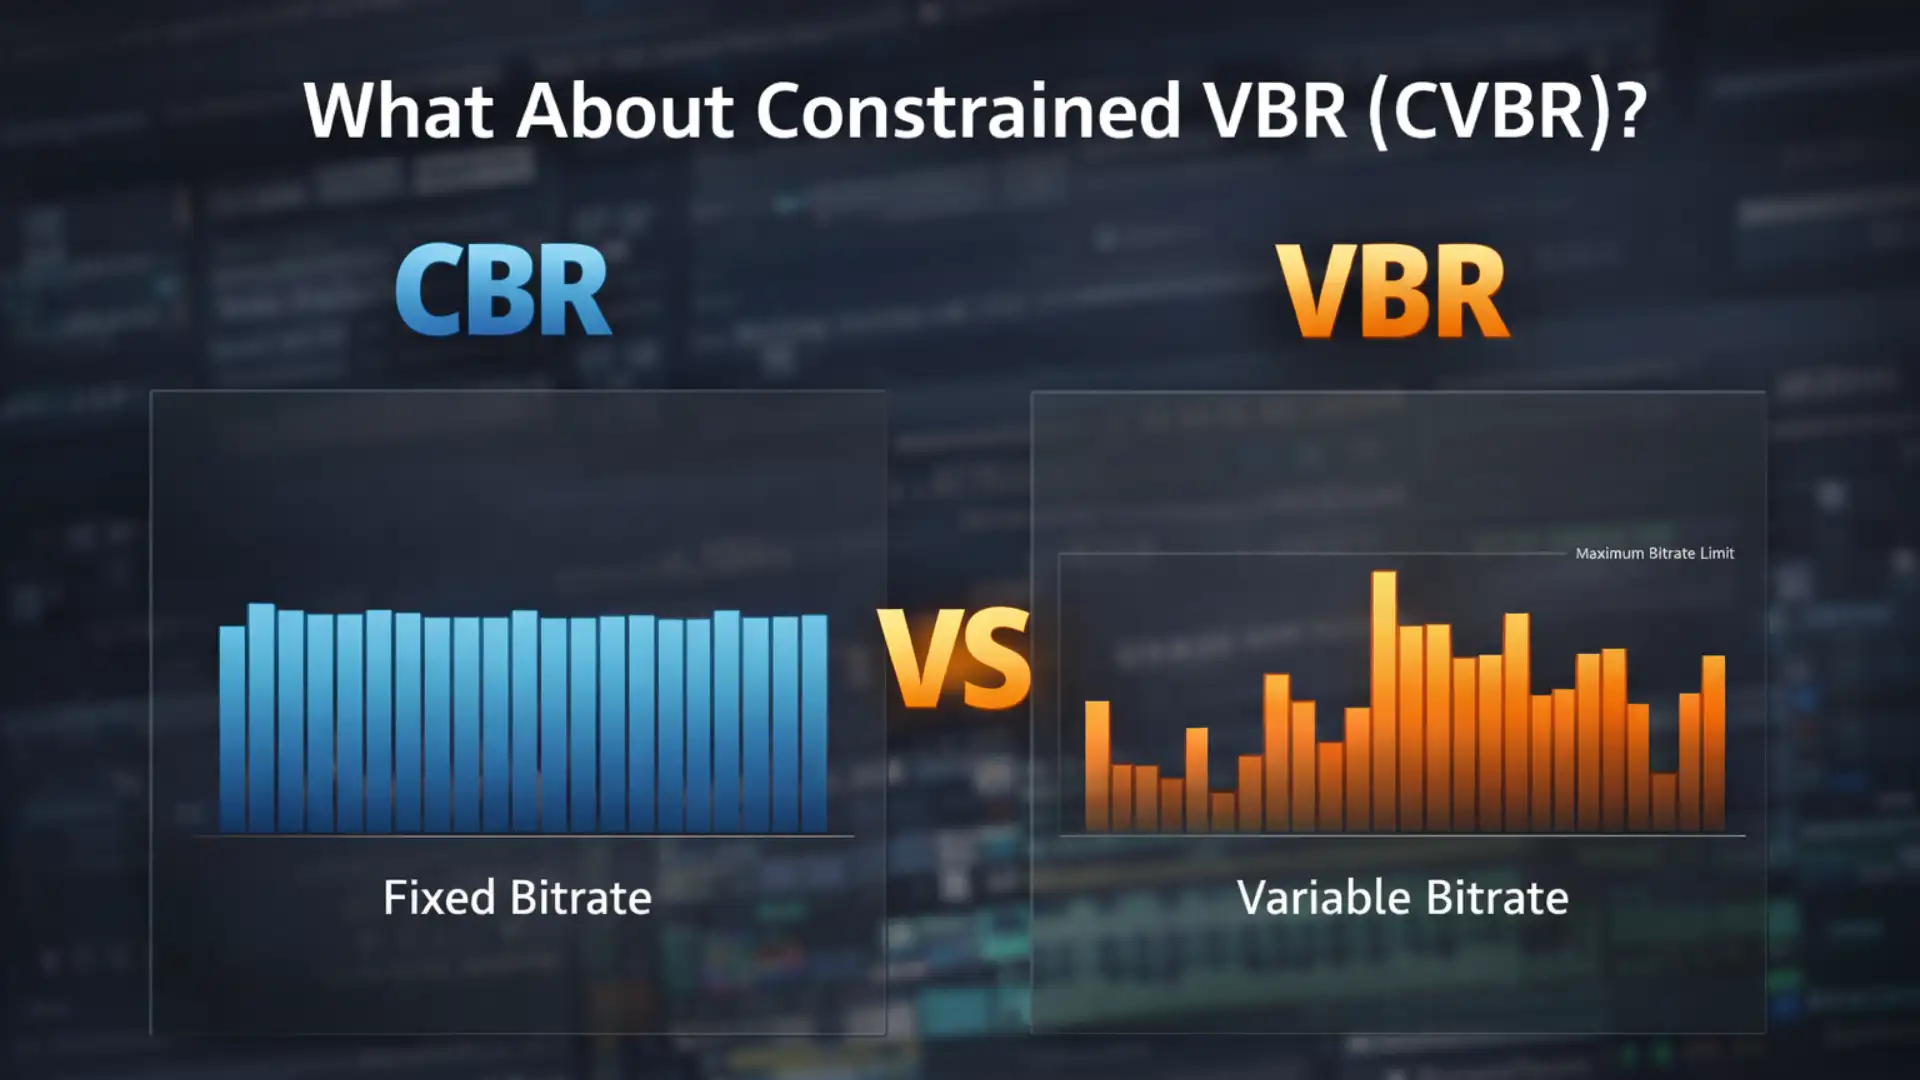
What About Constrained VBR (CVBR)?
Constrained VBR works like regular VBR but with a hard ceiling on bitrate spikes. While standard VBR might temporarily spike to 200% or more of your target during complex scenes, constrained VBR keeps those peaks within a tighter range, for example, staying within 110-125% of the target.
Apple’s HLS Authoring Specifications recommend 200% constrained VBR for VOD content and keeping peaks under 125% for live content. This gives you most of VBR’s quality benefits while keeping bandwidth requirements more predictable.
Constrained VBR isn’t a standard option in most NLE export panels (Premiere Pro, After Effects, and Resolve don’t label it explicitly). However, you can achieve it by setting your VBR maximum bitrate close to your target. For example, a target of 10 Mbps with a maximum of 12 Mbps is effectively constrained VBR. Tools like FFmpeg and professional hardware encoders offer explicit CVBR modes.
When to consider it:
- You’re uploading to platforms with strict bitrate caps.
- You need VBR’s quality but CBR’s predictability.
- You’re encoding for adaptive bitrate (ABR) streaming ladders.
Conclusion
CBR isn’t obsolete; it’s still the right call for live streaming and workflows that demand absolute bitrate predictability. And VBR 1 Pass is your speed-friendly middle ground for drafts, reviews, and social media posts.
The cheat sheet in this guide covers the most common scenarios you’ll face. Keep it handy, experiment with the settings in your editing software, and pay attention to the results. Once you see the difference a well-configured VBR 2 Pass export makes, you won’t want to go back.
Ready to put these settings to work? Browse Pixflow’s library of video templates for Premiere Pro, After Effects, and DaVinci Resolve, and export them with the confidence that your bitrate settings are dialed in. (Your renders will thank you.)
Disclaimer : If you buy something through our links, we may earn an affiliate commission or have a sponsored relationship with the brand, at no cost to you. We recommend only products we genuinely like. Thank you so much.


Write for us
Publish a Guest Post on Pixflow
Pixflow welcomes guest posts from brands, agencies, and fellow creators who want to contribute genuinely useful content.
Fill the Form ✏