DaVinci Resolve for Beginners: The Complete Guide to Free Professional Video Editing
- What Is DaVinci Resolve
- System Requirements and How to Download DaVinci Resolve 20
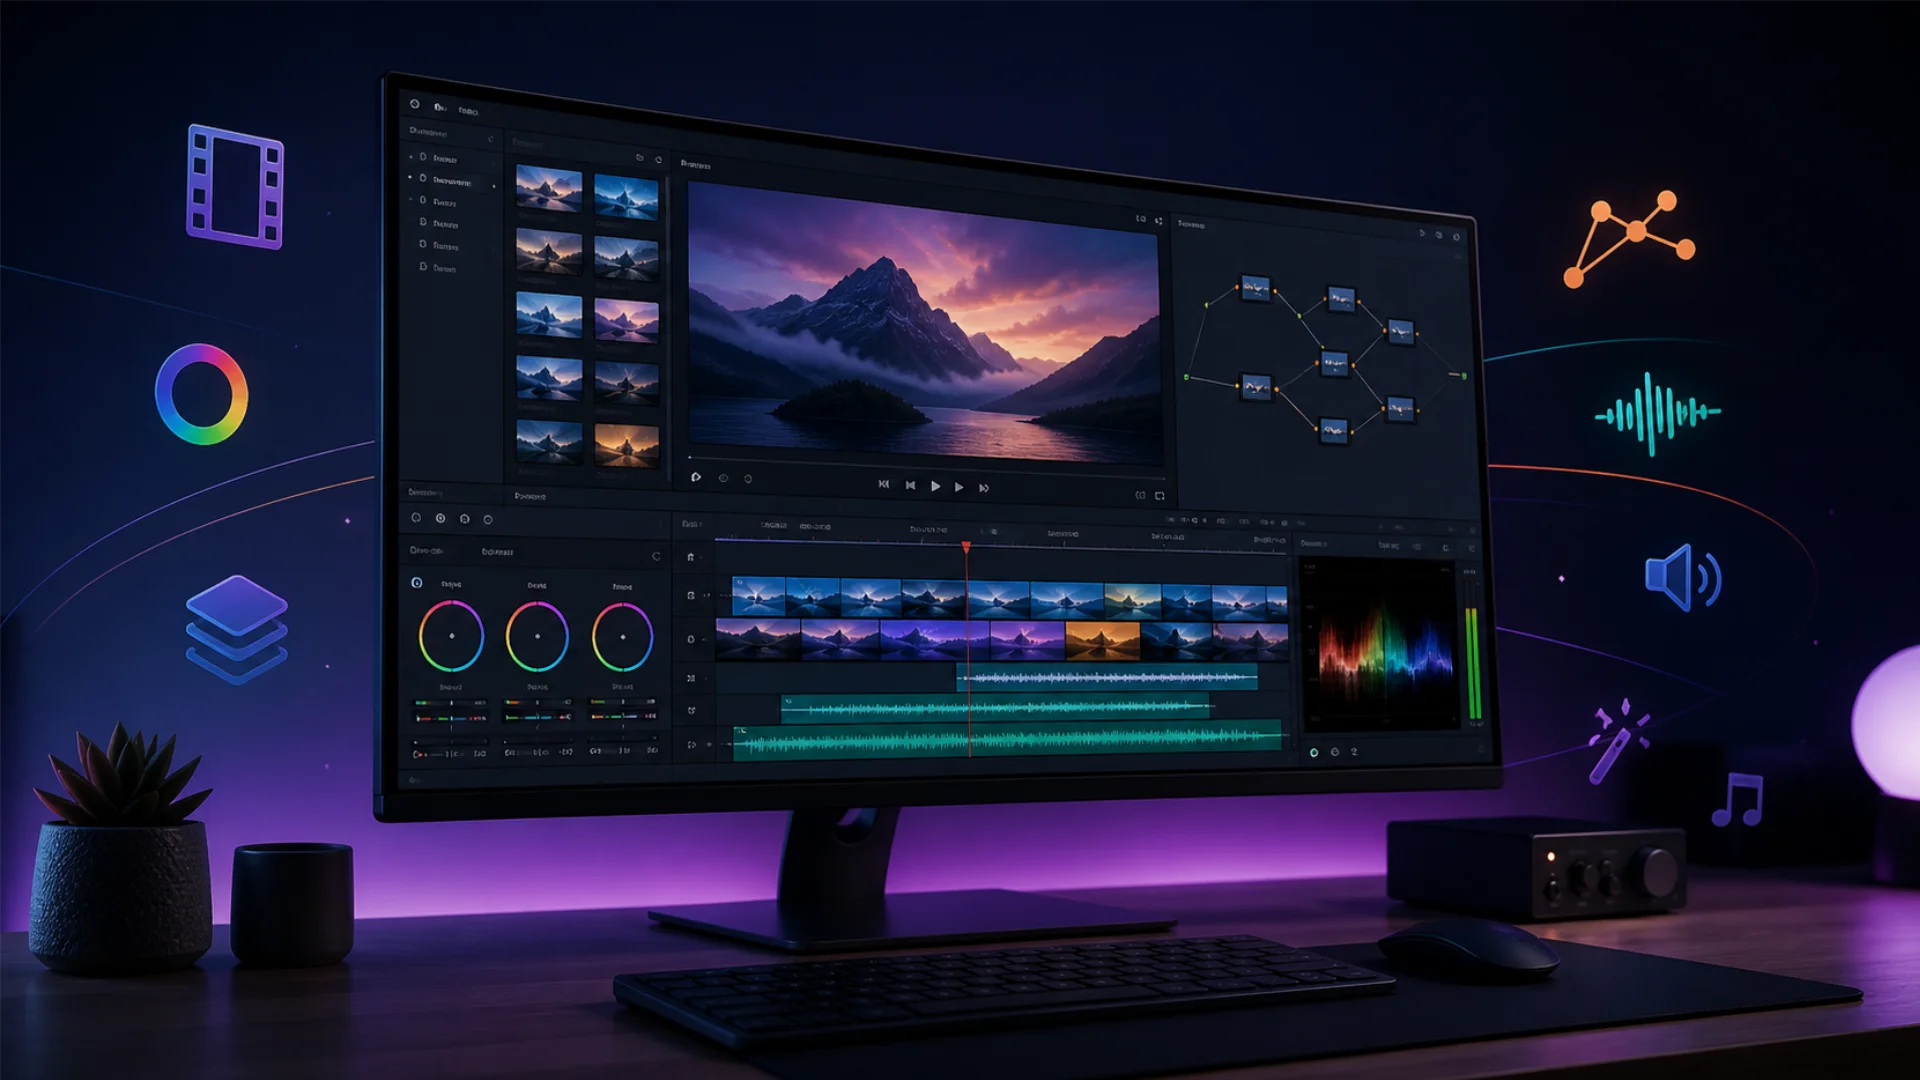
- Understanding the DaVinci Resolve Interface - The 7 Workspace Pages
- The Media Page: Importing and Organizing Your Footage
- The Cut Page - Fast and Simplified Editing for Quick Projects
- The Edit Page - Your Main Editing Workspace
- The Fusion Page - Visual Effects and Motion Graphics
- The Color Page - Professional Color Grading Made Accessible
- The Fairlight Page - Professional Audio Editing and Mixing
- The Deliver Page - Exporting Your Finished Project
- Essential Tips for DaVinci Resolve Beginners
- DaVinci Resolve Free vs Studio - Which Version Do You Need
- What Is New in DaVinci Resolve 21
- Conclusion
Sounds too good to be true? It’s not. DaVinci Resolve is the real deal, and it’s quickly becoming the go-to recommendation for anyone serious about video editing.
In this complete DaVinci Resolve tutorial for beginners, we’re walking you through everything you need to get started: downloading and installing the software, navigating all seven workspace pages, and understanding how each tool fits into your creative workflow. Whether you’re a filmmaker, YouTuber, or motion designer picking up Resolve for the first time, this guide has you covered.
This guide focuses on DaVinci Resolve 20, with a dedicated section on the brand-new DaVinci Resolve 21 (announced at NAB 2026) at the end.
What Is DaVinci Resolve (and Why Is It the Best Free Video Editor?)
Then Blackmagic Design acquired it in 2009, rewrote the software from the ground up, and made a decision that changed the industry: they released it for free.
Today, DaVinci Resolve is the world’s only all-in-one post-production suite that combines professional editing, color grading, visual effects, motion graphics, and audio post-production in a single application. That’s not marketing speak. It literally replaces what would otherwise require Premiere Pro, After Effects, Audition, and a dedicated color grading tool, all in one free download.
So who actually uses it? Everyone from Hollywood colorists grading blockbuster films to indie filmmakers working on their first short. YouTubers love it because it’s free and powerful. Motion designers appreciate its Fusion compositing engine. And audio engineers rely on its built-in Fairlight DAW for professional sound design.
You might wonder: why would Blackmagic give away software this powerful? The answer is straightforward. Blackmagic Design is primarily a hardware company. They sell cameras, capture cards, switchers, and color grading panels. DaVinci Resolve is the software ecosystem that makes all that hardware more valuable. The more people who use Resolve, the more people buy Blackmagic hardware.
Compared to Premiere Pro, Resolve matches or exceeds its editing capabilities while offering vastly superior color grading tools, and it does it without a subscription. Final Cut Pro is powerful but locked to macOS. DaVinci Resolve runs on Windows, macOS, and Linux.
System Requirements and How to Download DaVinci Resolve 20
Minimum System Requirements
How to Download and Install
- Visit blackmagicdesign.com/products/davinciresolve and click “Free Download Now.”
- Select your operating system (Windows, macOS, or Linux).
- Fill in your details (name and email) and download the installer.
- Run the installer and follow the prompts. On Windows, you may need to install some additional components like the Visual C++ redistributable.
- Launch DaVinci Resolve. The Quick Setup wizard will ask about your language, keyboard layout, and basic project settings. For now, keep the defaults and click Continue.
You’ll land on the Project Manager, where all your projects live in a centralized database. Double-click “Untitled Project” or create a new one to get started.
The free version of DaVinci Resolve covers roughly 90% of what the software can do, which is more than enough for most creators. The paid Studio version ($295, one-time) adds AI-powered tools, advanced noise reduction, and higher resolution output. We’ll cover that comparison in detail later, or you can jump to our dedicated guide on DaVinci Resolve Free vs Studio.
Understanding the DaVinci Resolve Interface: The 7 Workspace Pages
- Media – Import and organize your footage
- Cut – Fast, simplified editing for quick turnarounds
- Edit – Full-featured professional editing
- Fusion – Visual effects and motion graphics
- Color – Professional color grading
- Fairlight – Audio editing and mixing
- Deliver – Export your finished project
Think of it as a left-to-right pipeline. Your footage enters on the left (Media), gets shaped in the middle (Cut/Edit/Fusion/Color/Fairlight), and exits on the right (Deliver). You don’t have to use every page for every project, but knowing what each one does gives you the flexibility to tackle anything.
Let’s walk through each one.
The Media Page: Importing and Organizing Your Footage
Key Areas of the Media Page
- Media Storage (top-left): A file browser showing your computer’s drives and folders. Navigate to where your footage lives.
- Media Pool (bottom-center): Where your imported media is displayed. Think of it as your project’s internal library.
- Source Viewer (top-center): Preview any clip before importing or editing it.
- Metadata Panel (right): View and edit metadata tags for your clips.
How to Import Media
The easiest method: simply drag and drop files from the Media Storage browser (or from your computer’s file explorer) into the Media Pool. Done.
You can also right-click inside the Media Pool and select “Import Media” to browse for files. Resolve supports a massive range of formats: H.264, H.265, ProRes, DNxHR, BRAW (Blackmagic RAW), RED R3D, ARRIRAW, and many more.
Staying Organized with Bins
Bins are folders within DaVinci Resolve. Right-click in the Media Pool and select “New Bin” to create one. A solid organizational structure might look like this:
- A-Roll (interview/main footage)
- B-Roll (supporting footage)
- Audio (music, voiceover, sound effects)
- Graphics (logos, titles, lower thirds)
For larger projects, you can use metadata tags, keywords, and smart bins to automatically filter and sort clips. Smart bins are especially powerful: set up rules (like “show me all .braw files flagged green”) and Resolve automatically populates them.
Important Tip: Set Your Project Settings First
Before importing anything, click the gear icon in the bottom-right corner to open Project Settings. Set your Timeline Resolution and Timeline Frame Rate to match your footage. If you’re shooting 4K at 24fps, set those values here. This prevents mismatches that can cause headaches later.
Avoiding the “Media Offline” Error
This is the most common beginner issue. If you move your source files after importing them into Resolve, the software loses track of where they are and displays “Media Offline.” The fix: decide where your footage will permanently live before you import it. If it happens anyway, right-click the offline clips, select “Relink Selected Clips,” and point Resolve to the new location.
The Cut Page: Fast, Simplified Editing for Quick Projects
How It Differs from the Edit Page
The Cut page has a streamlined interface with fewer panels and a focus on efficiency. The biggest difference is the dual timeline: an overview timeline at the top showing your entire project, and a detail timeline at the bottom for precise edits. This lets you see the big picture and make fine adjustments simultaneously.
Key Features
- Source Tape Viewer: Instead of double-clicking each clip individually, the Source Tape viewer lets you scrub through all your imported footage as one continuous stream. It’s a huge time-saver when you’re sorting through lots of clips.
- Smart Insert: Drag a clip to the timeline and Resolve intelligently places it at the nearest edit point.
- Trim, Split, Rearrange: All the essential editing actions are available with simplified tools. Use the split tool to cut clips, drag to rearrange, and trim edges by hovering near clip boundaries.
- Transitions, Titles, and Effects: Quick access buttons along the top of the Media Pool let you drag and drop transitions, titles, and effects directly onto your timeline.
- Quick Export: When you’re done, hit Quick Export in the upper-right corner to render your project without ever visiting the Deliver page. Choose H.264 for a universally compatible file and you’re good to go.
When to Use Cut vs Edit
Use the Cut page for: social media content, quick assemblies, straightforward projects, and when speed is the priority.
Use the Edit page for: complex projects, multi-track timelines, detailed effects work, and anything that needs precise control.
The good news? Both pages work on the same timeline. You can start a rough cut on the Cut page and refine it on the Edit page without losing any work.
The Edit Page: Your Main Editing Workspace
Key Areas
- Source Viewer (top-left): Preview individual clips before adding them to the timeline.
- Timeline Viewer (top-right): Shows your sequence as you build it.
- Media Pool (top-left panel): Access all your imported media.
- Effects Library (top-left panel): Browse video transitions, audio transitions, titles, generators, and effects.
- Inspector (top-right panel): Control properties for any selected clip: transform (position, scale, rotation), cropping, speed, stabilization, and more.
- Timeline (bottom): Your editing canvas. Drag clips here, arrange them, and build your story.
Building Your Timeline
The basic workflow: browse your clips in the Media Pool or Source Viewer, set In (I) and Out (O) points to select the portion you want, then drag the clip to the timeline. You can also use Insert (F9) or Overwrite (F10) edits for more control over placement.
Essential Editing Techniques
Trimming is where the real editing happens. Resolve offers four trimming modes:
- Ripple: Shortens or extends a clip while automatically adjusting everything after it.
- Roll: Moves the edit point between two clips without changing the overall timeline length.
- Slip: Changes which portion of a clip is visible without moving it on the timeline.
- Slide: Moves a clip along the timeline while adjusting adjacent clips to fill the gap.
The Blade Tool (B) splits a clip at the playhead. Use it to make precise cuts, then switch back to the Selection Tool (A) to avoid accidental cuts. (Trust us, accidentally slicing a clip you just spent 10 minutes positioning is not fun.)
Keyboard Shortcuts You Need Right Away
Learning shortcuts will dramatically speed up your workflow:
- J / K / L: Reverse, stop, forward playback (tap J or L multiple times to increase speed)
- I / O: Set In and Out points
- B: Blade tool
- A: Selection tool
- Space: Play/Pause
- Ctrl+Z / Cmd+Z: Undo
For the complete list, check out our DaVinci Resolve keyboard shortcuts cheat sheet.
Adding Transitions
Open the Effects Library, navigate to Video Transitions, and drag your desired transition between two clips on the timeline. Cross Dissolve and Smooth Cut are the most commonly used. Select the transition in the timeline, then use the Inspector to adjust its duration and behavior.
For a deep dive into transition techniques, our guide on adding and customizing transitions in DaVinci Resolve covers everything from basic fades to creative effects.
Adding Text and Titles
In the Effects Library under Titles, you’ll find two main options:
- Text: Simple, straightforward 2D titles. Quick to set up, easy to customize.
- Text+: Powered by Fusion, with advanced animation, 3D capabilities, and character-level styling. More powerful, but heavier on your system.
Drag a title type onto a track above your video in the timeline, select it, and use the Inspector to change the font, size, color, and positioning. For professional title templates that are ready to use, check out our guide on creating professional lower thirds and titles in DaVinci Resolve.
Keyframes: Animating Parameters Over Time
Keyframes let you change any parameter gradually over time. Want a slow zoom into a shot? Set a keyframe for the Zoom value at the start, move the playhead forward, and set another keyframe with a higher zoom value. Resolve smoothly animates between the two.
You can keyframe virtually anything in the Inspector: position, scale, rotation, opacity, crop values, and more. The Keyframe and Curves editor (greatly improved in Resolve 20) gives you precise control over animation timing.
If you want to hit the ground running with professional-looking titles, transitions, and motion graphics, Pixflow’s library of DaVinci Resolve templates offers pre-built assets that can save you hours of work while keeping your projects looking polished.
The Fusion Page: Visual Effects and Motion Graphics
The Node-Based Approach
If you’re coming from After Effects, the biggest adjustment is that Fusion uses nodes instead of layers. Instead of stacking effects vertically in a layer panel, you connect nodes horizontally in a flow chart. Each node performs one operation (blur, color correction, mask, merge), and you connect them together to build your composite.
This might feel unfamiliar at first, but nodes offer a major advantage: you can see exactly how your entire effect chain flows, branch off at any point, and make changes without disrupting everything else.
Key Areas
- Node Editor (center): Your main workspace. This is where you build your effect chain.
- Viewer (top): Preview your composition. You can split it into two viewers for before/after comparisons.
- Toolbar (top of node editor): Quick access to commonly used tools like Merge, Transform, and various mask types.
- Inspector (right): Adjust parameters for the selected node.
What Beginners Can Do in Fusion
- Animated titles: Create dynamic text with custom animations, far beyond what the Edit page’s Text tool can do.
- Green screen keying: Remove green/blue screen backgrounds with the Delta Keyer node.
- Motion tracking: Track objects in your footage and attach elements to them.
- Simple compositing: Combine multiple video layers, add masks, and create picture-in-picture effects.
- Particle effects: Generate rain, snow, sparks, and other particle-based effects.
Fusion has a steeper learning curve than the other pages, and that’s perfectly fine. You don’t need to master it right away. Start with basic titles and simple composites, and explore more advanced techniques as your confidence grows. For a structured introduction, our Fusion tutorial for beginners walks you through the essentials step by step.
The Color Page: Professional Color Grading Made Accessible
Why Resolve’s Color Tools Are Legendary
DaVinci’s color grading tools have been used on thousands of major films and TV shows. The same node-based pipeline that colors blockbusters is available to you in the free version. No other software at this price point (or any price point, really) comes close.
Key Areas
- Gallery (top-left): Save and apply color grades (called “stills”) across clips or projects.
- Node Editor (top-center): Build your color grading pipeline using nodes. Each node applies a specific correction.
- Viewer (center): See your graded image in real time.
- Color Wheels / Bars / Log (bottom-left): Your primary correction tools for adjusting Lift (shadows), Gamma (midtones), and Gain (highlights).
- Curves (bottom-center): Fine-tune tonal ranges with precision.
- Qualifier (right): Select specific colors or luminance ranges to correct.
- Power Windows (right): Draw shapes to isolate areas of the frame for targeted correction.
- Tracker (right): Track objects or windows so corrections follow movement.
- Scopes (bottom-right): Waveform, Vectorscope, Histogram, and Parade for objective analysis.
Node-Based Color Grading
Just like Fusion, the Color page uses nodes. Each node represents one color operation. You can chain multiple nodes together: one for exposure correction, another for a creative look, another for skin tone refinement, and so on. For a complete breakdown of node types and when to use them, see our guide on serial, parallel, and layer nodes in DaVinci Resolve.
Getting Started with Primary Correction
Primary correction adjusts the overall look of your image. Here’s the simplest way to start:
- Select a clip in the Color page timeline.
- Use the Lift wheel to adjust shadow brightness and color.
- Use the Gamma wheel to adjust midtone brightness and color.
- Use the Gain wheel to adjust highlight brightness and color.
- Adjust the Saturation slider to control overall color intensity.
For a quick starting point, try the auto-color button (the “A” icon in the color wheels panel). It’s not perfect, but it gives you a reasonable baseline to refine from.
Using LUTs for Instant Color Grades
LUTs (Look-Up Tables) are pre-built color transformations that you can apply to your footage for instant creative looks. To use one: right-click a node, go to “LUT,” and browse the available options. Resolve comes with some built-in LUTs, but the real magic happens when you import professional LUT packs.
For a detailed walkthrough, check out our guide on importing, applying, and creating custom LUTs in DaVinci Resolve.
Color Matching Across Clips
When your project uses footage from different cameras (or different lighting setups), you’ll need to match the color across clips for a consistent look. Resolve has dedicated tools for this, including the Color Match palette and shot matching features. Our guide on color matching footage from different cameras covers this workflow in detail.
Reading Scopes Like a Pro
Scopes are your objective reference. While your eyes can be fooled by the color of your room lighting or your monitor’s calibration, scopes show you exactly what’s happening in your image:
- Waveform: Shows brightness distribution from left to right. Keep your whites below 100 and blacks above 0 for broadcast-safe content.
- Vectorscope: Displays color saturation and hue. Useful for checking skin tones.
- Histogram: Shows the distribution of brightness values.
- Parade: Shows RGB channels separately, perfect for checking white balance.
If you’re looking for a shortcut to cinematic color grades, Pixflow’s LUT collection offers over 1,000 professional 3D LUTs compatible with DaVinci Resolve. For an authentic film look, the Film Emulation Pro pack includes LUTs based on real Kodak, Fujifilm, and Ilford film stocks. And if you need professional title designs to complement your color work, the Dramatic Movie Title Templates for DaVinci Resolve pack offers 30 cinematic title templates ready to customize.
For a comprehensive beginner’s walkthrough of the entire Color page, our DaVinci Resolve color grading tutorial covers nodes, wheels, curves, and everything in between.
The Fairlight Page: Professional Audio Editing and Mixing
Key Areas
- Timeline: Same timeline as Cut/Edit, but with audio-focused tools and expanded waveform display.
- Mixer: A professional mixing console where you can adjust volume, pan, EQ, and effects for every track.
- Inspector: Clip-level audio controls including volume, pitch, and EQ.
- Effects Panel: Browse and apply Fairlight FX audio plugins.
Essential Audio Tasks
Adjusting Volume: Select a clip and use the Inspector to change the volume level. You can also drag the volume line directly on the audio waveform in the timeline. A good rule of thumb: keep background music around -20 dB so it doesn’t compete with dialogue.
Adding Fades: Hover near the beginning or end of an audio clip to reveal the fade handle, then drag it to create smooth fade-ins and fade-outs.
Applying EQ: The clip EQ (now featuring 6 bands in Resolve 20/21) lets you shape the tonal quality of your audio. Cut low frequencies to reduce rumble, boost high frequencies for clarity, or notch out specific problem frequencies.
Noise Reduction: Fairlight includes noise reduction tools for cleaning up background noise, hum, and other audio issues.
The Built-in Sound Library
DaVinci Resolve includes a downloadable Sound Library with hundreds of sound effects. In the Edit or Fairlight page, open the Sound Library panel, download the library on first use, and search for effects by keyword. Pro tip: search “***” (three asterisks) to see everything available.
Syncing External Audio
If you record audio separately (common with external recorders or lavalier mics), Resolve makes syncing easy. Select both the video clip and the separate audio file, right-click, choose “Auto Sync Audio,” and select “Based on Waveform.” Resolve analyzes both audio tracks and aligns them automatically.
Normalizing Audio Levels
To even out volume differences across your clips: select all clips in the timeline, right-click, and choose “Normalize Audio Levels.” Select “Independent” mode to normalize each clip individually, creating consistent volume throughout your project.
For advanced audio techniques, our guide on Fairlight audio editing and mixing covers the full workflow from recording to final mix.
The Deliver Page: Exporting Your Finished Project
Key Areas
- Render Settings (left): Choose your format, codec, resolution, frame rate, and quality settings.
- Timeline Viewer (center): Preview what will be exported, set In and Out points to render only a portion.
- Render Queue (right): Queue up multiple render jobs and process them all at once.
Recommended Export Settings by Platform
For YouTube:
- Format: MP4
- Codec: H.264 or H.265
- Resolution: 1920×1080 (1080p) or 3840×2160 (4K)
- Frame rate: Match your project (24, 25, or 30fps)
- Quality: Restrict to 20,000-50,000 Kbps for 1080p, 50,000-80,000 Kbps for 4K
For Instagram/TikTok:
- Format: MP4, H.264
- Resolution: 1080×1920 (vertical) or 1080×1080 (square)
- Frame rate: 30fps
- Keep file size under 100 MB for smooth upload
For a complete breakdown of platform-specific export settings, check out our guide on the best export settings in DaVinci Resolve for YouTube, Instagram, and TikTok.
Quick Export vs Deliver Page
For simple exports, the Quick Export option (available from the Cut, Edit, or File menu) lets you render without visiting the Deliver page at all. Choose a preset, name your file, and export. It’s perfect for quick turnarounds.
The Deliver page gives you full control: custom codecs, bitrate settings, audio format options, subtitle rendering, and the ability to queue multiple renders with different settings.
Understanding Codecs
- H.264: The most universally compatible codec. Works everywhere, good compression, reasonable quality. Your default choice for web delivery.
- H.265 (HEVC): Better compression than H.264 at the same quality, meaning smaller file sizes. Great for 4K content, but some older devices struggle to play it.
- ProRes: Apple’s professional codec. Large files, but excellent quality and fast editing performance. Ideal for archiving masters or sharing with other editors.
Essential Tips for DaVinci Resolve Beginners
1. Learn keyboard shortcuts early. Even memorizing J/K/L playback, I/O for in/out points, and B for the blade tool will transform your editing speed. It’s like learning the piano notes before the song. Once they become muscle memory, you’ll rarely touch the mouse.
2. Use proxy workflows for 4K/8K footage. If your computer struggles with high-resolution footage, proxies let you edit with lightweight, lower-resolution copies and then switch back to full quality for the final export. It’s a game-changer for working on laptops or older machines. Our proxy workflow guide walks you through the setup.
3. Save and backup projects regularly. In the Project Manager, right-click a project and select “Export Project Archive” to create a complete backup including media. DaVinci Resolve also has a “Live Save” feature (Preferences > User > Project Save and Load) that auto-saves your work.
4. Start with the Cut page for simple projects. Don’t feel pressured to use the Edit page for everything. The Cut page is designed for speed, and for many projects, it’s all you need.
5. Use templates and presets. Whether it’s title templates, LUT presets, or transition effects, pre-built assets save you time and help you maintain a consistent look across your projects.
6. Explore Blackmagic’s free training resources. Blackmagic Design offers free PDF training guides and video lessons at blackmagicdesign.com/products/davinciresolve/training. The official Beginner’s Guide to DaVinci Resolve 20 is over 600 pages of detailed instruction.
7. Consider the Speed Editor for faster editing. Blackmagic’s dedicated hardware controller gives you a physical search dial and editing keys. It’s not essential, but if you find yourself spending hours in Resolve, it can significantly speed up your workflow. Check out our Speed Editor review for a detailed look.
DaVinci Resolve Free vs Studio: Which Version Do You Need?
Studio-Only Features:
- DaVinci Neural Engine (AI-powered tools: Magic Mask, object tracking, facial recognition, voice isolation)
- Temporal and spatial noise reduction
- HDR grading with Dolby Vision support
- Multi-GPU acceleration
- 10-bit H.264/H.265 encoding
- Resolution beyond 4K (up to 32K) at up to 120fps
- Stereoscopic 3D tools
- Additional Resolve FX plugins
Who’s fine with Free: Most beginners, YouTubers, indie filmmakers, and anyone working in 4K or below. The free version handles 90% of what you’ll need.
Who should consider Studio: Professional colorists, VFX artists working with AI tools, anyone needing advanced noise reduction, and editors delivering in HDR or resolutions above 4K.
The best part? The $295 is a one-time payment. No monthly fees, no annual renewals, free updates for life. For a detailed feature-by-feature comparison, our DaVinci Resolve Free vs Studio guide has the complete breakdown.
What Is New in DaVinci Resolve 21
The Photo Page: Still Image Editing Comes to Resolve
The headline feature. DaVinci Resolve 21 introduces a completely new Photo page, bringing Resolve’s legendary color grading tools to still photography. You can import photos, organize them in albums, grade them using the full node-based Color page pipeline, and even tether Sony or Canon cameras for direct capture into Resolve.
This is Blackmagic directly competing with Adobe Lightroom, and they’re doing it with tools that Hollywood colorists have relied on for decades.
AI Tools That Actually Matter
Resolve 21 introduces several new AI-powered features:
- IntelliSearch: Search your entire media library using plain language. Type “person walking on beach” and Resolve finds matching clips. You can even search for individual faces.
- CineFocus: Adjust the focal point of a shot after it’s been recorded. Click where you want focus, adjust aperture and depth of field, and even keyframe focus pulls.
- Face Age Transformer: Change an actor’s apparent age, perfect for flashback sequences.
- Face Reshaper: Adjust facial features on tracked subjects.
- AI Blemish Removal: Reduce skin imperfections while preserving natural texture.
- Slate ID: Automatically reads clapperboard metadata from footage, saving hours of manual data entry.
- UltraSharpen: AI-powered sharpening that can rescue slightly out-of-focus footage.
- Motion Deblur: Reduce motion blur artifacts for cleaner slow-motion and freeze frames.
Cut and Edit Improvements
Keyframe and curves editor upgrades include new ease animations with loop, pingpong, and relative modes. You can now animate Fusion effects directly on the Edit page. Native support for Lottie animations and HTML graphics means drag-and-drop animated overlays. Text+ gets multi-language spell check, a font browser, and emoji support.
Color Page Upgrades
The MultiMaster trim manager lets you create multiple HDR and SDR deliverables from a single timeline. Magic Mask now supports render-in-place caching for real-time performance. The node editor gains a layer list view for cleaner organization, and group grades now support multiple versions.
Fusion Gets Krokodove
Fusion now includes the popular Krokodove library: over 70 new compositing tools, templates, and effects. The macro editor has been overhauled, and audio-driven animation connects Fairlight’s audio engine directly to Fusion parameters.
Fairlight Audio Updates
Folder-based track management lets you collapse multiple audio tracks into a single composite view. The clip EQ expands to 6 bands, matching the track EQ. New EQ and Level Matcher tools automatically adjust a target clip to match a reference clip’s tonal spectrum.
Content Creator Tools
Resolve 21 adds direct social media uploads to YouTube, TikTok, Vimeo, and X. Vertical and square resolution presets are built into project settings. Picture-in-Picture Resolve FX makes reaction-style videos quick to set up. Lottie animation support means you can use thousands of free animated graphics with a simple drag and drop.
While this guide focuses on DaVinci Resolve 20, the fundamentals you’ve learned here apply directly to version 21. The interface philosophy, workspace pages, and core workflows remain the same, with everything in version 21 building on top of what already exists.
Conclusion
The learning curve is real, but so is the payoff. Start with the basics: import your footage on the Media page, build your edit on the Cut or Edit page, and export from the Deliver page. As your skills grow, explore the Color page for cinematic grading, Fusion for visual effects, and Fairlight for professional audio. Every hour you invest in learning Resolve pays dividends across every project you touch.
Ready to accelerate your creative workflow? Pixflow’s DaVinci Resolve store has professional templates, LUTs, transitions, and title packs designed to help you create stunning content faster. (Your timeline is waiting.)
Disclaimer : If you buy something through our links, we may earn an affiliate commission or have a sponsored relationship with the brand, at no cost to you. We recommend only products we genuinely like. Thank you so much.
Blog Label:


Write for us
Publish a Guest Post on Pixflow
Pixflow welcomes guest posts from brands, agencies, and fellow creators who want to contribute genuinely useful content.
Fill the Form ✏

