How to Mix Dialogue, Music, and Sound Effects in Premiere Pro

- Why Audio Mixing Matters More Than You Think
- The Audio Hierarchy: Dialogue, Music, and Sound Effects
- Setting Up Your Premiere Pro Workspace for Mixing
- Target Audio Levels: dB and LUFS Explained
- Step 1: Mixing and Cleaning Dialogue
- Step 2: Mixing Music with Auto-Ducking
- Step 3: Mixing and Layering Sound Effects
- Bringing It Together: The Mix Bus and Mastering
- Pro Tips and Common Mixing Mistakes to Avoid
- Recommended Tools and Resources
- Conclusion
The good news is that Premiere Pro gives you everything you need to fix this without buying a single plugin. In this guide you will learn a repeatable, professional workflow for balancing the three core layers of any soundtrack: dialogue, music, and sound effects. We will cover how to set up your workspace, the exact volume levels the pros aim for, how to clean up voices, how to make music sit politely under speech with auto-ducking, and how to master your final mix to the right loudness for YouTube and beyond.
Before we dive in, one quick note: a clean mix starts with clean source material. If you are still hunting for crisp, professional effects, a curated library of royalty-free sound effects will save you hours and instantly raise the quality of your soundtrack.
Why Audio Mixing Matters More Than You Think
A good mix does three things. It keeps dialogue intelligible at all times, so the viewer never strains to understand a word. It uses music to guide emotion and pacing without ever fighting the voice. And it uses sound effects to make the visuals feel real and tactile. When those three layers are balanced, the audience stops noticing the audio at all, which is exactly the point. Great sound is invisible.
The opposite is just as powerful. A muddy, unbalanced mix signals amateur faster than almost anything else, and it is one of the most common reasons viewers click away from otherwise strong videos.
The Audio Hierarchy: Dialogue, Music, and Sound Effects
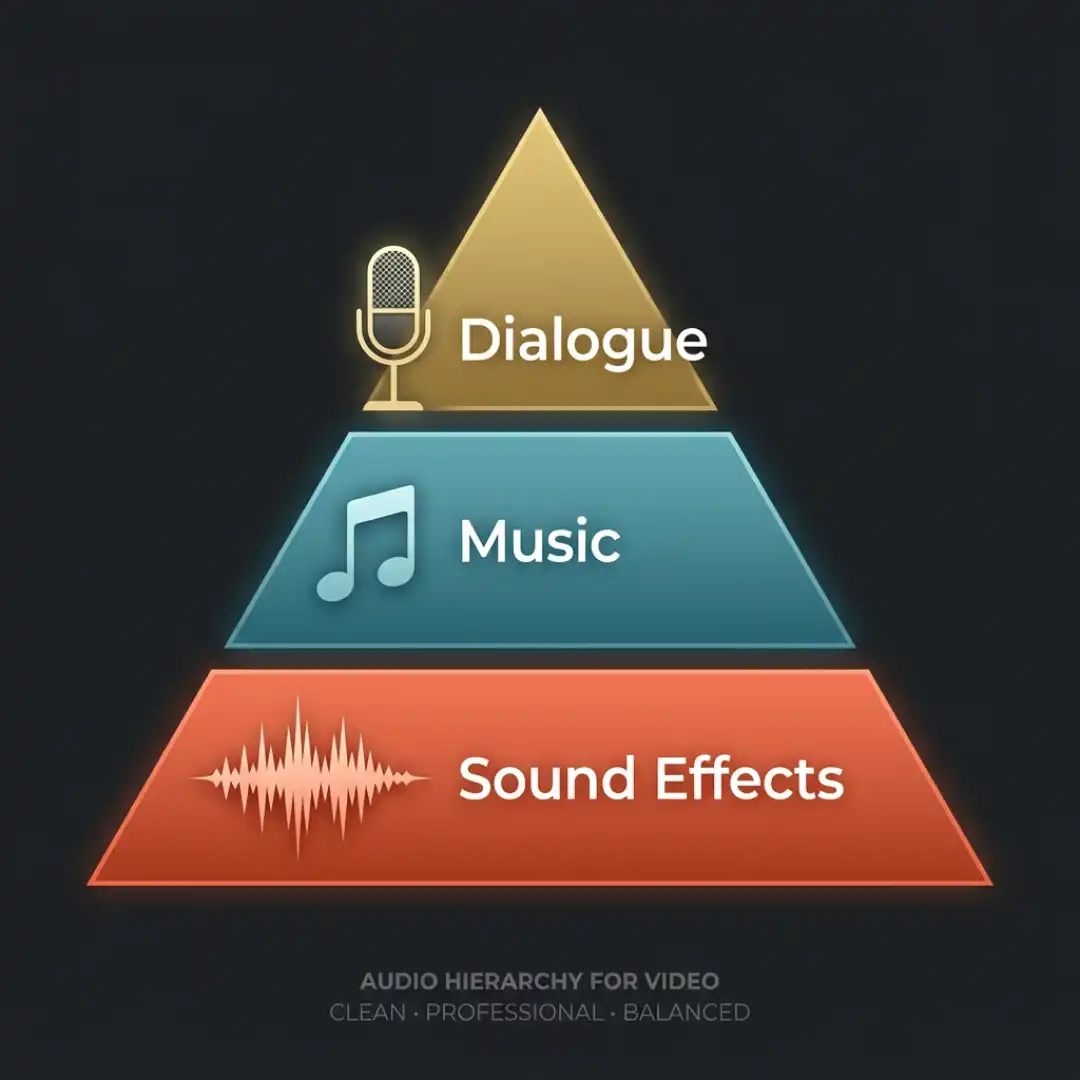
Here is how the three layers relate to each other:
- Dialogue sits at the top of the hierarchy. It is the loudest, clearest, and most protected element in your mix. If anything has to give way, it is never the dialogue.
- Music is the emotional bed underneath. It supports the mood and the pacing, but it should never compete with the voice. When someone is speaking, the music steps back.
- Sound effects and ambience sell the picture. Footsteps, whooshes, room tone, and background atmospheres make a scene feel real. Layered ambience is a craft of its own, and if you want to go deeper there, our guide to ambient sound design covers it in detail.
Mixing is only one piece of a larger discipline. If you want the full picture of how recording, editing, designing, and mixing fit together, start with our complete guide to sound design for film and treat this article as the hands-on mixing chapter.
Setting Up Your Premiere Pro Workspace for Mixing
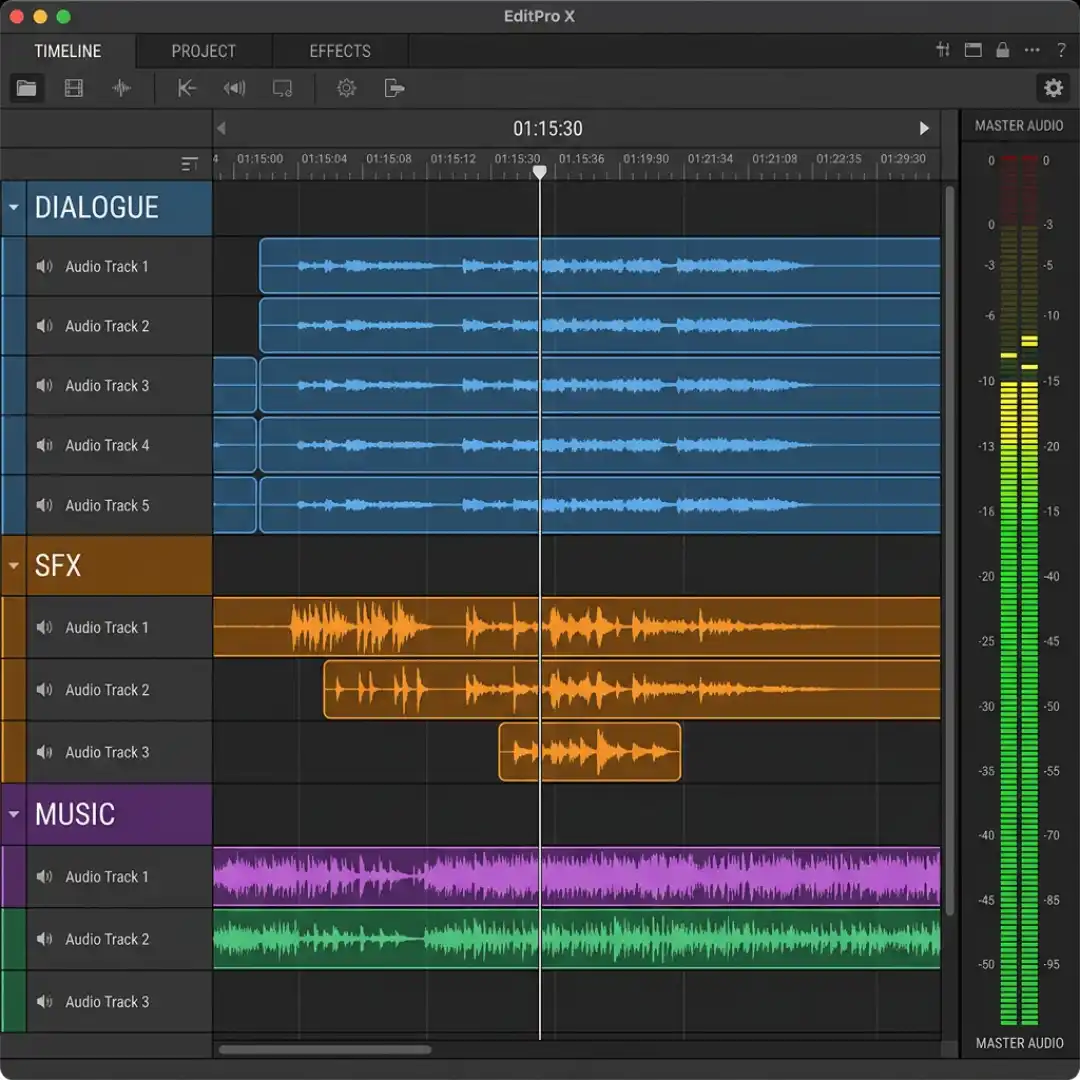
- Switch to the Audio workspace from Window, then Workspaces, then Audio. This rearranges your panels around the Essential Sound panel and the Audio Meters, which are the two tools you will use most.
- Make the Audio Meters large and readable. They display your levels in dB, and you will rely on them constantly. Mixing by ear alone is how mixes go wrong, especially on headphones you are used to.
- Turn on waveforms and increase your track height so you can see the shape of every clip at a glance.
- Organize your tracks like a pro. Keep dialogue on the top audio tracks, sound effects in the middle, and music on the bottom tracks as the bed. Labeling and color coding your tracks, a habit the editors at frame.io strongly recommend, turns a chaotic timeline into something you can mix quickly.
For finer control over the whole session, the full faders, panning, sends, and submix routing live in the Audio Track Mixer. If you want a dedicated walkthrough of that panel, see our Premiere Pro Audio Track Mixer guide.
Target Audio Levels: dB and LUFS Explained
- dB (decibels) on your meters measures the level of the signal at any given moment. This is what you watch to avoid clipping, which is going over 0 dB and causing distortion.
- LUFS (Loudness Units relative to Full Scale) measures perceived loudness over time. This is what streaming platforms use to decide how loud your video actually sounds to a human ear.
Use these as your starting targets, then trust your ears to fine-tune:
- Dialogue: aim for an average around -12 dB to -10 dB, with peaks staying safely below 0 dB. A good ceiling for peaks is about -6 dB.
- Music under dialogue: roughly -18 dB to -25 dB so it sits clearly beneath the voice. When music plays alone, with no one speaking, you can bring it up closer to -10 dB.
- Sound effects: usually -12 dB to -18 dB, and as a rule never louder than your dialogue unless a big, intentional moment calls for it.
For the final export, match the integrated loudness to where the video will live:
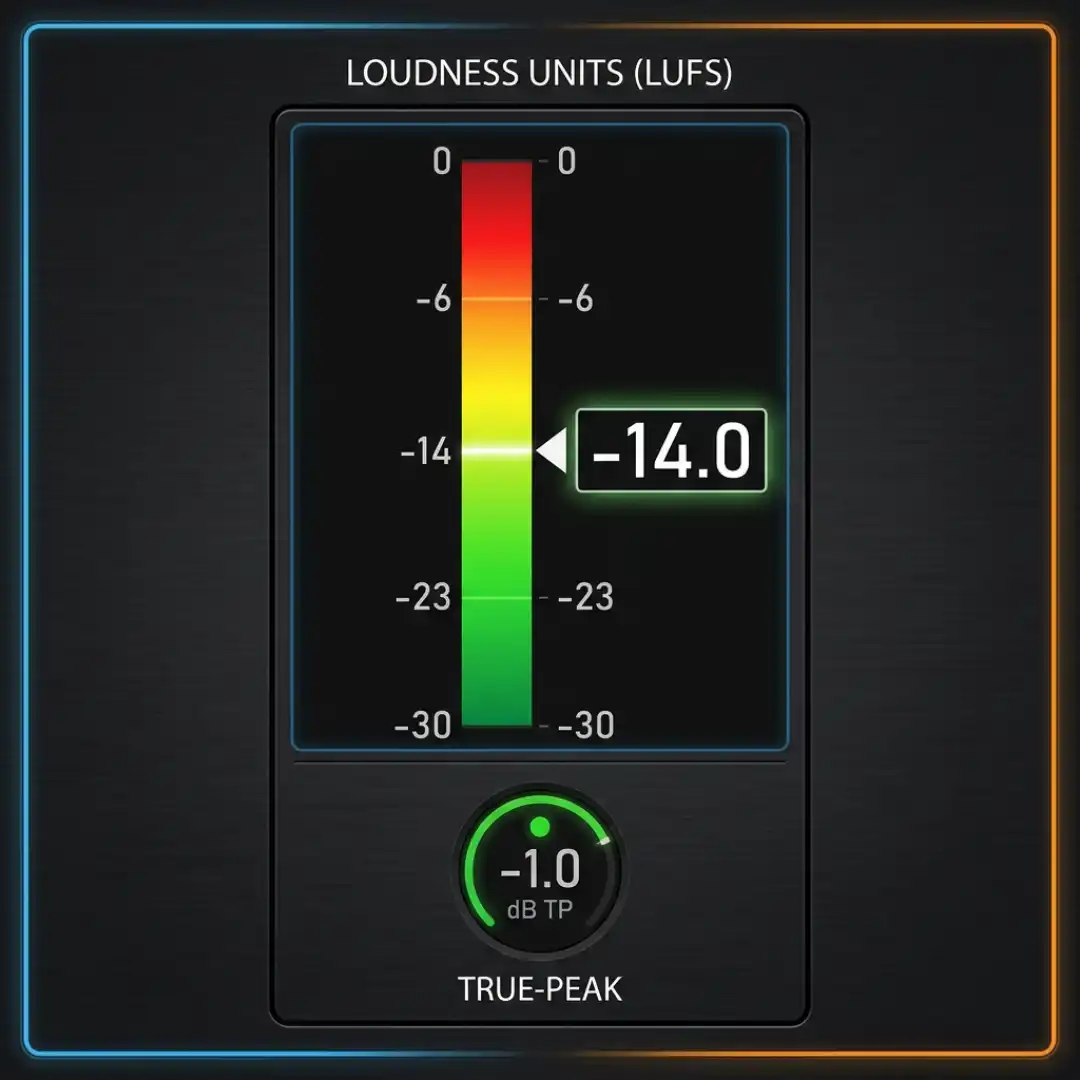
- YouTube, Spotify, and most streaming services normalize to around -14 LUFS.
- Apple Music targets about -16 LUFS.
- Broadcast television uses -23 LUFS (EBU R128) or -24 LUFS (ATSC A/85).
- Theatrical film is mixed in a different environment and runs considerably lower.
The key habit is to leave headroom while you work. If every element is already maxed out, you have no room to balance or master at the end. If terms like gain staging, EQ, and compression are still fuzzy, our primer on sound mixing basics explains the fundamentals before you start turning knobs.
Step 1: Mixing and Cleaning Dialogue
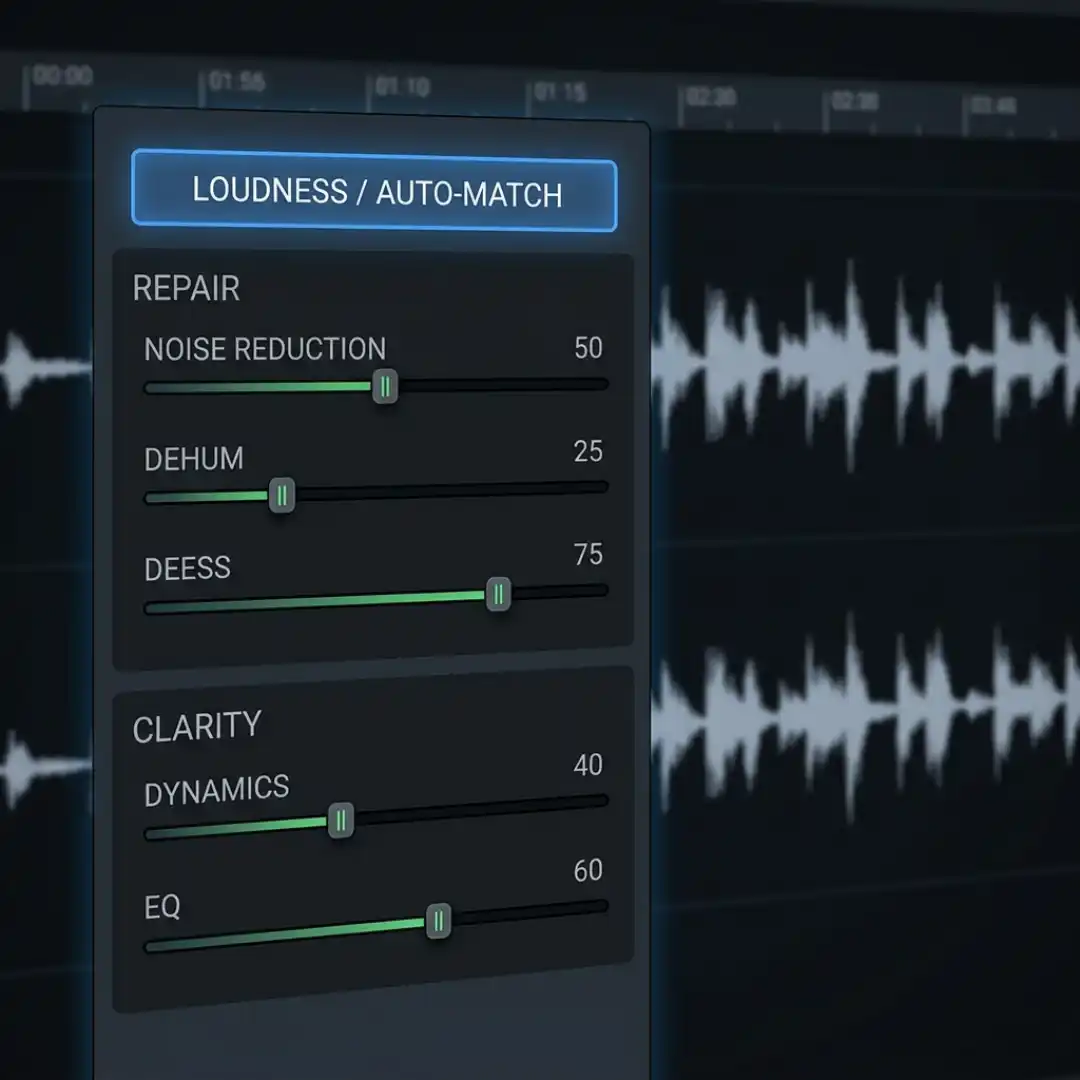
- Select your dialogue clips, open the Essential Sound panel, and tag them as Dialogue. This unlocks a set of controls tuned specifically for the human voice.
- Use Auto-Match to even out loudness across all your clips. Premiere matches them to a consistent internal baseline so a quiet line and a loud line no longer jump around, then you raise the whole group to your target level.
- Repair the sound. Reduce Noise tames hiss and air conditioning hum, Reduce Rumble cleans the low end, DeHum removes electrical buzz, and Reduce Reverb softens echoey rooms. Use a light hand, because pushing these sliders too far makes voices sound robotic and underwater. For badly recorded audio, Premiere’s Enhance Speech feature can rescue a take with one click.
- Add Clarity. The Dynamics slider evens out loud and soft moments, while the EQ presets and the Vocal Enhance option add presence. A gentle high-pass filter that rolls off everything below about 80 Hz removes rumble without thinning the voice.
- Confirm the level on your meters. Your dialogue should average around -12 dB to -10 dB.
Remember that mixing the voice is not the same as editing the performance. For tighter cuts, breath removal, and seamless transitions between takes, see our deep dive on dialogue editing techniques.
Step 2: Mixing Music with Auto-Ducking
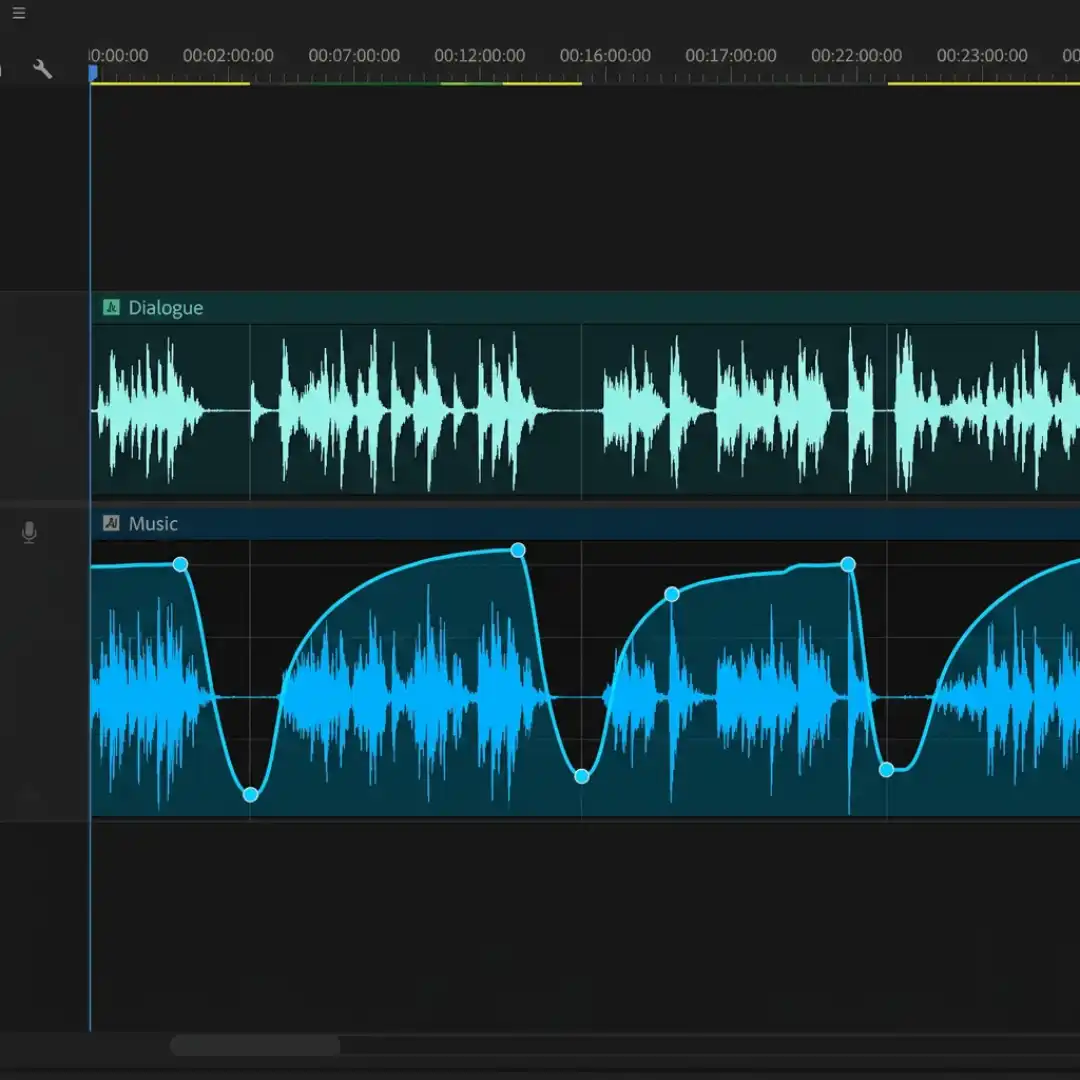
Start by dropping your music to roughly -18 dB to -25 dB so it clearly sits under the voice. Then set up auto-ducking, which is the single biggest time saver in audio mixing.
- Tag your music clips as Music in the Essential Sound panel.
- Open the Ducking section and set it to duck against Dialogue.
- Set the Sensitivity, the Reduce By amount (how far the music drops when speech is detected, often around -18 dB to -24 dB), and the Fade durations so each dip feels smooth and natural rather than abrupt.
- Click Generate Keyframes. Premiere analyzes your dialogue track and writes volume keyframes onto the music automatically, lowering it whenever someone speaks and lifting it back up in the gaps.
One quirk worth remembering: if you move or re-time clips after generating keyframes, the ducking will not follow them. Just click Generate Keyframes again to refresh. Adobe documents this auto-ducking workflow step by step in its Help Center if you want the official reference.
For an even cleaner blend, carve space with EQ. A high-pass filter on the music thins out the low rumble that muddies a mix, and a gentle dip around the 1 kHz to 4 kHz range, where the voice lives, lets dialogue cut through without you having to crank its volume. Finish musical sections with an Exponential Fade for natural, professional fade-outs.
The track you choose matters as much as how you mix it. For music that is cleared for monetized and commercial videos, browse our roundup of royalty-free music options.
Step 3: Mixing and Layering Sound Effects
- Tag your effects as SFX and use Auto-Match to set a consistent starting point, then fine-tune each one by hand. Effect levels vary enormously, from a barely-there -30 dB room tone to a punchy -6 dB impact, so there is no single magic number. The rule of thumb is to keep them below the dialogue unless a loud moment is intentional.
- Layer for realism. A single convincing door slam might be built from three sounds: the latch click, the wood, and a low thud underneath. Combining elements is what separates a flat effect from a cinematic one, and our guide to layering sound effects walks through the technique in depth.
- Use panning and the stereo field. Position effects slightly left or right to match the on-screen action and to create a sense of width and space. To push this into fully immersive, three-dimensional mixes, see our overview of spatial audio.
A polished mix needs polished raw material. You can pull from Premiere’s limited built-in sounds, or build a proper toolkit. Our comparison of the best sound effect libraries is a useful map, and the Pixflow Sound Effects library gives you broadcast-ready effects that are organized and labeled for fast editing.
Bringing It Together: The Mix Bus and Mastering
- Set clip gain first, then mix with faders. Use clip-level gain (the G shortcut) for rough balance on individual clips, then ride the channel faders in the Audio Track Mixer for the overall blend between dialogue, music, and effects.
- Route everything to a Mix or Submix track for mastering. Adding effects here applies them to the entire mix at once, which is exactly what you want for final processing.
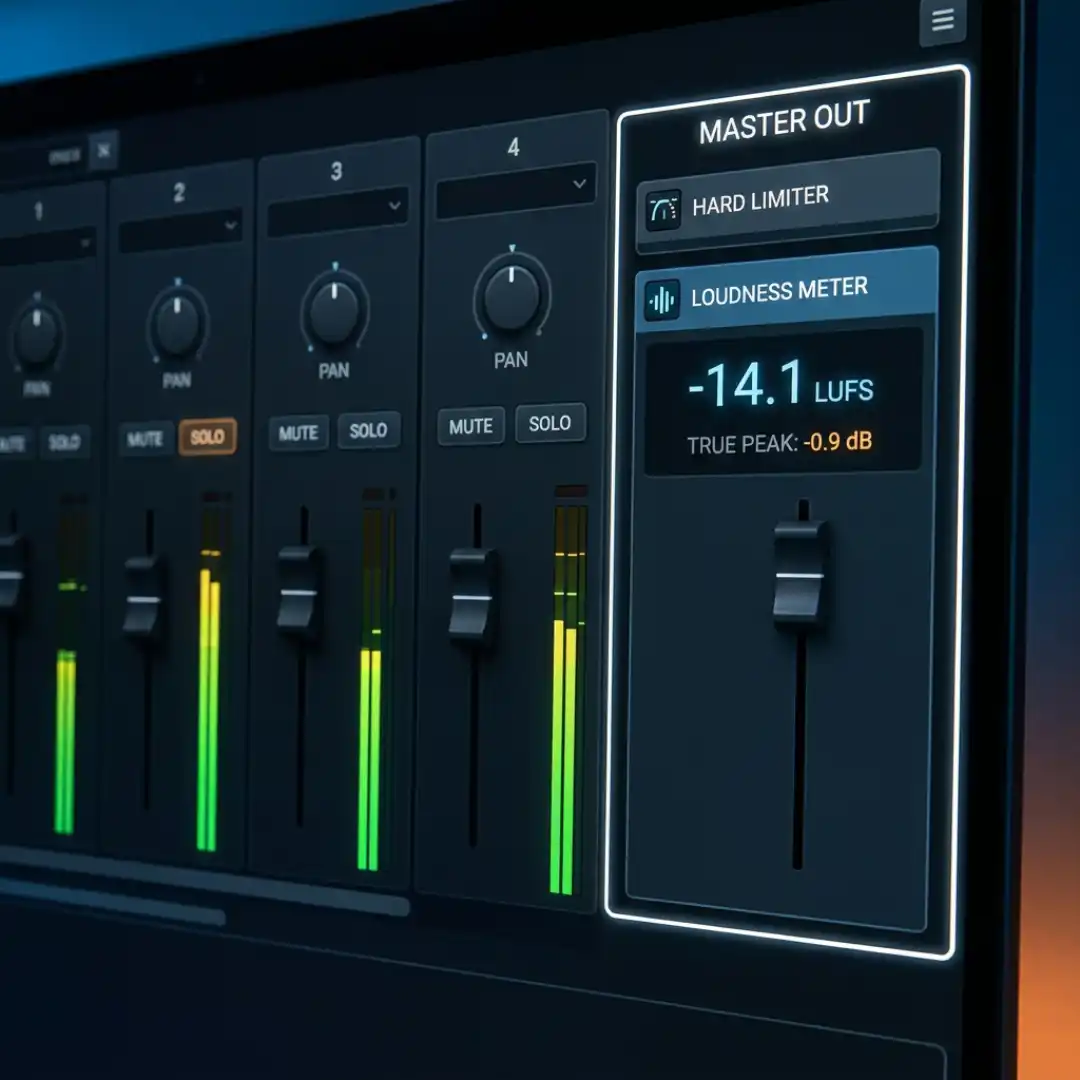
- Add a Hard Limiter on the master with a ceiling around -1 dB true peak. This safety net catches any stray peaks and guarantees you never clip on export.
- Add a Loudness Radar or Loudness Meter, play the timeline from start to finish, and read the integrated LUFS value. Nudge the master level until you hit your platform target, around -14 LUFS for YouTube.
- A touch of gentle EQ across the master can glue the mix together, but go easy. Mastering is about subtle moves, not dramatic ones.
Finally, test your mix everywhere. Listen on a phone speaker, laptop speakers, earbuds, and proper headphones or monitors. A mix that holds up across all of them is a mix that is genuinely ready to publish.
Pro Tips and Common Mixing Mistakes to Avoid
- Mixing only by ear. Your ears adapt and fatigue, so always confirm against the meters.
- Over-cleaning dialogue. Too much noise reduction leaves voices sounding robotic and hollow. Less is usually more.
- Starting too loud. If you push everything to the ceiling early, you leave no headroom to balance or master later.
- Forgetting to regenerate ducking keyframes after you move clips. The old keyframes stay put while your audio moves on.
- Skipping the multi-device test. A mix that sounds great in studio headphones can collapse on a phone speaker.
- Crushing the limiter. Slamming the master into a limiter causes pumping and distortion instead of loudness.
- Setting a music level once and forgetting it. A good music bed breathes, rising in the gaps and ducking under speech.
Recommended Tools and Resources
When you are ready to go further, our guide to essential Premiere Pro audio effects covers the plugins, presets, and effect chains worth knowing, so you can add character and polish on top of the fundamentals you just learned.
Conclusion
The fastest way to level up from here is to start with great raw material. Stock your timeline with crisp, ready-to-use effects from the Pixflow Sound Effects library, and keep exploring the rest of our sound design series to sharpen every layer of your soundtrack.
Disclaimer : If you buy something through our links, we may earn an affiliate commission or have a sponsored relationship with the brand, at no cost to you. We recommend only products we genuinely like. Thank you so much.
Blog Label:



Write for us
Publish a Guest Post on Pixflow
Pixflow welcomes guest posts from brands, agencies, and fellow creators who want to contribute genuinely useful content.
Fill the Form ✏