Ambient Sound Design: How to Layer Background Audio for Immersive Videos
- What Is Ambient Sound Design?
- Why Ambient Sound Matters for Immersive Video
- The Building Blocks: Beds vs Specifics
- How to Layer Ambient Sound, Step by Step
- Where to Source Ambient Sounds
- Mixing Your Ambient Layers: Levels, EQ, Panning, and Reverb
- Mono vs Stereo vs Surround for Backgrounds
- Ambient Sound by Environment
- Common Ambient Sound Mistakes to Avoid
- Tools and Software for Ambient Sound Design
- Quick Workflow Checklist
- Conclusion
Great visuals grab attention, but sound is what actually pulls a viewer into the scene. You can spend days on lighting, color, and framing, yet a clip will still feel flat and fake if the world is silent underneath the dialogue. Ambient sound design is the layer most beginners skip and the one professionals obsess over, because it is the difference between footage that looks good and footage that feels real.
This guide breaks down ambient sound design from the ground up: what it is, why it matters, the building blocks the pros use, and a repeatable, step-by-step workflow for layering background audio in any editor. It is written for beginners and intermediate editors alike, so if a term is new, keep reading, it gets explained. For the wider context of how ambience fits into a full mix, this article sits under our complete guide to sound design for film.
What Is Ambient Sound Design?
It helps to separate three terms that get used loosely:
- Room tone: the quiet, specific sound of a real location with nothing happening in it. True room tone is recorded on set and lives with the dialogue. In post you often add a matching tone to fill gaps.
- Ambience or backgrounds: the layers of environmental sound (wind, traffic, crickets, distant crowd) you add in post to make a space feel alive.
- Spot effects, also called specifics: individual, intentional sounds placed at exact moments, like a single car horn, a dog bark, or a door closing.
A useful way to think about it, borrowed from working sound editors: beds are the long washes of sound that prime the canvas, and specifics are the detailed brush strokes you paint on top. Background ambience does two jobs at once. First, it lays a bed of tone that smooths out the subtle shifts in edited dialogue. Second, it creates richness and an emotional direction for the scene.
Key takeaway: Ambience is not background filler. It is the first creative sound design layer you build everything else on, and it quietly shapes how the audience is supposed to feel.
Why Ambient Sound Matters for Immersive Video
The Building Blocks: Beds vs Specifics
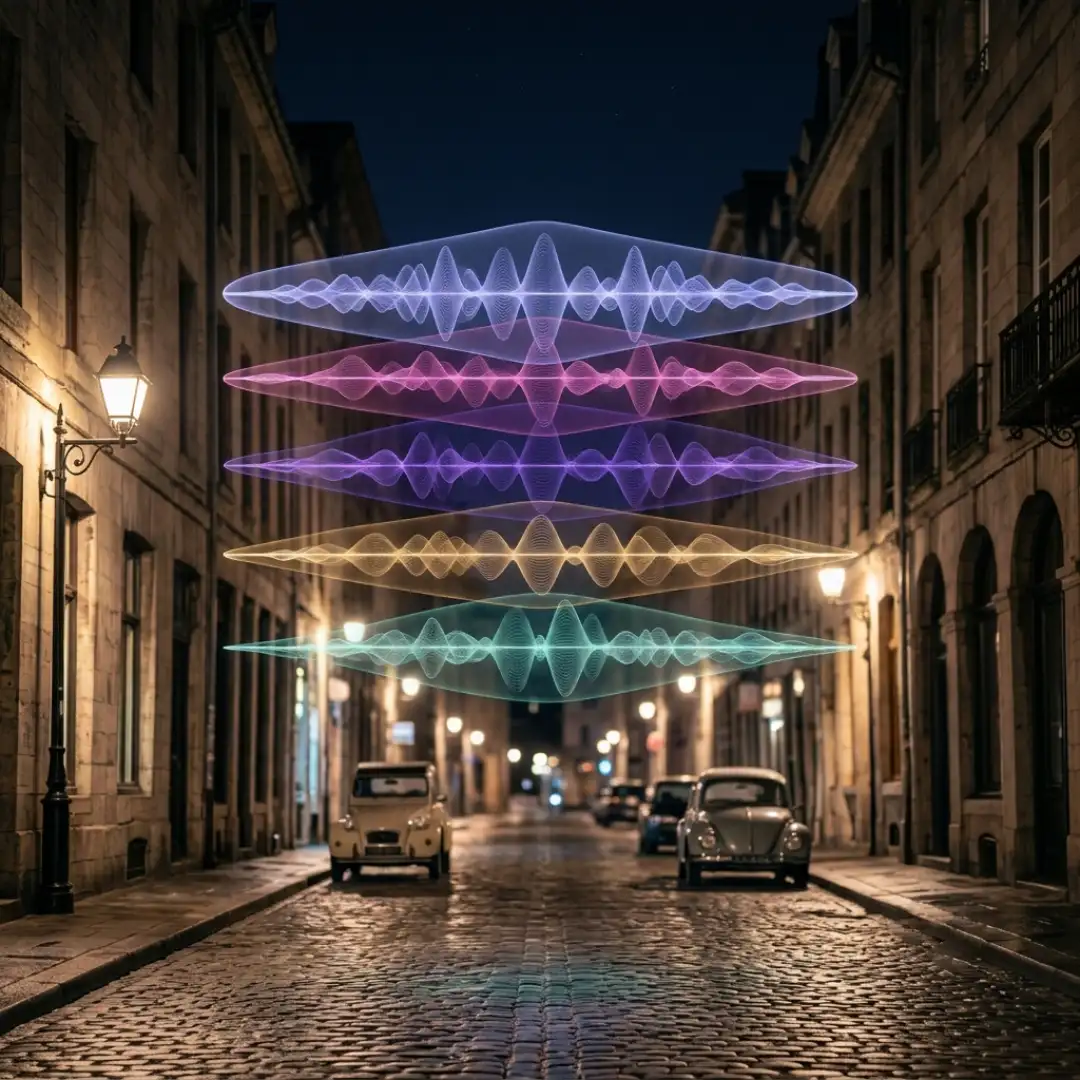
Layering is the heart of this craft. As one sound designer put it, one layer is almost never enough. A convincing night exterior might be four layers at once: an electrical hum for nearby lights, a darker exterior room tone, a bed of crickets, and a second crickets layer panned differently for width. To go deeper on stacking effects cleanly, see our guide to sound effects layering.
How to Layer Ambient Sound, Step by Step
Step 1: Mark your scenes and stay organized
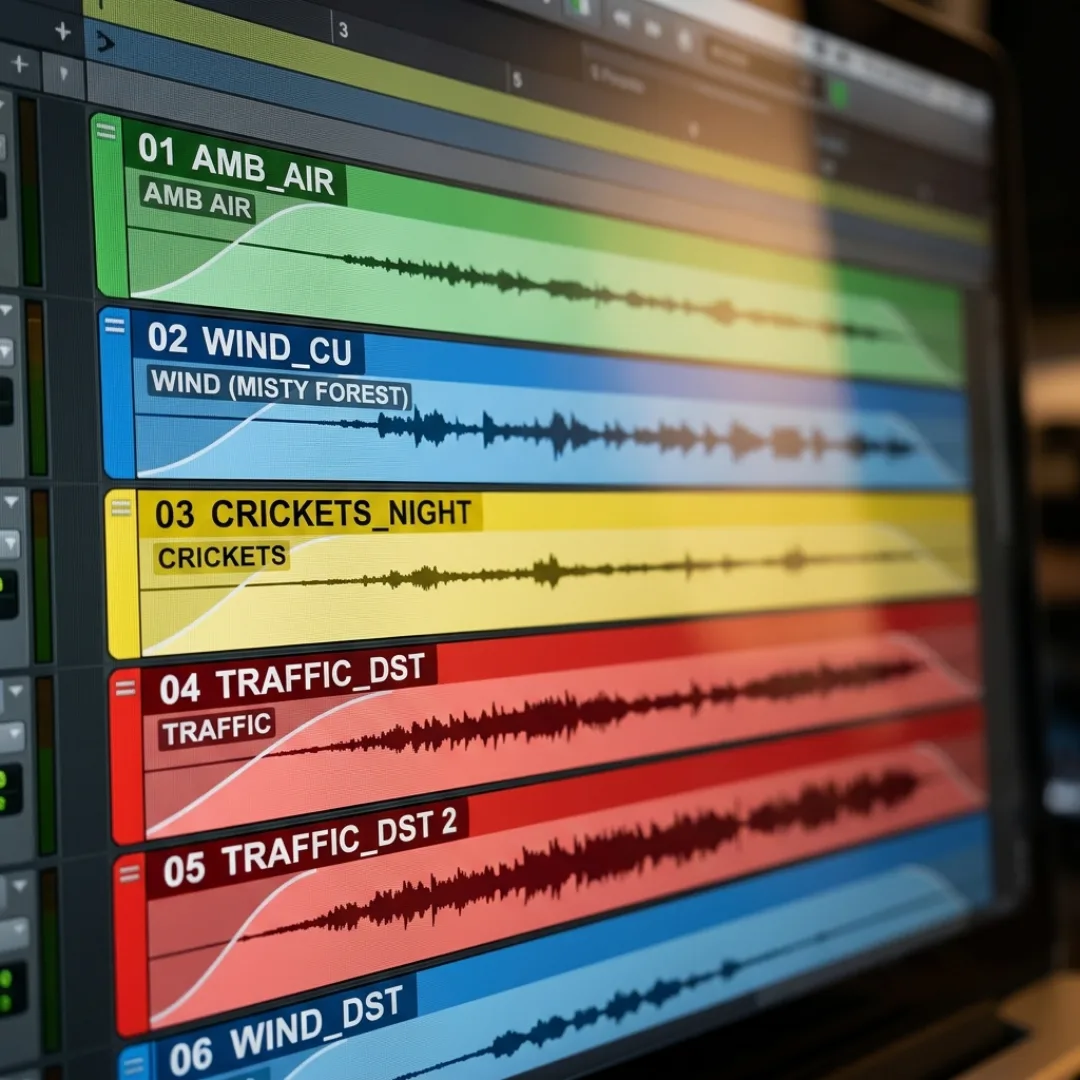
Before adding a single sound, place markers at every scene change. Make all of your audio layers start and end on those exact cut points so transitions stay clean. Color-code and name your tracks (for example: Air, Wind, Animals, Traffic, Walla) so the session does not become chaos. A common pro approach is to split backgrounds into A and B track groups so you can checkerboard scenes, meaning scene one sits on the A tracks and scene two on the B tracks, which makes balancing and crossfading far easier.
Step 2: Lay down your tone bed first
Start with the foundational bed. Pick one quiet layer whose tone matches the production dialogue as closely as possible. This is the layer that smooths out the small shifts in the edited dialogue track. Keep it fairly flat and centered. The less of it you need, the better, but it should always be there gluing the scene together.
Step 3: Build the environment with more beds
Add two or three more beds chosen for tone, not just realism. Ask what the scene should feel like. For an oppressive or ominous mood, lean on low-end textures like deep room tone and wind. For something pleasant, avoid heavy low end and choose lighter, airier elements. Match the beds to the time of day, the season, and the location. Crickets in a snowy winter scene break the illusion instantly, and an airplane in a period piece set in the 1800s will get flagged immediately.
Step 4: Place your specifics in the gaps
Now paint in the detail. Scrub the picture for visual cues, then drop in specifics: a distant dog, a passing scooter, a car horn, a bird. Place them in the pauses between lines so they never compete with dialogue. Use gradual fade-ins and fade-outs on every clip so nothing pops in or out. Establishing wide shots at the head of a scene are the perfect place to be generous with specifics, then pull back as the camera moves into close-ups and conversation.
Step 5: Add perspective and motion
Directors love ambience that does something interesting at the start of a scene and then lays back. Vary your specifics with perspective: a truck that moves left to right, a bird that crosses behind the viewer, a sound that drops in level when the camera cuts inside a room. Subtle level changes, a 3 to 6 dB dip, are often enough to sell a perspective shift without the audience noticing the mechanics.
Step 6: Handle repeats and loop points
If a scene runs longer than your sound file, repeat the bed but hide the seam with an equal-power crossfade so there is no audible jump. Always listen through the whole layer for stray sounds, like a lawnmower or siren buried in a recording, that would not belong in your scene.
Key takeaway: Beds first, specifics second, perspective last. Organize before you create, and let the wide shots breathe with detail while the close-ups stay clean.
For a worked example of cutting backgrounds for an unfamiliar location, Pro Sound Effects’ walkthrough on immersive backgrounds and SFX Engine’s guide to layering sound effects in video both reinforce this beds-then-specifics order.
Where to Source Ambient Sounds
Recording your own ambience is one of the easiest ways to build a personal library. Backgrounds are forgiving to capture: you do not need expensive microphones, and quiet seasons like winter are great for clean recordings. Capture the mundane, a buzzing refrigerator, distant traffic, a crowded room where no single voice is intelligible, and label everything so you can find it later. If you want a hands-on starting point, our guide to making Foley sound effects at home covers the recording basics.
Mixing Your Ambient Layers: Levels, EQ, Panning, and Reverb
Levels and balance
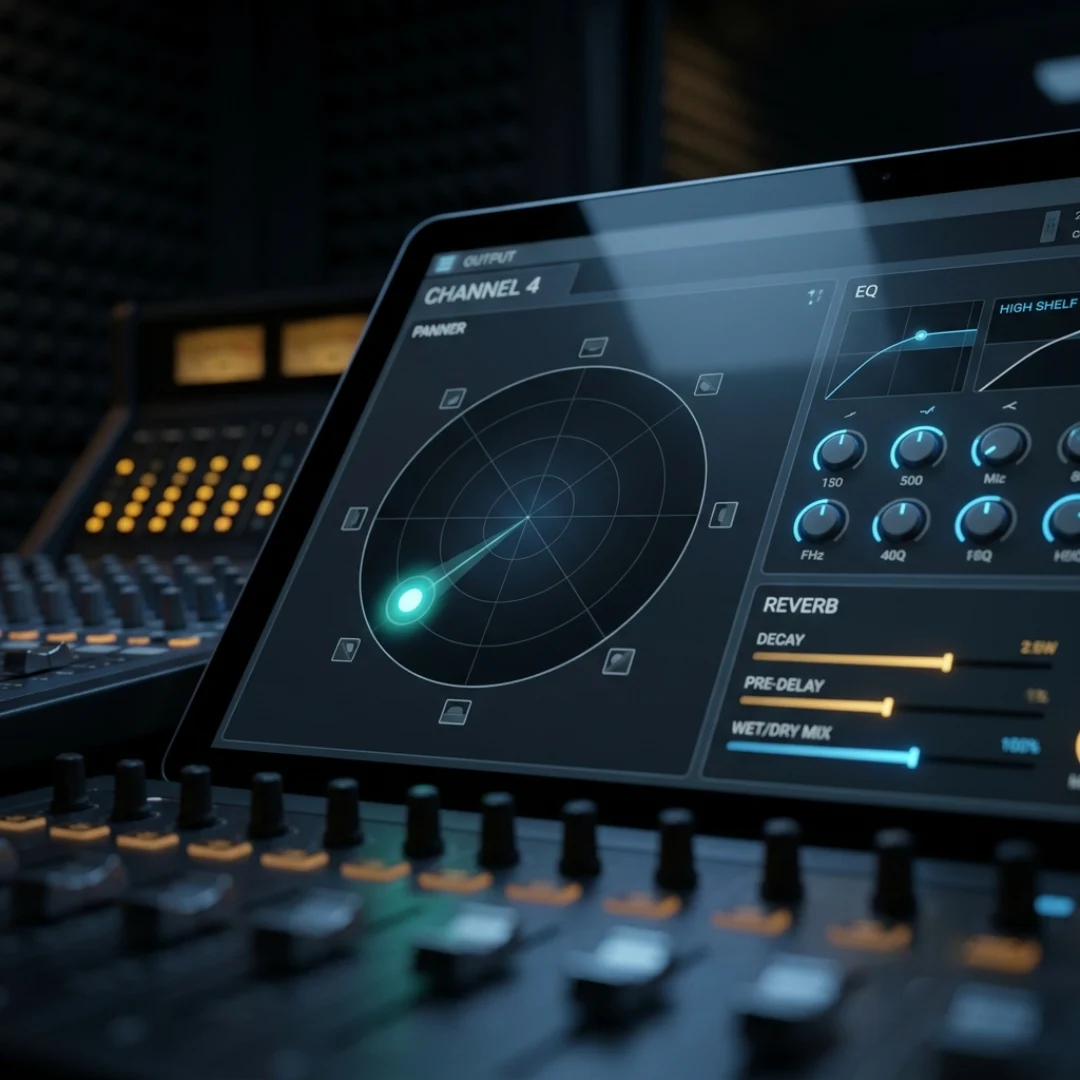
There is no fixed loudness target for ambience; the rule is simply that it should not distract from the dialogue. Set levels by ear in a properly calibrated room, not on headphones, because background levels and reverb are notoriously hard to judge on headphones. Use clip gain to balance individual sounds against each other first, then group all your backgrounds so you can ride them together against the rest of the mix. For social platforms, target a full-mix loudness around or below -14 LUFS so the platform does not apply extra compression. To dial in level balance across a whole project, see our walkthrough on audio mixing in Premiere Pro.
EQ
Equalization shapes tone and carves space. Notch out any hums or buzzes hiding in a recording. Roll off high frequencies on a sound that is meant to be behind a wall or door so it feels muffled and distant. Most importantly, when a voiceover starts to get buried, gently boost the frequencies where the voice sits while reducing those same frequencies in the music and ambience so the dialogue cuts through. For more techniques, our overview of Premiere Pro audio effects is a good reference.
Panning
Panning places sounds in space and is where ambience becomes immersive. Pan your tone bed and one mono layer to the center so it supports the dialogue, then spread your stereo beds and specifics outward. If a subject moves left to right on screen, pan the matching sound to travel with it. In a surround mix, layer multiple beds and move them around the room, because real environments surround us in 360 degrees rather than sitting flat in stereo. For the next level, our spatial audio and 3D sound guide goes further, and Studio 11’s notes on 3D audio mixing techniques are worth a look.
Reverb
Reverb creates depth and glues sounds into a shared space. Different environments need different amounts: a small bedroom needs only a subtle touch, while a hallway or a large building produces a much larger echo. Add reverb to a dry effect to make it feel like it belongs in the room, and remember that adding reverb raises the overall level, so tuck the fader back down afterward. Keep the production-matching tone bed mostly dry so it stays close to the original dialogue.
Key takeaway: Balance with clip gain, carve with EQ, place with panning, and seat sounds in space with reverb. Mix ambience in a real room, not on headphones.
Mono vs Stereo vs Surround for Backgrounds
Ambient Sound by Environment
Common Ambient Sound Mistakes to Avoid
- Using a single layer. One sound rarely reads as a real place. Build at least two to four layers.
- Letting ambience distract. If the audience notices a background sound and wonders what it was, it is too loud or too busy. Backgrounds should be felt, not spotted.
- Ignoring the dialogue tone. If your added ambience does not match the production sound, the mix feels disjointed and gets flagged.
- Looping without crossfades. Hard loop points create an audible pulse. Always crossfade repeats.
- Mismatching time, season, or place. Crickets in winter, the wrong wildlife, or a modern plane in a period piece all break immersion.
- Mixing on headphones. Background levels and reverb need a calibrated room to judge accurately.
- Over-designing quiet moments. Sometimes the most powerful choice is to strip everything away before a key beat. Silence has impact.
For a deeper list of pitfalls across a whole project, see our guide to sound design mistakes to avoid, and FilmLocal’s piece on mastering ambient sound for more field-tested advice.
Tools and Software for Ambient Sound Design
- Adobe Premiere Pro: Strong for editors who want to design sound on the same timeline as their picture. Use track-based and clip-based volume, EQ, and reverb. If your source audio is rough, our guide on how to fix bad audio in Premiere Pro helps you clean it before you layer ambience on top.
- DaVinci Resolve Fairlight: A full audio post environment built into a free editor, with metering, EQ, and panning suited to detailed ambience work. Our DaVinci Resolve Fairlight audio guide walks through the page.
- Pro Tools and other DAWs: The industry standard for dedicated audio post, with deep routing, VCA control, and surround panning for serious projects.
Whichever tool you use, the principles in this guide stay the same. The software changes; beds, specifics, panning, and restraint do not. For the bigger picture of how ambience joins Foley, dialogue, and effects into a finished soundtrack, our complete guide to cinematic sound effects ties it all together.
Quick Workflow Checklist
- [ ] Mark every scene change and cut all layers to those points
- [ ] Color-code and name your tracks
- [ ] Lay a tone bed that matches the production dialogue
- [ ] Add two to three more beds chosen for tone, time, and place
- [ ] Place specifics in the gaps between dialogue lines
- [ ] Add perspective shifts and movement
- [ ] Crossfade any repeated loops
- [ ] Balance with clip gain, then group the backgrounds
- [ ] Carve with EQ, place with panning, seat with reverb
- [ ] Check the full mix in a calibrated room and against your loudness target
Conclusion
When you are ready to build scenes faster, reach for a ready-made Pixflow sound effects library to supply clean, professional ambience beds and spot effects, then layer your own recordings on top for sounds nobody else has. Do the work scene by scene, and your videos will not just look good, they will feel real.
Disclaimer : If you buy something through our links, we may earn an affiliate commission or have a sponsored relationship with the brand, at no cost to you. We recommend only products we genuinely like. Thank you so much.
Blog Label:



Write for us
Publish a Guest Post on Pixflow
Pixflow welcomes guest posts from brands, agencies, and fellow creators who want to contribute genuinely useful content.
Fill the Form ✏