Depth of Field in Filmmaking: How to Control Focus for Cinematic Shots

- What Is Depth of Field in Filmmaking?
- Why Depth of Field Matters for Cinematic Storytelling
- Shallow vs Deep Depth of Field
- The 4 Factors That Control Depth of Field
- How to Get a Shallow Depth of Field (The Cinematic Look)
- How to Get a Deep Depth of Field (When Everything Should Be Sharp)
- Focus Pulling and Rack Focus: Keeping Your Shot Sharp
- Depth of Field for Drone and Aerial Footage
- Creative Uses of Depth of Field in Cinema
- Faking and Fixing Depth of Field in Post
- Bringing It All Together
That is depth of field doing its quiet, powerful work.
Here’s the thing: depth of field is one of the first tools that separates footage that looks like “video” from footage that looks like cinema. It’s how you guide the viewer’s eye, isolate emotion, build scale, and tell the audience what matters in the frame, all without a single line of dialogue.
In this guide we’re breaking down exactly what depth of field is, the four factors that control it, how to nail shallow and deep focus on any camera, how to pull focus like a pro, and even how to fake (and fix) depth of field in post. This is a core skill in our Cinematography Techniques pillar guide, so consider this your deep dive into focus. Let’s get into it.
What Is Depth of Field in Filmmaking?
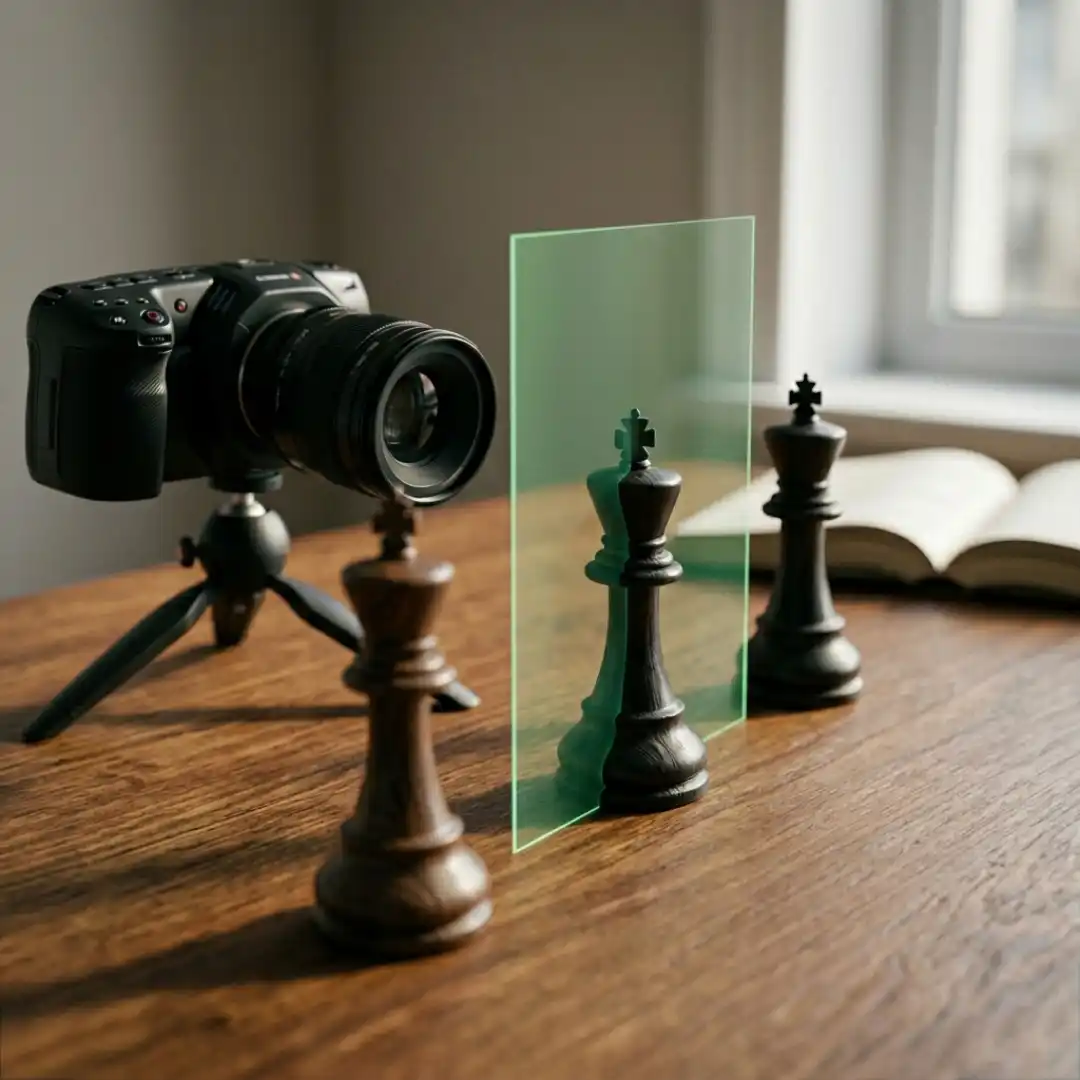
As StudioBinder’s guide to depth of field puts it, the field is the area of acceptable sharpness, and the depth is how much of that area (front to back) holds focus. A few terms worth knowing:
- Point of focus: the exact spot your lens is focused on.
- Plane of focus: the flat, two-dimensional plane extending from that point, parallel to your sensor. Anything sitting on it is tack sharp.
- Bokeh: the aesthetic quality of the out-of-focus areas, those soft orbs of light you get behind your subject.
When people talk about a “cinematic” look, they’re usually talking about a shallow depth of field: a thin slice of the frame in focus, with dreamy blur in front of and behind the subject. But as we’ll see, that’s only half the story.
Why Depth of Field Matters for Cinematic Storytelling
Here’s what controlling focus actually does for your story:
- It directs the eye. A sharp subject against a soft background is a visual spotlight. The viewer can’t help but look exactly where you point them.
- It isolates emotion. Blurring a busy world around a character pulls us into their internal experience. Think of those intimate, lonely close-ups in Her, where Theodore is sharp and the city behind him melts away, separating him from the world he can’t quite connect to.
- It creates scale and context. A deep depth of field that keeps a character and their vast environment in focus says something different: this person is part of a bigger world.
- It sets mood. Soft, shallow focus feels romantic, dreamy, and intimate. Deep, sharp focus feels grounded, tense, or epic.
The filmmaker Neil Oseman has a great breakdown of using depth of field creatively that’s worth a read once you’ve got the fundamentals down. The short version: focus is emotion. Use it on purpose.
Shallow vs Deep Depth of Field
A shallow depth of field keeps a small slice of the frame sharp (often just your subject) while everything else blurs out. It’s the classic isolate-the-subject, creamy-background look. A deep depth of field keeps most or all of the frame, foreground to background, in sharp focus.
Neither is “better.” They’re different tools for different jobs. Here’s a quick side-by-side:
The 4 Factors That Control Depth of Field
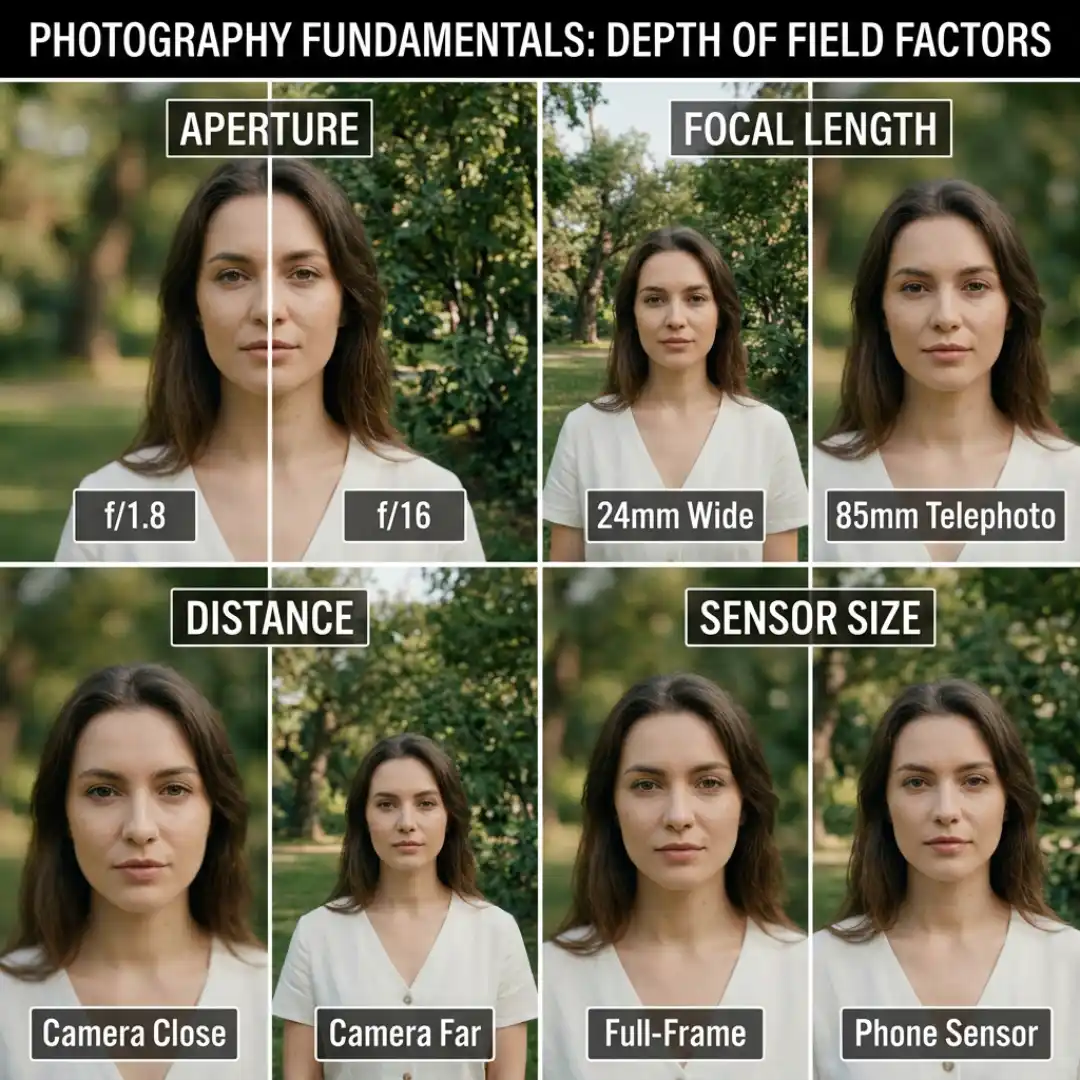
1. Aperture (f-stop)
Aperture is the size of the opening in your lens that lets light through, measured in f-stops. This is your most direct depth of field control.
Here’s the part that trips everyone up at first: lower f-stop numbers mean a bigger opening and a shallower depth of field. Higher f-stop numbers mean a smaller opening and a deeper depth of field.
- f/1.4, f/2, f/2.8 = wide open, shallow focus, lots of background blur
- f/8, f/11, f/16 = stopped down, deep focus, most of the frame sharp
When a lens is at its lowest possible f-stop, it’s called being “wide open.” Just remember that opening up your aperture also lets in more light, so on a bright day you may need an ND filter to shoot wide open without overexposing. Aperture is one corner of the exposure triangle, and it works hand in hand with shutter speed and ISO to balance your image.
2. Focal Length
The focal length of your lens dramatically affects depth of field. Longer (telephoto) lenses like 85mm and 135mm produce a much shallower depth of field and compress the background into a soft, creamy blur. Wider lenses like 16mm and 24mm keep far more of the scene in focus.
This is why a portrait shot on an 85mm at f/2.8 looks dreamy, while a landscape on a 16mm at the same aperture stays mostly sharp. If you want a full breakdown of how lenses shape your image, our guide to lens focal length covers the physics in plain language.
3. Subject-to-Camera Distance
The closer your camera is to your subject, the shallower your depth of field becomes. The further away you are, the deeper it gets.
This is the secret weapon for shooters who can’t open their aperture (like when you’re already maxed out on a kit lens). Just move closer to your subject, and push the background further away from them, and you’ll get noticeably more blur. It even works on a smartphone.
4. Sensor Size
Larger sensors (full-frame, Super 35, medium format) produce a shallower depth of field than smaller sensors (Micro Four Thirds, phone sensors) at an equivalent framing. This is because you have to get closer or use a longer lens to fill the same frame on a bigger sensor.
It’s the main reason phone footage historically looked “deep” and flat, and why full-frame cameras became the go-to for that buttery cinematic blur. (Modern phones fake it with computational “cinematic mode,” which we’ll touch on later.)
How to Get a Shallow Depth of Field (The Cinematic Look)
- Open your aperture wide. Start around f/2 to f/2.8. This gives you a beautifully shallow look while still keeping your subject sharp. Going all the way to f/1.4 looks stunning but the focus margin gets razor thin (more on that in the focus pulling section).
- Reach for a longer lens. A 50mm, 85mm, or 100mm will blur the background far more than a 24mm. The longer the lens, the creamier the bokeh.
- Get closer to your subject. Reduce the distance between camera and subject, and increase the distance between subject and background.
- Shoot on the biggest sensor you have. Full-frame and Super 35 will get you there fastest.
A quick note on lens speed: every lens has a maximum aperture (its “speed”). A lens that opens to f/1.8 will give you a shallower look than one that only opens to f/4. If shallow focus is your goal, fast prime lenses are your friend. Our roundup of the best cinematic lenses on a budget is a great starting point if you’re building a kit. (Fstoppers also has a tidy breakdown of the three easiest ways to control DOF.)
The cinematic look is part lens and part grade, though. Once you’ve captured shallow, intentional focus in camera, the final polish happens in post. Our Film Emulation Pro pack gives you real film scans, LUTs, grain, and letterboxes from Kodak, Fujifilm, Ilford and more, so that shallow-focus footage gets the authentic film texture to match. It’s the fastest way to bridge the gap between “nice blur” and “actual movie.”
How to Get a Deep Depth of Field (When Everything Should Be Sharp)
To get a deep depth of field, reverse the recipe:
- Stop down your aperture. Move toward f/8, f/11, or higher. The smaller the opening, the more of your frame stays sharp.
- Use a wider lens. A 16mm to 35mm keeps far more of the scene in focus naturally.
- Back the camera away from your subject.
- Add light. Here’s the catch: stopping down lets in less light, so deep focus shots usually need a brighter scene or more lighting. This is where solid lighting fundamentals pay off, and our lighting for cinematography guide walks through how to add enough light to shoot deep without crushing your image into noise.
A handy rule of thumb from cinematographers: the tighter your shot, the shallower you’ll usually go (to focus attention), and the wider your shot, the deeper you’ll usually want it (so no important detail gets lost). It’s a guideline, not a law, but it’s a great instinct to build.
Focus Pulling and Rack Focus: Keeping Your Shot Sharp
Manual vs autofocus
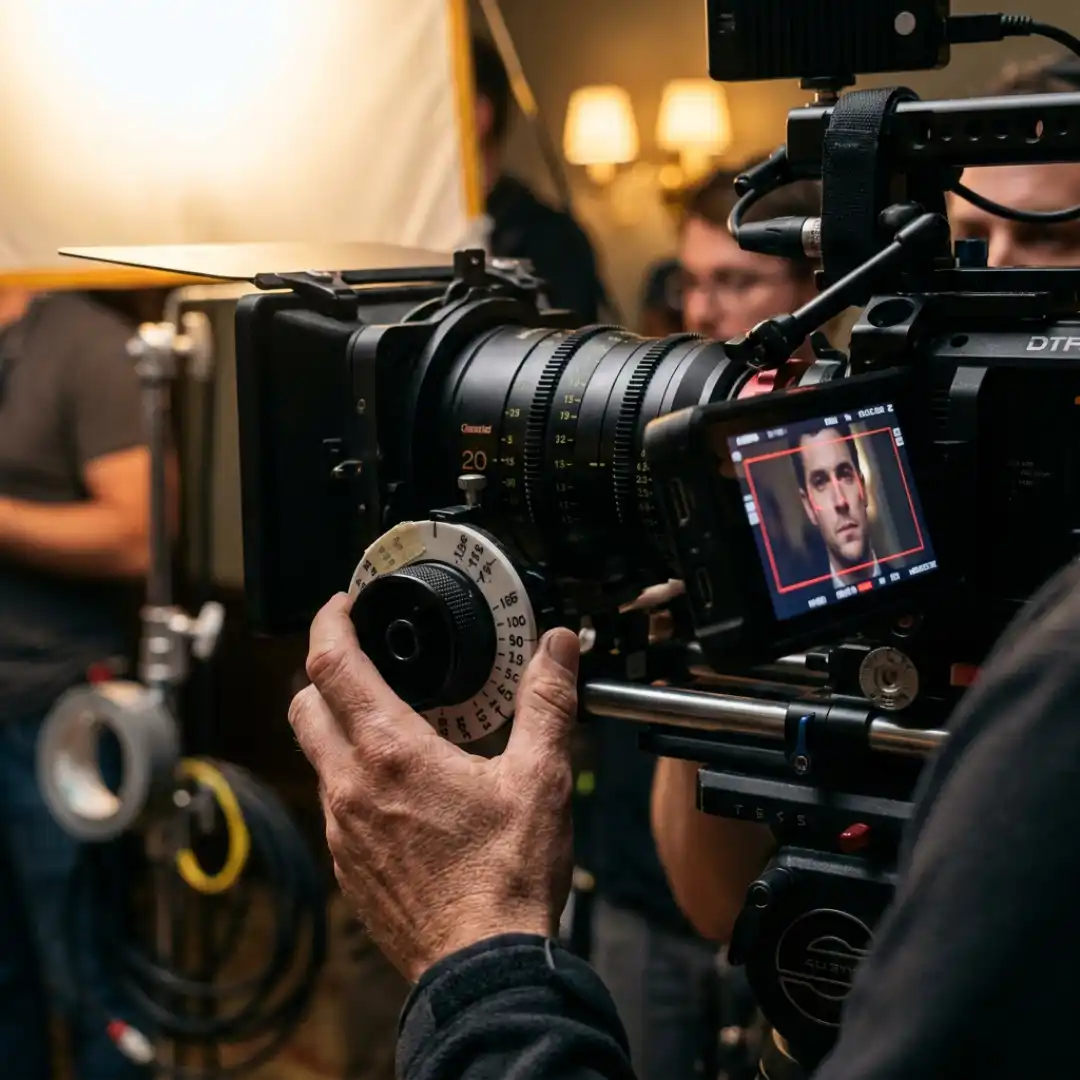
Modern autofocus systems are genuinely impressive and great for run-and-gun, vlog-style, or fast-moving shoots. But for controlled cinematic work, many filmmakers still pull focus manually, because autofocus can’t time a dramatic rack focus or know which subject should be sharp in a given beat. Manual focus gives you that authorship.
Tools to nail focus every time
- Focus peaking: your camera overlays colored outlines on whatever is in sharp focus. Turn it on and chase the highlights.
- Zoom-to-check: punch in on your LCD or monitor (many cameras let you double-tap) to confirm sharpness before rolling.
- A bigger monitor: a larger external monitor makes soft focus far easier to catch on set than a tiny camera screen.
- Lens distance marks and a tape measure: higher-end lenses have accurate distance markings. Measure from the sensor plane (marked with a circle-and-line symbol on the body) to your subject, then dial that distance on the lens barrel.
- A follow focus or wireless system: for repeatable, smooth rack focuses, a follow focus unit with marked positions lets you hit the same two points every take.
Rack focus as storytelling
A rack focus is a reveal. Pulling focus from a character’s face to a figure appearing in the doorway behind them, or from an object to the person holding it, guides the audience’s attention and builds tension exactly when you want it. It’s one of the most elegant in-camera storytelling moves you have.
Keeping focus while the camera itself is moving is even trickier. If you’re combining moving focus with moving camera, smooth stabilization helps enormously, our Steadicam vs gimbal breakdown covers how to keep your movement (and your focus) buttery.
Depth of Field for Drone and Aerial Footage
But if you want more cinematic separation in your aerial work, a few things help:
- Fly lower and closer to a foreground element (a tree, a ridge, a building edge) to introduce some natural blur and a sense of depth.
- Use ND filters to keep your shutter speed cinematic in bright daylight, which keeps that smooth, filmic motion.
- Choose drones with larger sensors if shallow aerial focus matters to you, bigger sensors give you more control.
- Layer your composition with clear foreground, midground, and background so the deep focus reads as rich depth rather than flat.
There’s a helpful deep dive on mastering depth of field in aerial drone footage if you shoot a lot from the sky. The key mindset shift: with drones, you’re usually working with deep focus and using composition and altitude to create depth, rather than fighting for shallow blur.
Creative Uses of Depth of Field in Cinema
- Subject isolation: the everyday workhorse, blur the world to spotlight a face or an object.
- Deep focus for layered action: keep multiple planes sharp so the audience chooses where to look, letting tension simmer across the whole frame (the Citizen Kane approach).
- The split diopter: a specialty lens attachment that keeps both a close foreground subject and a distant background subject sharp at once, while the middle stays soft. The Departed uses this to make two characters feel both connected and unsettlingly distant in the same frame.
- Tilt-shift lenses: these create selective bands of focus, often making real scenes look like tiny miniatures. Roger Deakins used tilt-shift in The Assassination of Jesse James to give memories that fragmented, dreamlike feel.
- Focus as a reveal: the rack focus, used to surprise, connect, or redirect attention at the perfect dramatic beat.
The lesson from all of these: there’s no “correct” depth of field. There’s only the depth of field that serves the story you’re telling. The most overused mistake is defaulting to the shallowest possible focus on every shot because it feels “cinematic.” Great cinematographers shoot plenty of their work between f/2.8 and f/5.6, and go deep when the scene demands it.
Faking and Fixing Depth of Field in Post
Fixing slightly soft focus
If a shot is just a touch soft (not wildly out of focus), a careful sharpening pass can rescue it. In DaVinci Resolve, a small amount of blur-radius adjustment in the color page adds clarity and makes things pop. Don’t overdo it, oversharpening looks crunchy and artificial. And know the limit: if a shot is genuinely, badly out of focus, no amount of sharpening will bring it back. That’s a reshoot.
Faking shallow depth of field
To add background blur after the fact:
- Power windows / masks: isolate a region and blur it, then shape it over the background. Quick but not physically accurate.
- Magic Mask (or rotoscoping): isolate your subject, then blur everything behind them. This gets you closer, though you’ll often see a little fringing around the edges.
- Lens blur and depth-map tools: more advanced compositing (like lens blur in Fusion or a depth-map-driven blur) gives a more believable falloff, but it takes real work and still tends to leave a faint glow around subjects.
The takeaway: post can enhance and occasionally rescue, but it can’t truly replace optical depth of field. Get it right on set, then use post to polish. And when you’re polishing, the right grade ties everything together, Film Emulation Pro lets you lay authentic film stock emulation, grain, and letterboxing over your graded footage so your in-camera focus work lands with a true cinematic finish.
Bringing It All Together
Start simple. Grab a fast prime, open up to f/2.8, get close to your subject, and watch the background melt. Then practice the opposite: stop down, widen out, and keep a whole scene alive with deep focus. Pull focus by hand until it becomes muscle memory. The more deliberate you get with focus, the more your work will feel like cinema instead of footage.
And when you’re ready to put the final cinematic polish on those beautifully focused shots, Film Emulation Pro gives you the LUTs, grain, and film frames to make them look like they came straight off a Kodak reel. (Your timeline will thank you.)
Now go point that lens at something and decide, on purpose, exactly what the world gets to see.
Disclaimer : If you buy something through our links, we may earn an affiliate commission or have a sponsored relationship with the brand, at no cost to you. We recommend only products we genuinely like. Thank you so much.
Blog Label:



Write for us
Publish a Guest Post on Pixflow
Pixflow welcomes guest posts from brands, agencies, and fellow creators who want to contribute genuinely useful content.
Fill the Form ✏