Lighting for Cinematography: How to Light Any Scene Like a Pro

- What Lighting for Cinematography Really Means
- The Five Properties of Light Every Cinematographer Must Control
- The Core Lighting Setups Every Filmmaker Should Master
- Cinematic Lighting Techniques That Separate Pros from Amateurs
- How to Light Any Scene: The 7-Step Pro Workflow
- Lighting Scenarios: How Pros Light Real Locations
- Common Cinematic Lighting Mistakes to Avoid
- Essential Lighting Gear (Without Going Broke)
- From Lighting to Finished Film: Where to Go Next
- Conclusion
Most filmmakers start by overlighting. They throw soft light at every shadow until the frame is evenly bright and emotionally empty. The pros do the opposite. They start by deciding where the light should come from, why it would be there, and what feeling the shadows should create. Then they place a single light, then maybe another, and they spend just as much time taking light away as they do adding it.
This guide is a complete walkthrough of lighting for cinematography for filmmakers from beginner to intermediate. You will learn the five properties of light, the core lighting setups every cinematographer should master, the cinematic techniques that separate professionals from amateurs, a 7-step workflow you can apply on any shoot, scenario-by-scenario playbooks for real locations, the most common mistakes to avoid, and a no-fluff gear list. By the end, you will know how to walk into any room and light it like a pro. And when you cut your footage together, you can give it that final cinematic polish with assets like Pixflow’s CineTitles for title sequences that match the look you just created.
What Lighting for Cinematography Really Means
The single biggest mindset shift for new cinematographers is this: lighting is at least as much about the shadows as it is about the light. A pleasing image has bright areas, midtones, and deep blacks. If you flood every shadow with fill, you erase contrast, you erase depth, and you erase emotion. More lights does not mean better lighting. One well-placed source with a clear motivation will always beat a six-light setup that has no story logic behind it.
The Five Properties of Light Every Cinematographer Must Control
Quality: Hard Light vs Soft Light
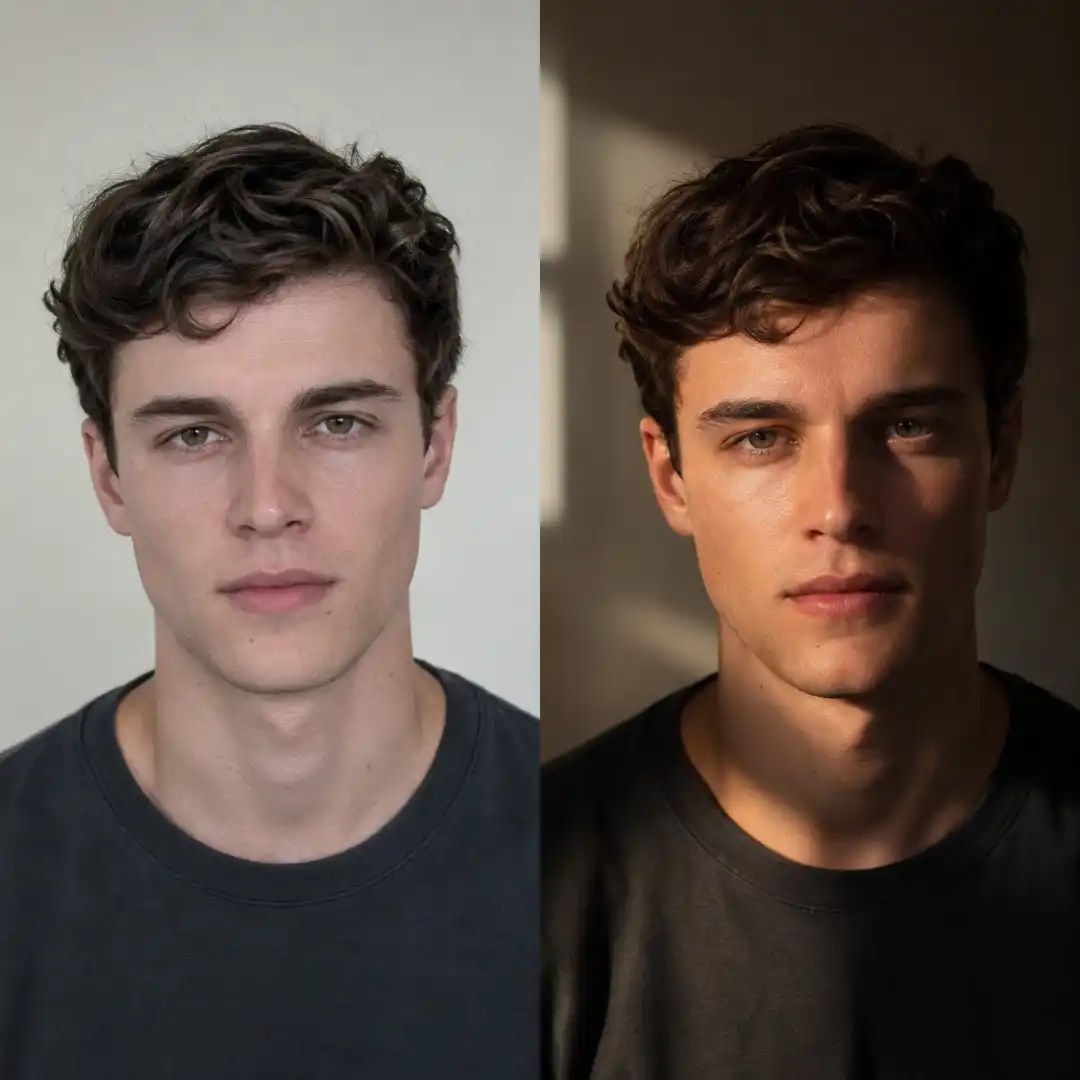
Light quality describes how the shadow edge behaves. A small light source far from your subject produces hard light: sharp, defined shadows, glassy highlights, and dramatic texture. A large light source close to your subject produces soft light: gradual shadow falloff, smooth skin tones, and a flattering wrap around the face. Neither is better. Soft light is great for naturalistic skin and commercial work. Hard light is unmatched for shape, drama, sun, and stylized looks.
A pro move many beginners miss is combining both on the same subject. Use a large soft source as your main key, then add a small hard kicker from the same side at slightly higher intensity. The soft source covers the skin pleasantly, and the hard one carves dimension into the cheekbone, eye socket, and nose.
Direction: Front, Side, Back, Top, Under
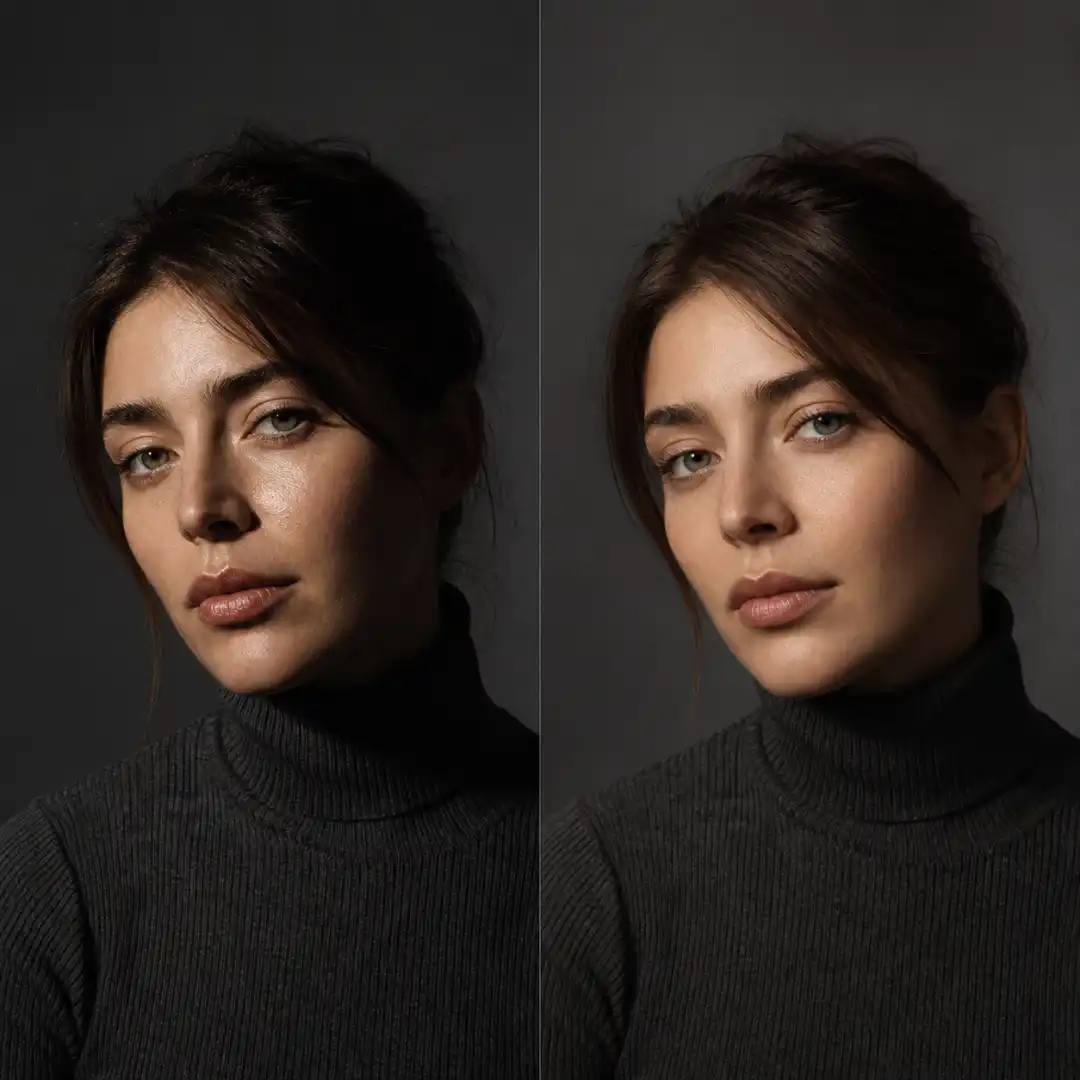
Where your key light comes from relative to the camera defines the entire mood of the shot. Lighting from directly in front of the subject flattens the face and erases depth. This is news lighting and sitcom lighting, and it is almost never cinematic. Lighting from the side carves shape across the face and creates the most familiar cinematic look. Lighting from behind silhouettes the subject and adds a glowing rim. Top light is dramatic and slightly oppressive, great for villains, interrogations, or dinner scenes. Underlighting is unnatural and uncomfortable, perfect for horror.
The single most important placement rule for modern cinematography is the far-side key, also called upstage lighting. Imagine a line running through your subject’s nose. The side of the nose closer to the camera is the near side; the side away from the camera is the far side. Place your key on the far side, and the light wraps across the face toward camera, leaving a small shadow on the near cheek. This is the look you see in almost every modern film and high-end commercial.
Intensity and Exposure
Absolute brightness matters less than relative brightness. The camera does not care whether your key light is 60 watts or 600 watts; it cares about the ratio between your key, your fill, your background, and your highlights. The job of intensity is to set those relationships, then to give you enough output to control the rest of the frame with ND filters and aperture. Your aperture choice also shapes depth of field, so exposure and focus decisions always travel together.
A common case where intensity becomes critical is window-motivated interior work. If you expose for the bright window outside, the room becomes a cave, and you need a powerful key (often 300W or 500W LED) just to lift your subject. If you expose for the room, the window blows out. A pro workflow is to use a variable ND on the camera so you can dial the window to a natural value, then use a strong key inside to match the new exposure.
Color Temperature
Color temperature is measured in Kelvin. Lower numbers (2700K to 3200K) are warm and orange, like household tungsten bulbs and candlelight. Higher numbers (5600K to 6500K) are cool and blue, like daylight and overcast skies. 4500K is a useful neutral middle ground. Your job on set is to choose a temperature that matches the motivation. If your scene is lit by a window, your key should be daylight. If your scene is lit by a lamp, your key should be tungsten. Mixing temperatures is fine, but only when intentional, for example a warm subject against a cool background.
For a deeper breakdown of how to use warmth and coolness to tell story, see our guide on cinematography color temperature.
Contrast Ratio
The key-to-fill ratio determines how dramatic your scene feels. A 1:1 ratio (key and fill equal) is flat and corporate. A 2:1 ratio looks natural and pleasant, ideal for interviews and naturalistic narrative. A 4:1 ratio is dramatic and confident, the classic cinema look. An 8:1 or higher is moody, noir, and intense. Decide the ratio for the scene first, then build your lighting toward it. Modern films often lack deep blacks because of high-dynamic-range cameras and the temptation to fill every shadow. Resist that. Shadows are not a mistake to fix; they are a tool to use.
The Core Lighting Setups Every Filmmaker Should Master
Three-Point Lighting (Key, Fill, Backlight)
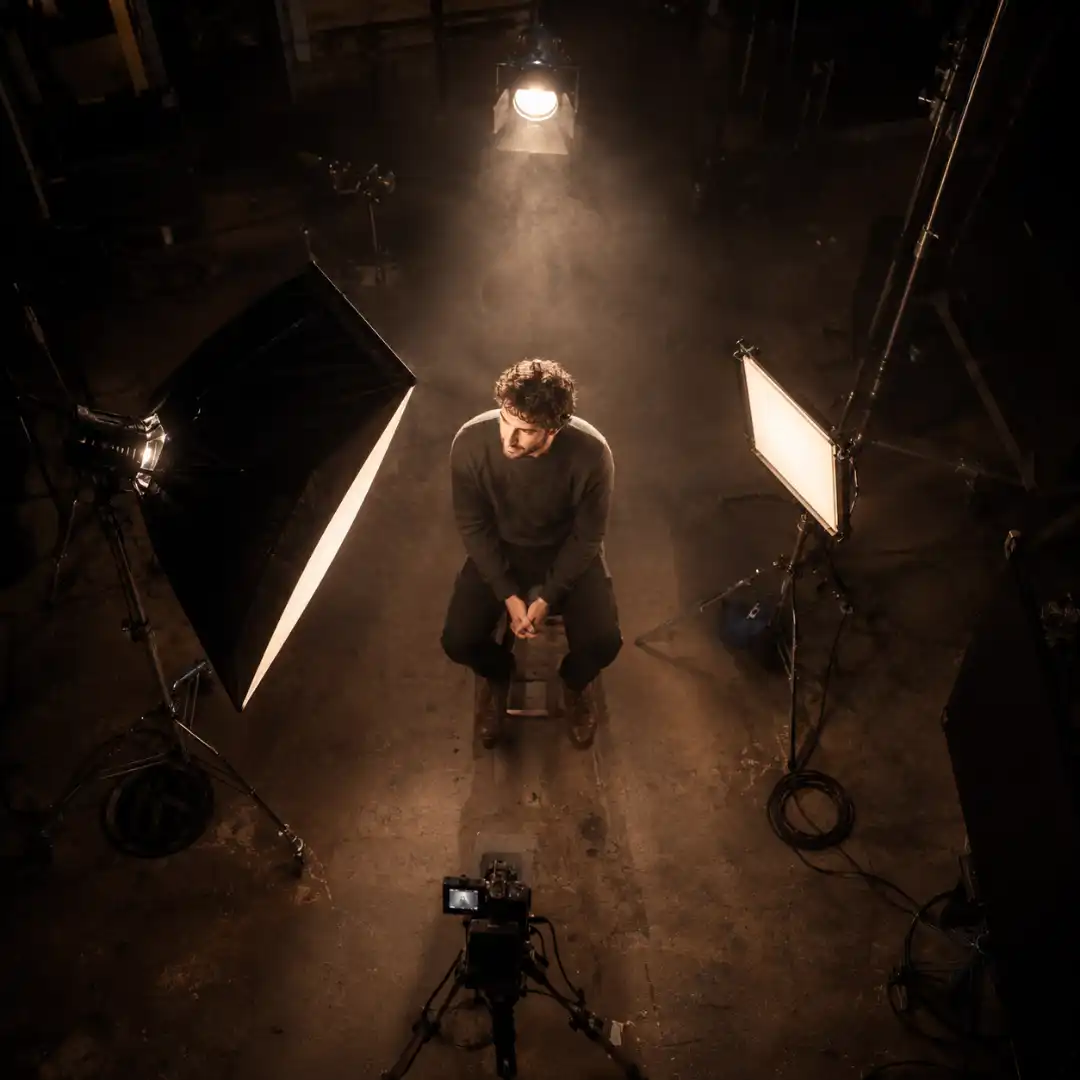
Three-point lighting is the most taught and most adaptable setup in cinematography. The key is your brightest, primary light, placed at roughly 30 to 45 degrees off the camera. The fill is a softer, dimmer light on the opposite side that lifts the key’s shadows just enough to retain detail. The backlight (also called the rim or hair light) sits behind the subject, pointing back toward the camera, creating a glowing edge that separates the subject from the background.
Three-point is a starting point, not a destination. You will spend your whole career bending, breaking, and re-shaping it for specific scenes. For the full walkthrough including ratios, distances, and modifier choices, read our dedicated guide on the three-point lighting setup.
Two-Light Setup (Key Plus Back or Rim)
Drop the fill, and you get a more contemporary moody look. Use your key on the far side at a 4:1 or higher ratio, then add a rim or back light from the opposite side or directly behind. The unkey side of the face falls into deep shadow, but the rim keeps the subject from disappearing into a black background. This is the bread-and-butter setup for music videos, neo-noir, and most modern dramas.
One-Light Cinematic Setup
You can get a beautiful cinematic frame with a single light source, provided you understand what to do without the other two. The trick is choosing a key, then using either bounce or negative fill to control the rest. A window can be your only light, with a piece of white foam core to lift the shadows or a black flag to deepen them. A single 300W LED with a softbox can be your only artificial source if you place it on the far side and let the unkey side go dark. The constraint forces you to think about shape rather than coverage.
Four-Point Lighting (Adding a Background Light)
Add a fourth light dedicated to the background or set, separate from the subject. This could be a strip of light hitting a wall, a colored gel washing the back of the frame, or a kicker on a piece of set dressing. The job of this light is to give the background depth and texture so it does not flatten into a wall behind the subject.
Universal One-Source Scene Lighting
A technique pros use on commercials and short films with multiple shots: rig one big motivated light high overhead, dial in its angle and intensity at the start of the day, and never touch it. Instead of relighting every angle, you move actors and camera through the frame and let their position relative to the light create variety. The same overhead source can produce a near-silhouette on a foreground actor walking past, a top-rim on a background actor catching the spill, and a soft fill on an actor in a bright patch. This is fast, consistent, and impressively cinematic when planned correctly.
Cinematic Lighting Techniques That Separate Pros from Amateurs
Motivated Lighting
Motivated lighting means every artificial light you place is justified by something in the world of the scene. The viewer should never wonder why a light is hitting the actor’s face. The window justifies your soft daylight key. The lamp justifies your warm tungsten side light. The TV justifies the flickering blue glow. When motivation is clear, the viewer’s brain accepts the image and disappears into the story. When motivation is wrong, the lighting calls attention to itself and pulls the viewer out.
The first thing to do on any location is walk through it before you set up a single light. Ask: where would light naturally be coming from in this room, at this time of day, in this world? Then enhance that source instead of replacing it.
Practical Lights
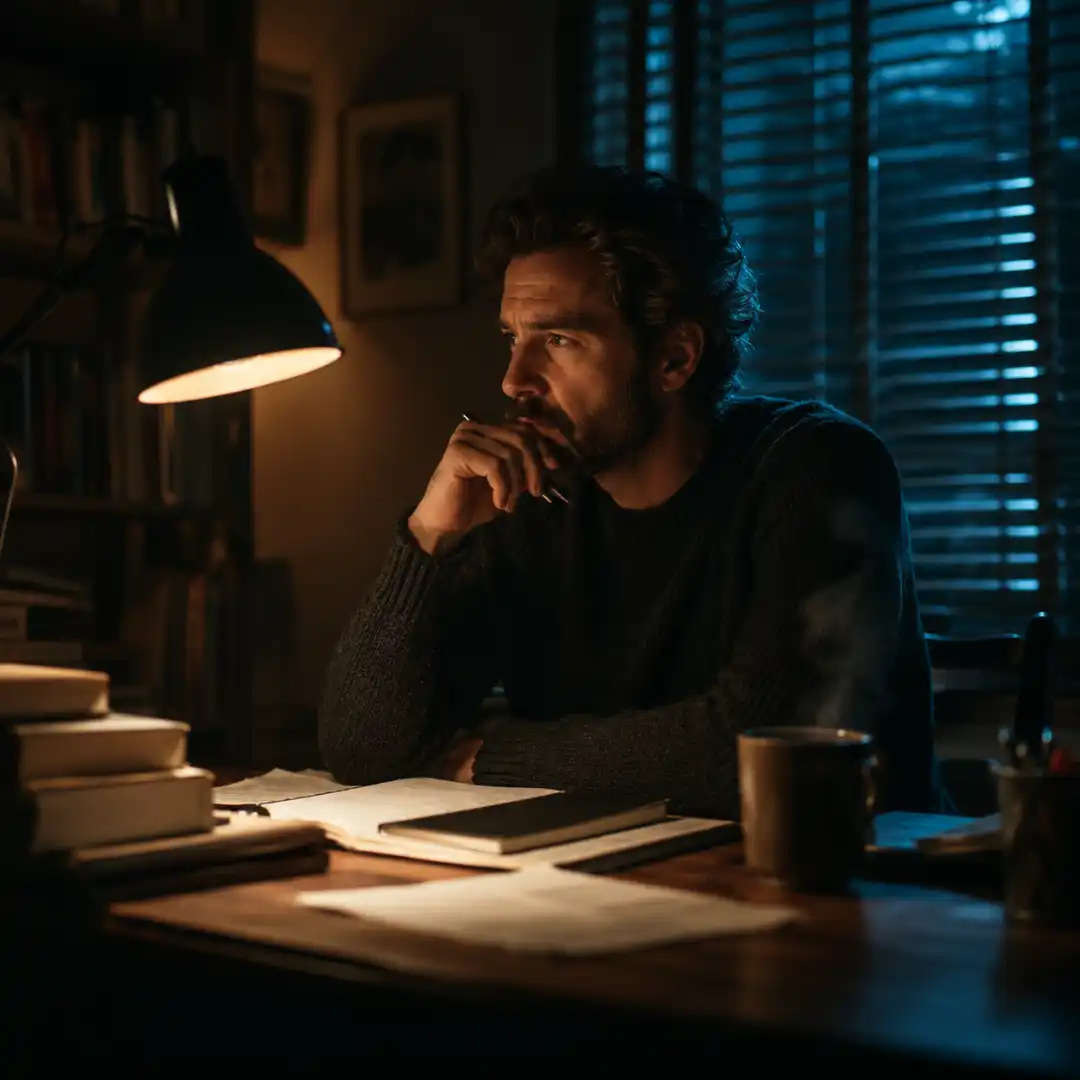
Practicals are any light source visible in the frame: lamps, candles, fairy lights, neon signs, TV screens, fire pits, streetlights through a window. They do two jobs at once. They make the world feel real and lived-in. And they give you on-screen evidence that justifies whatever artificial lights you bring in.
Sometimes the practical itself is enough light to expose the scene. More often, you use the practical for visual logic and add a hidden movie light that matches its color and direction, doing the actual heavy lifting. A great trick is building fake light sources: a piece of cardboard with slits cut into it, placed in front of a 60W LED, throws hard blind-like shadows on the wall and sells the existence of a window that does not exist.
Far-Side Key (Upstage Lighting)
This is the single biggest lighting habit to adopt early. After you place your camera, draw an imaginary line through the subject’s nose. Place your key on the far side of that line relative to the camera. The light rolls across the face toward the camera, creating a subtle shadow on the near cheek (often forming a small triangle just below the eye, known as Rembrandt lighting). This is what gives faces depth and shape on screen. A near-side key flattens; a far-side key sculpts.
The one common exception is beauty lighting, where you want even, glowing skin with minimal shadows. Then you light from directly in front and slightly above. Use this on purpose, not by accident.
Shaping Natural Light
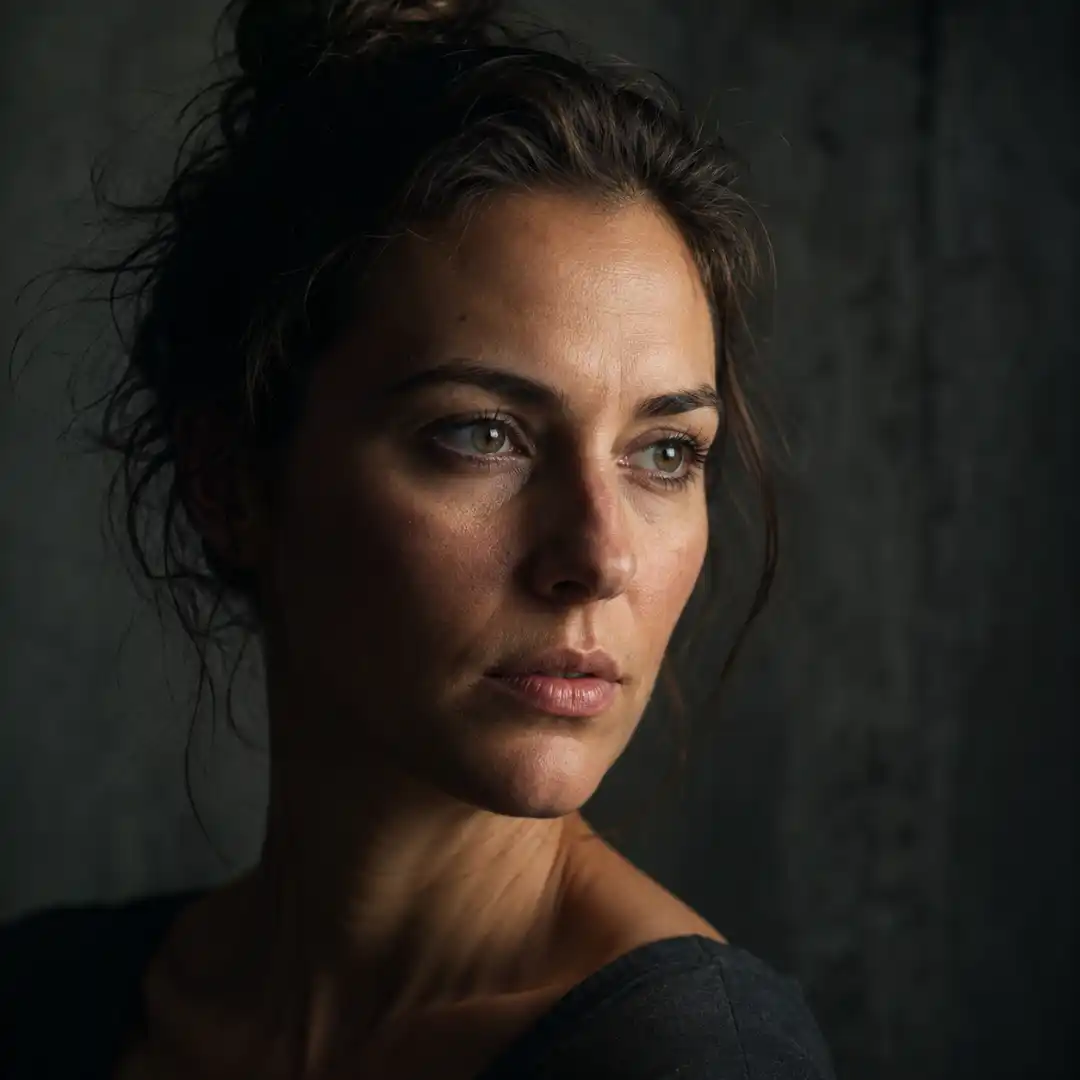
Natural light is free and powerful, but it is rarely usable straight from the sky. Direct midday sun is harsh, top-heavy, and produces ugly raccoon eye shadows. The fix is shaping. Schedule shoots for golden hour or blue hour for naturally directional, warm or cool light. On overcast days, the whole sky becomes a giant soft box. When the sun is hard, diffuse it with a 6×6 or 12×12 silk frame, bounce shadows with a white card, or deepen them with negative fill (a black flag). For window-lit interiors, sheer curtains turn an oppressive bright window into a beautiful diffused source.
High-Key and Low-Key Lighting
High-key lighting is bright, evenly distributed, with low contrast. It conveys lightness, comedy, romance, optimism. Think sitcoms and rom-coms. Low-key lighting is the opposite: dominant shadow, deep blacks, strong contrast, selective light. It conveys drama, threat, mystery, intimacy. Think film noir and thrillers. Choose deliberately based on the emotion of the scene. For a deeper comparison and decision framework, read our guide on high key vs low key lighting.
Chiaroscuro and Low-Fill Lighting
Chiaroscuro is the painterly tradition of dramatic shadow play, where a single shaft of light defines a figure against near-black surroundings. In cinematography, you achieve this with a strong key, almost no fill, and tight control over spill. A flagged-off COB LED, a window cracked open just enough to let in a slice of light, or a single practical in an otherwise dark room can all produce chiaroscuro. It is the most cinematic lighting style and works wonders for emotional weight.
Color Contrast (Warm Subject, Cool Background)
Separation is not only about brightness; it is also about color. A warm key on the subject and a cool wash on the background pushes the subject forward in a way the eye reads instantly. This is the foundation of the famous teal-and-orange look. Use it sparingly and intentionally. Pair a tungsten 3200K key with a 6500K background practical or gelled wall wash, and you will get clean color separation without losing realism.
Shaping Tools: Flags, Grids, Snoots, Negative Fill
Lighting is as much about subtraction as addition. Flags block light from going where you do not want it. Grids attach to softboxes and force soft light into a narrow controlled spread. Snoots produce a tight focused beam, perfect for hitting one specific element. Negative fill (black flags, duvetyne, foam core painted black) absorbs ambient bounce on the unkey side, deepening shadows and adding contrast. If your image looks too bright and too flat, the answer is rarely “add a light.” It is almost always “flag, grid, or negative fill.”
How to Light Any Scene: The 7-Step Pro Workflow
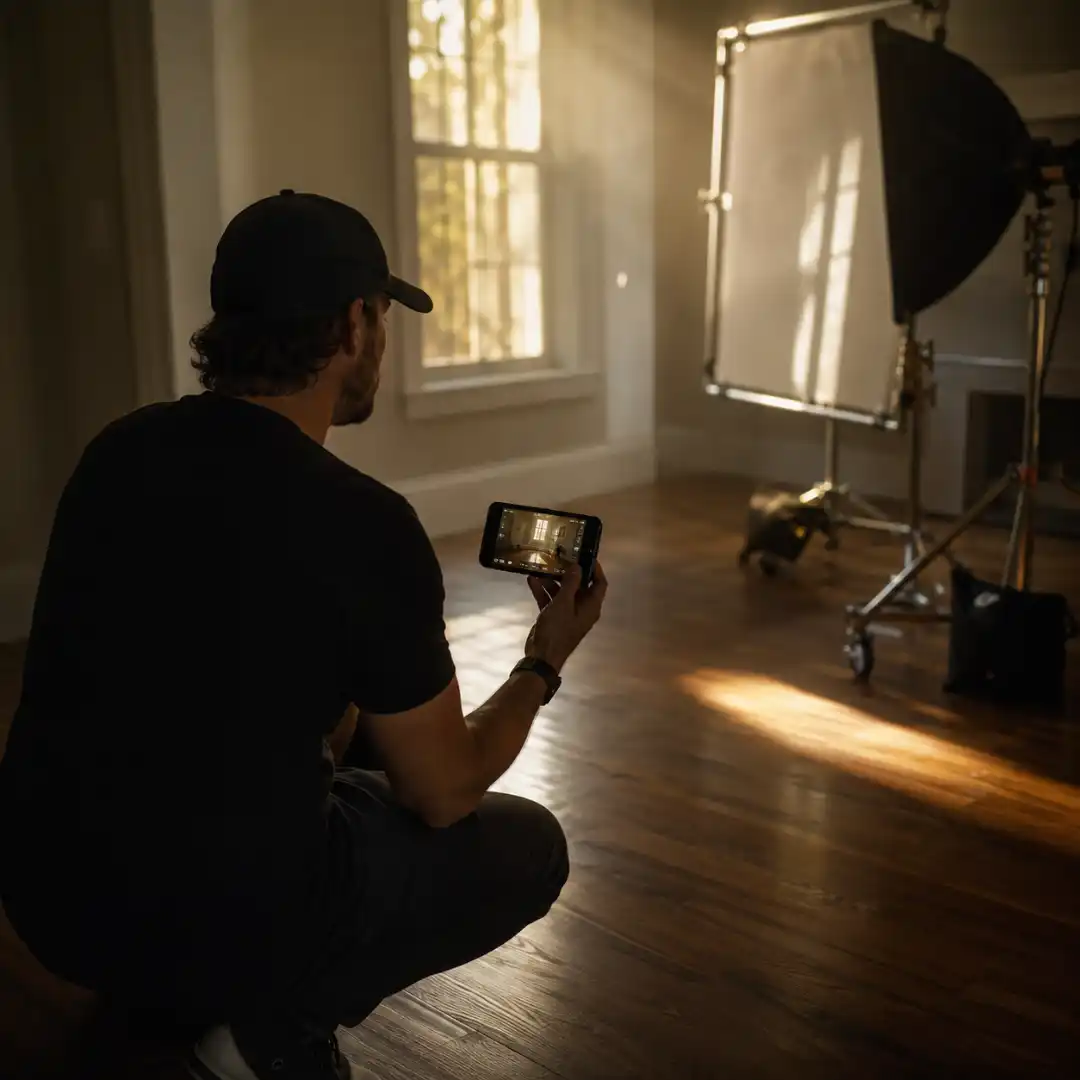
- Define the emotion first. Read the script or the brief. Before you place any lights, decide whether the scene is warm or cold, hopeful or threatening, naturalistic or stylized. The mood drives every other decision.
- Find the natural motivation. Walk the location. Identify where light would actually come from in this world: a window, a lamp, a TV, a streetlight, the sun. Your artificial lights will pretend to be one of these sources.
- Block the camera, then the light. Decide your shot angles based on the location and the story. Then plan your lighting so the natural motivation falls on the far side of the subject relative to the lens. If the motivation is on the wrong side for your shot, either change the shot or change the motivation (close a curtain, turn off a practical).
- Place the key light. Match the motivation in direction, color temperature, and intensity. Use a soft modifier for naturalistic looks; use a harder source for shape and drama. If the source you are imitating is warm, your key is warm. If it is daylight, your key is daylight.
- Sculpt with shadows. Use negative fill to deepen the unkey side. Use flags and grids to keep spill off walls, ceilings, and background elements you want dark. Resist adding fill until you have shaped the shadows.
- Separate the subject from the background. Add a backlight, a kicker, a practical in the frame, or a color-contrasting background light. The goal is to never let your subject silhouette against a flat black wall (unless that is the intended look).
- Balance for the camera. Set white balance to your dominant key. Check skin tones, highlights, and shadows on a calibrated monitor. Add haze for volume if the scene needs visible light beams or atmospheric depth. Once you can see the final image, refine the placement of every fixture in small adjustments.
When the footage is in the can and you move to post, finishing assets like Pixflow’s Letterbox Film Frames can lock the cinematic aspect ratio you composed for during the shoot, making sure the final delivery matches the look you lit.
Lighting Scenarios: How Pros Light Real Locations
Daytime Interior (Window-Motivated)
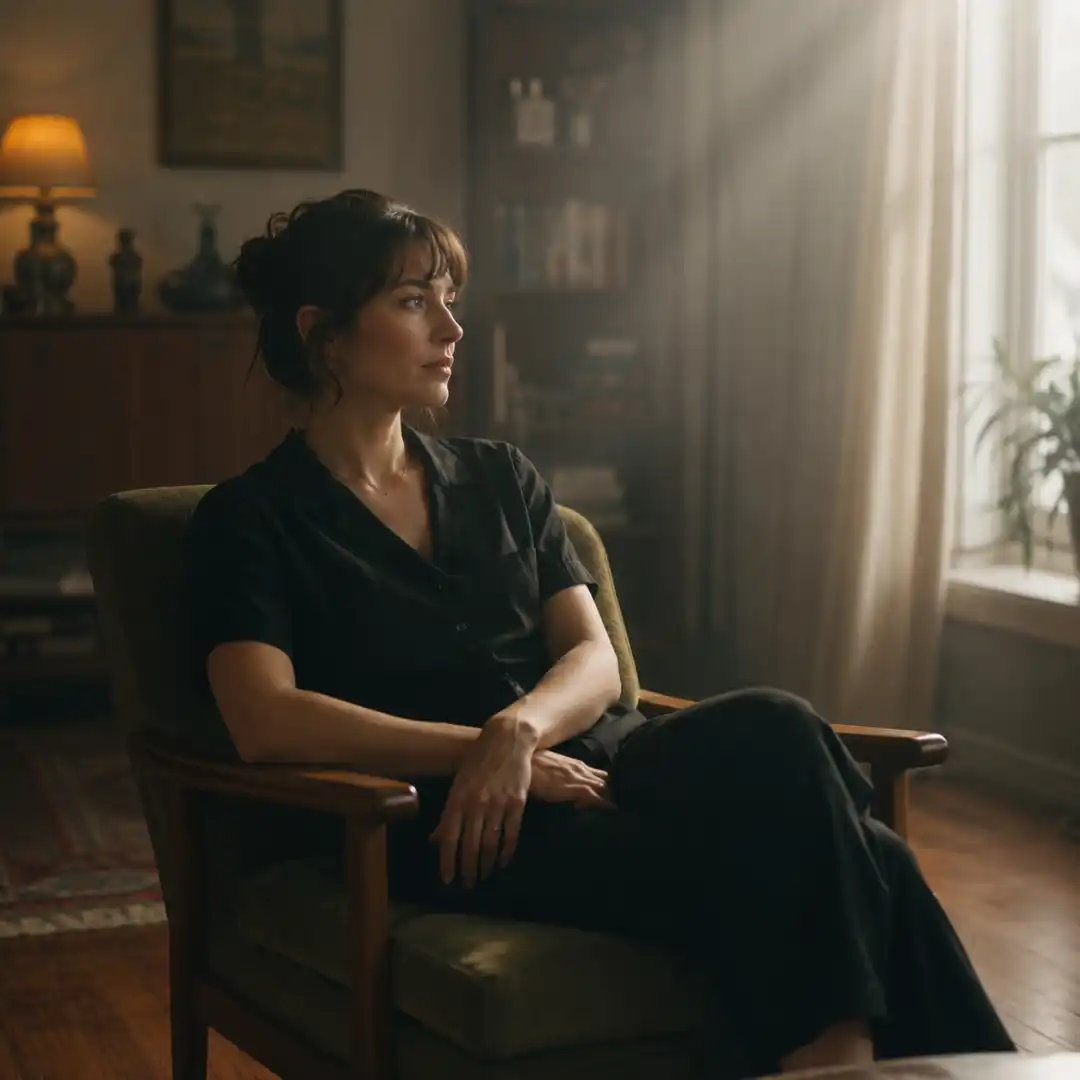
The window is your key. Position the camera so the window is on the far side of your subject’s nose line. Expose for the window using a variable ND on the camera so it reads as a natural bright value, not a blown-out white. Add a strong daylight-balanced LED (300W to 500W class) inside the room, just outside the frame on the window side, with a softbox or diffusion frame to soften it. This artificial light matches the window’s color and direction and lifts the subject without changing the look. Add negative fill on the camera side to keep the unkey shadows deep. A touch of haze adds volume to the window light.
Nighttime Interior
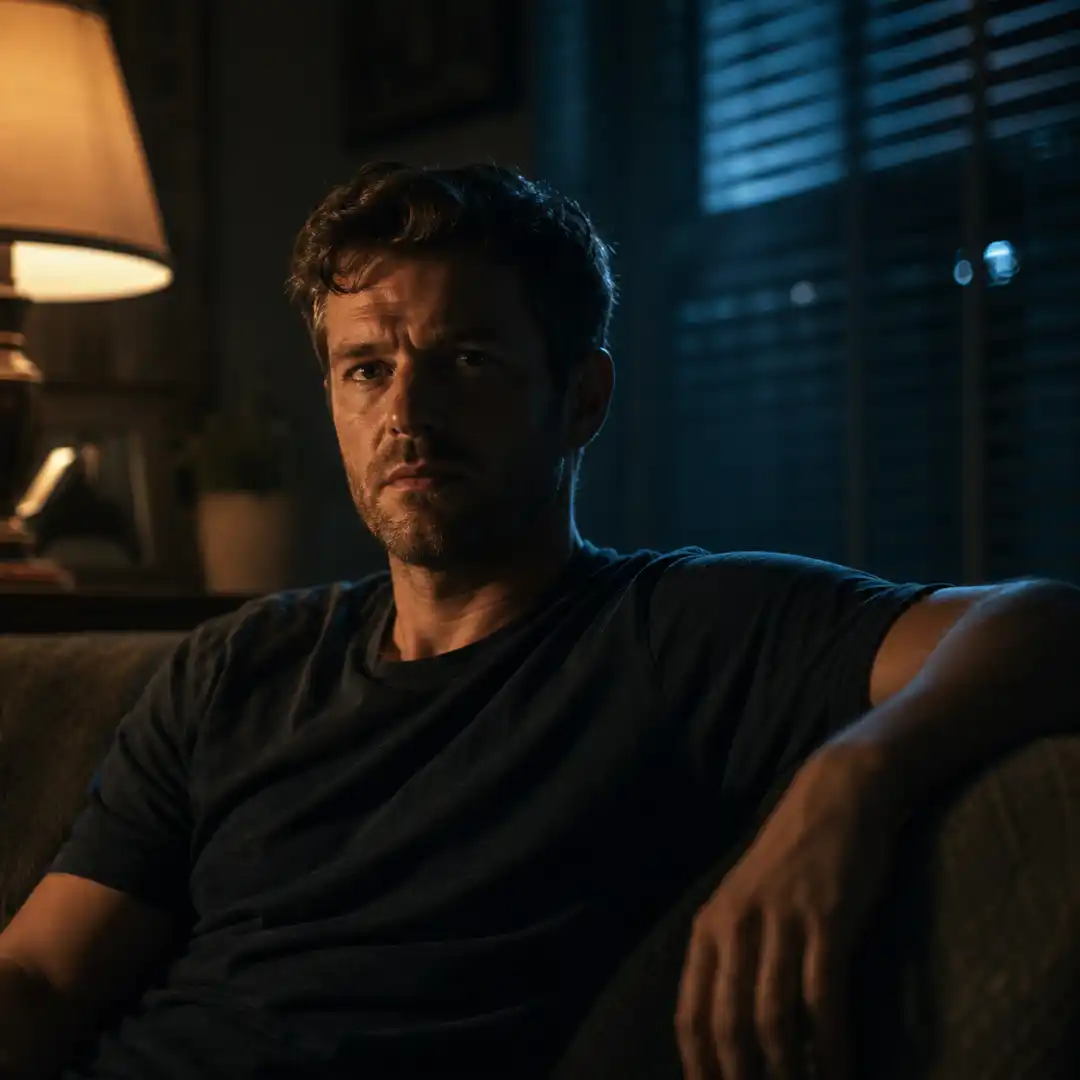
Start with a single practical (a lamp, a TV, a candle) in the frame. This is your visual justification. Hide a tungsten-balanced LED nearby, matching the practical’s color and direction, doing the real lifting. Add a cool moonlight backlight through a window or doorway, gelled to 5600K or higher, to create a rim and color contrast. The warm subject against the cool background gives you depth and emotion without overlighting. Optional: a second hidden hard kicker on the side, also tungsten, for shape. Keep ambient fill almost zero.
Daytime Exterior
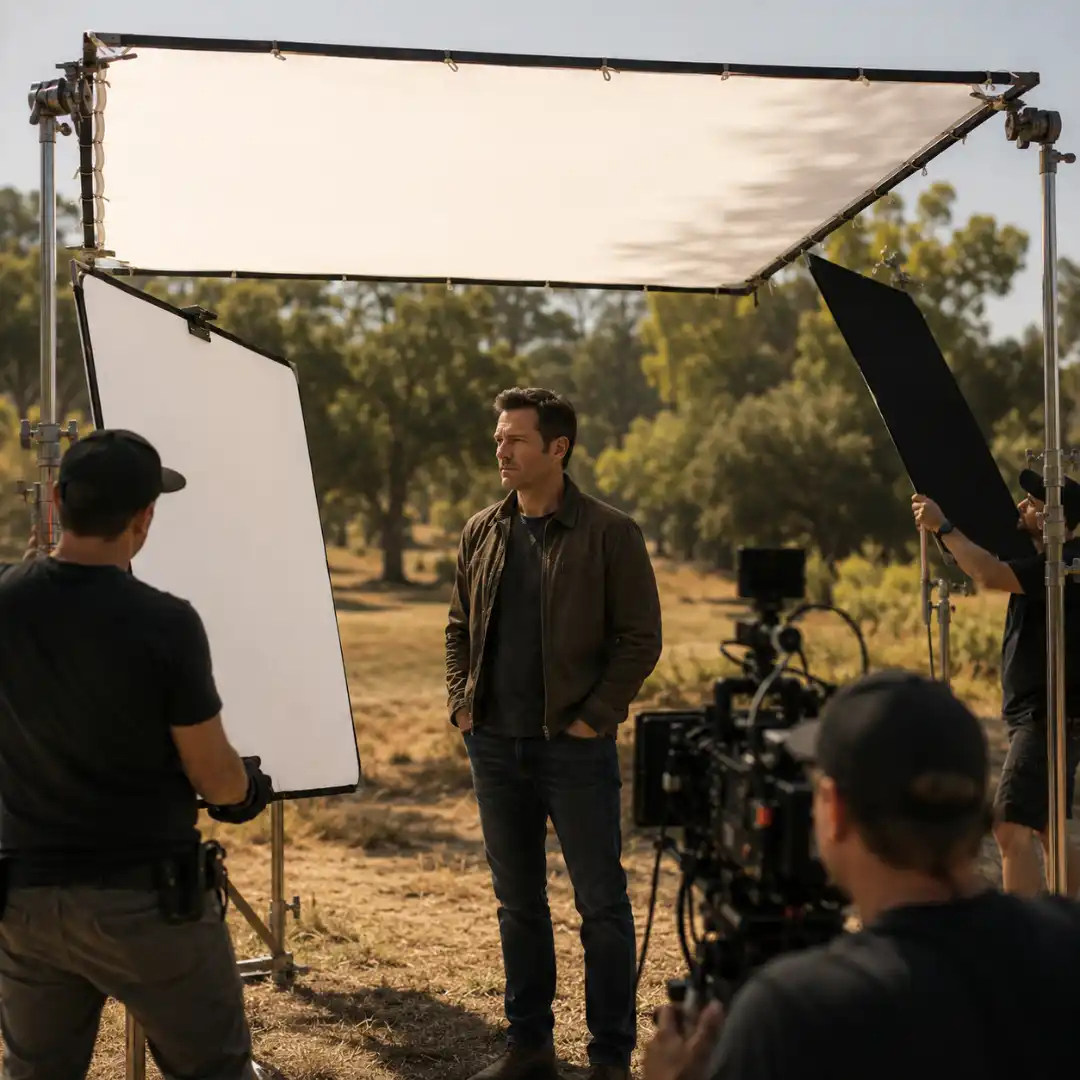
Do not fight the sun, schedule around it. Shoot during golden hour for warm directional light, blue hour for cool atmospheric light, or on overcast days for a giant diffused sky. If you must shoot at midday, diffuse the hard sun with a 6×6 or 12×12 silk frame above the subject, then add a bounce card to lift shadows or negative fill to deepen them. Backlight whenever possible: putting the sun behind the subject gives a halo and lets you shape the front with controlled bounce or fill.
Nighttime Exterior
This is the hardest scenario for beginners because there is no ambient light to work with. Build it. Rig a tall HMI or large LED high above and behind your subject to simulate moonlight, gelled cool. Add practicals in the frame: streetlights, window glows, car headlights, neon signs. These give the location depth and make the lighting believable. Use color contrast aggressively. A warm practical near the subject against a cool moonlight rim is one of the most striking nighttime looks in cinema.
Talking-Head / Interview Setup
A reliable pro template: soft far-side key at 45 degrees off-axis, dimmed fill on the near side at a 4:1 ratio (or no fill at all with negative fill instead), a subtle hair light from behind, and a motivated background element (a practical lamp, a soft window glow, a colored wall wash) for depth. Frame so the subject’s eye line crosses into the empty side of the frame, which is also where the key light comes from. This is the look most modern documentary, YouTube, and podcast interviews aspire to.
Single-Light Minimalist Setup
If you only have one light, find a window or a reflective surface to give you a second. The window becomes your key, the single light becomes a far-side rim, and a piece of white foam core becomes your fill. Or flip it: the single light is your soft key, the window is your rim, and negative fill on the camera side gives you contrast. The constraint of one light is a creative gift, not a limitation, once you commit to the discipline.
Mixed-Light / Bar or Party Scenes
These scenes are visually rich because they break color temperature rules on purpose. Embrace it. Have multiple practicals at different temperatures (warm Edison bulbs, cool blue neon, magenta accent lights). Pick one practical as the motivation for your key on the main subject, match its color, and let the rest of the frame be a chaotic colorful background. Add haze for atmosphere. The exposure is always a compromise; choose your subject’s exposure first and let the rest fall where it falls.
Common Cinematic Lighting Mistakes to Avoid
- Lighting from the front. Flattens the face and erases all depth. Move the key to the side or far side.
- Overlighting the scene. More lights does not mean better lighting. Pull lights out and see how much you actually need.
- Mixing color temperatures unintentionally. A daylight key and a tungsten practical can produce greenish skin tones if the camera white balance is set wrong. Decide your dominant color temperature, balance to it, and treat any other temperature as deliberate contrast.
- Using the room’s overhead house lights. Hard top-down house lights almost never look cinematic. Turn them off, then rebuild the scene with motivated practicals and your own fixtures.
- Making the rim or kicker brighter than its supposed source. If a window in the background is the brightest part of the frame, an edge light supposedly coming from that window cannot be brighter than the window itself.
- Forgetting to expose for the window. A blown-out white window kills the photographic feel of any interior scene. Drop ND on the camera or scrim the inside light until the window reads as a normal bright value.
- Ignoring the background. Subjects against flat dark walls look stagey. Add a wall wash, a kicker, a practical, or a color shift to give the background life.
- Treating lighting as a checklist. “I have a key, fill, and back, we are done.” No. Lighting should be a deliberate response to the scene’s emotion, not a paint-by-numbers diagram.
Essential Lighting Gear (Without Going Broke)
Main keys: A COB LED in the 200W to 500W class will cover most interior and even some exterior work. Popular reliable options include the Aputure 300X or LS 600, Nanlite Forza 300 or 500, and the Godox VL150 or VL300. Bicolor (variable color temperature) is worth the extra cost for flexibility.
Soft modifiers: A 4×4 or 6×6 diffusion frame is the workhorse soft source. Add a Lantern or large softbox attachment for portable softness. A Light Dome or similar gives soft wrap around faces.
Negative fill and shaping: A 4×4 floppy flag, a yard or two of duvetyne, and a few black foam core boards will do 80% of the shaping work on small sets. C-stands and grip arms are non-negotiable.
Bounce: White foam core, a 4×4 muslin, a folding 5-in-1 reflector. Cheap, light, and indispensable.
Practicals: A handful of warm Edison-style bulbs, a couple of Aputure MC mini LEDs, a Nanlite PavoTube or similar tube light, and string fairy lights. These provide visual logic and on-camera decoration.
Shape: Barn doors, grids, snoots, and a few homemade gobos (cardboard with shapes cut into it works perfectly).
Support: At least two heavy-duty c-stands, multiple sandbags, and a couple of light stands. Stability is safety. Never trust a light on an unweighted stand.
From Lighting to Finished Film: Where to Go Next
- Go back to the foundational guide for the broader picture: Cinematography Techniques: The Ultimate Visual Storytelling Guide for Filmmakers.
- Pair lighting with focus and visual depth in our breakdown of depth of field in filmmaking.
- Match your light to the right glass with our lens selection guide for filmmakers.
Conclusion
If you only take one habit from this guide, make it this: before you place a light, walk the location and identify where light would naturally come from. Then enhance that source instead of inventing a new one. Practice with one light before you reach for two. Learn to subtract with flags and negative fill before you reach for more wattage. Watch the films and commercials you love with the sound off and reverse-engineer their key positions, motivations, and ratios.
When your scene is lit and your footage is graded, give the final cut a true cinematic finish. A polished title sequence using assets like Pixflow’s Movie Title Templates is the last 5% that signals “this is a film” the moment a viewer presses play. Light the scene like a pro, then deliver it like one.
Disclaimer : If you buy something through our links, we may earn an affiliate commission or have a sponsored relationship with the brand, at no cost to you. We recommend only products we genuinely like. Thank you so much.
Blog Label:



Write for us
Publish a Guest Post on Pixflow
Pixflow welcomes guest posts from brands, agencies, and fellow creators who want to contribute genuinely useful content.
Fill the Form ✏